
Mastering emergency braking (noodsremmen) is a critical survival skill for any Category A motorcyclist. This lesson breaks down the techniques required to stop as quickly and safely as possible, a vital component for your Dutch theory exam and real-world riding confidence.

Mastering emergency braking, known as noodsremmen in Dutch, is a fundamental skill for every motorcyclist, particularly for those preparing for the Dutch CBR Category A motorcycle theory exam. This critical maneuver involves rapidly reducing your speed to avoid an imminent hazard, ensuring the shortest possible stopping distance while maintaining complete control of your motorcycle. It's a proactive safety measure that can significantly reduce the risk of collisions and is a core component of safe riding in the Netherlands.
Motorcycles offer exhilarating freedom but also demand heightened awareness and specific skills for safe operation. Unlike cars, motorcycles are inherently less stable and more susceptible to traction loss during sudden braking. The ability to perform a controlled emergency stop is not just about avoiding an accident; it's about preserving stability, preventing skids, and ultimately, safeguarding yourself and other road users. Dutch traffic legislation places a strong emphasis on a rider's duty to maintain control of their vehicle at all times, including during unexpected situations that demand rapid deceleration.
An effective emergency stop on a motorcycle is a complex interplay of rider input, vehicle dynamics, and an understanding of road conditions. It requires more than simply squeezing the brake levers; it demands a precise technique that integrates progressive brake application, managing the bike's weight transfer, maintaining an optimal body posture, and employing a strategic line-of-sight. The goal is always to maximize the available tire-to-road friction without exceeding it, thereby achieving maximum deceleration safely.
When a motorcycle decelerates rapidly, its weight distribution shifts dramatically. This phenomenon, known as weight transfer, is a crucial concept in emergency braking.
During braking, the motorcycle's centre of mass moves forward, causing the front wheel to bear a significantly greater load while the load on the rear wheel diminishes. This dynamic weight transfer increases the available traction for the front tire, allowing it to handle more braking force. Conversely, the rear tire's reduced load means it can only tolerate less braking force before locking up. For example, braking from 80 km/h on dry asphalt can increase the front axle load from 45% to around 65% of the total mass. A proper understanding and management of this weight shift are essential for balanced and effective braking.
Traction is the grip between the tires and the road surface, governed by the friction coefficient (µ). This coefficient varies significantly depending on the surface condition—dry asphalt offers high friction (µ ≈ 0.9), while wet or oily roads provide much less (wet µ ≈ 0.5, oil µ ≈ 0.2). The total available traction forms a "friction circle" (also known as the traction circle), which represents the combined limits of braking, acceleration, and cornering forces the tires can handle. During an emergency stop, most of this circle is allocated to braking; any additional steering input will reduce the available braking grip, increasing the risk of a skid.
Effective emergency braking relies on using both the front and rear brakes in a coordinated, progressive manner. This technique is called progressive dual-brake application.
A braking technique where the rear brake is applied first (lightly) and increased progressively, while the front brake is gradually modulated, reaching maximal front-brake pressure near the point of maximal deceleration.
Most modern motorcycles are designed with a front-dominant braking system, meaning the front brake provides the majority of the stopping power (typically 70-90%). However, the rear brake plays a vital role in stabilizing the motorcycle and initiating the weight transfer. The progressive dual-brake technique involves first applying the rear brake gently to settle the bike and begin the weight transfer. As the front end compresses, progressively increase pressure on the front brake lever. This allows the front tire to take on more braking force as its load increases, maximizing the overall stopping power without locking either wheel.
An abrupt application of either brake, especially the front brake without prior weight transfer or the rear brake with reduced load, can lead to immediate wheel lock-up. A locked wheel loses directional control and can result in a skid, causing the rider to lose control or crash. Smooth, graduated pressure allows the rider to feel the limits of traction and modulate the brakes just below the point of lock-up. For instance, from 60 km/h, a rider might start with 10% rear brake lever travel, then linearly increase front brake up to 80% as speed decreases.
Your body position during an emergency stop significantly impacts the motorcycle's stability and your ability to control it. Upright rider posture is key.
Maintaining a near-vertical torso, with elbows relaxed, knees pressed against the tank, and head aligned with the bike’s centre line during rapid deceleration.
By keeping your torso upright and your arms relaxed, you allow your arms to absorb the braking forces without stiffening and introducing unwanted steering inputs. Pressing your knees firmly against the fuel tank helps you brace against the forward inertia, keeping your body stable and integrated with the bike. This posture lowers the combined centre of gravity of rider and bike, which is critical for maximizing front-wheel load and resisting the tendency to pitch forward.
An aggressive forward lean or stiff arms during hard braking can shift your body weight too far forward, exacerbating the weight transfer and increasing the risk of a pitch-over (a forward flip). Maintaining an upright, yet slightly engaged, posture ensures that your weight distribution supports the front wheel without overloading it. Your head should remain aligned with the bike's centre line, contributing to overall balance.
Where you look during an emergency stop is as crucial as how you brake. Line-of-sight refers to your visual strategy.
The visual strategy of looking toward the desired stopping point rather than at the hazard itself, ensuring steering and braking actions remain stable.
A common and dangerous mistake is target fixation, where a rider fixates on the obstacle they are trying to avoid. This neurological phenomenon causes "tunnel vision" and an involuntary tendency to steer towards what you are looking at, even when trying to avoid it. If you look at the hazard, you risk braking while unconsciously steering directly into it, destabilizing the bike.
Instead, during an emergency stop, consciously shift your gaze past the hazard to the clear road or intended stopping point ahead. This helps keep your steering path straight and stable. For example, if a car suddenly stops in front of you, look to the clear patch of road just beyond or beside the vehicle, rather than directly at its bumper. This visual strategy allows you to maintain a straight trajectory and focus your mental and physical inputs solely on braking effectively.
Maintaining a straight path during an emergency stop is paramount for safety and efficiency. This is known as straight-line braking.
Maintaining a straight trajectory while applying maximum braking force, avoiding any lateral steering input.
As discussed with the friction circle, a tire has a finite amount of grip. If you are braking, a significant portion of that grip is already being used for deceleration. Introducing lateral forces from steering or leaning into a turn consumes the remaining grip, leaving little or none for braking. This drastically reduces the available braking force and increases the risk of a skid. Straight-line braking ensures that the tire's entire contact patch is dedicated to stopping the motorcycle, maximizing grip and stability.
Attempting to brake hard while simultaneously leaning into a curve is one of the most common causes of motorcycle accidents. On a non-ABS motorcycle, this will almost certainly result in a loss of traction, leading to a low-side (where the bike slides out from under you) or potentially a high-side crash (where the bike suddenly regains traction, flips you over, and then slides). Even with ABS, braking in a turn reduces the effectiveness of the system and extends stopping distances. Dutch traffic law implicitly obliges riders not to endanger others, and braking while turning drastically increases this risk.
The effectiveness of your emergency braking is heavily dependent on the road surface and environmental conditions. You must perform surface-condition adaptation to remain safe.
Adjusting braking force, posture, and line-of-sight based on the friction coefficient of the road surface (dry, wet, oily, gravel, sand).
Roads that are wet, icy, oily, or covered in loose gravel or sand have a significantly lower friction coefficient than dry asphalt. This means the tires have less grip, and the maximum safe controlled deceleration rate is much lower. Attempting to brake with the same force as on a dry road will almost certainly lead to wheel lock-up and a skid. On wet surfaces, you might reduce front-brake lever travel to 60-70% of what you'd use on dry conditions. On extremely slippery surfaces like ice or snow, rely mainly on gentle rear brake application and minimal front brake, aiming for a deceleration of ≤0.3 g.
Controlled deceleration rate refers to the target magnitude of deceleration (expressed in g-units, where 1 g is the acceleration due to gravity) that keeps your braking within the tire-road friction limit. On dry asphalt, most motorcycles can achieve 0.8-1.0 g. However, on wet roads, this might drop to 0.4-0.6 g, and on gravel, it could be even lower. Understanding this principle allows you to adjust your braking force proactively. Harder braking does not always stop you quicker if it leads to a skid, as a skidding wheel takes longer to stop than a rolling one.
Dutch traffic legislation provides a framework for safe riding that directly applies to emergency braking scenarios. While there isn't a specific law titled "emergency braking," several articles in the Reglement Verkeersregels en Verkeerstekens 1990 (RVV 1990) outline a rider's responsibilities.
Under RVV 1990, Article 6.4, a holder of a Category A driving license is mandatory required to keep control of their vehicle at all times, including during emergency maneuvers like sudden stops. Failure to do so can result in legal consequences and is a key assessment point during practical exams. This implies that riders must master the techniques required to perform a controlled emergency stop without losing stability or endangering themselves or others.
RVV 1990, Article 6.1, prohibits braking abruptly in a manner that endangers other road users. This is particularly relevant when following traffic may not anticipate your sudden stop, potentially leading to a rear-end collision. Your braking actions must be predictable and safe for all road users.
Furthermore, Article 6.5 of RVV 1990 mandates that riders adapt their speed and braking force to maintain traction on wet or slippery surfaces. This reinforces the need for surface-condition adaptation. For motorcycles equipped with Anti-Lock Braking Systems (ABS), the Centrum voor Veilig Rijden (CVD) 2006 Guideline 34 recommends that riders do not rely solely on ABS to compensate for inappropriate brake inputs. ABS is a safety aid, not a replacement for correct technique.
Even experienced riders can make mistakes during high-stress emergency braking situations. Recognizing these common pitfalls is the first step to avoiding them.
Optimal emergency braking isn't a one-size-fits-all technique. It must be adapted to a variety of environmental and vehicle conditions.
Applying these principles in realistic scenarios highlights their importance.
Correct Behavior: The rider immediately shifts their line-of-sight past the pedestrian to the clear road beyond. They initiate a progressive dual-brake application, starting with gentle rear brake pressure, then smoothly increasing front brake up to maximal safe pressure. An upright posture is maintained, and the motorcycle remains in a straight line. With an estimated deceleration of 0.9 g, the motorcycle stops safely within approximately 23 meters, well before the crosswalk. Incorrect Behavior: The rider slams the front brake, leans aggressively forward, and fixates on the pedestrian. This causes the front wheel to lock, leading to a loss of control and an unavoidable impact.
Correct Behavior: Recognizing the reduced traction due to the wet surface, the rider initiates an emergency stop earlier than on dry roads (accounting for longer perception-reaction time in adverse conditions). They apply the rear brake gently and modulate the front brake to approximately 60% of their dry-road maximum. Maintaining an upright posture and looking ahead to the clear lane beyond the debris, they limit deceleration to about 0.5 g. The motorcycle safely stops in approximately 86 meters, avoiding the obstacle. Incorrect Behavior: The rider applies full front brake pressure as if on a dry road. The front wheel locks, the motorcycle loses straight-line stability, and skids uncontrollably, potentially leading to a crash.
Correct Behavior: The rider anticipates lower rear traction due to the loose surface and the rearward shift of the center of gravity from the load. They apply the rear brake very softly, followed by progressive front brake application up to about 70% of its dry-road potential. The rider maintains an upright torso and aims to keep the bike in a straight line on the gravel. Limiting deceleration to around 0.6 g, the motorcycle stops in approximately 50 meters, safely avoiding the animal. Incorrect Behavior: The rider uses the rear brake heavily, causing the rear wheel to lock immediately on the loose gravel. The bike fishtails violently, leading to a loss of control and collision with the animal.
Correct Behavior: The rider quickly shifts their line-of-sight beyond the car's brake lights to the limited illuminated road ahead. They initiate a progressive dual-brake application, maintaining an upright posture. If permissible and safe, they briefly use high-beam to get a better visual reference of the road ahead, then switch back to low-beam. Targeting a deceleration of approximately 0.7 g, they stop safely behind the vehicle. Incorrect Behavior: The rider fixates on the leading car's bright brake lights. This causes target fixation, leading to an unconscious tendency to steer toward the car while braking, and potentially a front brake lock due to improper modulation.
Mastery of emergency braking (noodsremmen) is a non-negotiable skill for every Dutch Category A motorcyclist. It is about more than just stopping; it's about a complete understanding of your motorcycle's dynamics and your interaction with the environment. By consistently practicing progressive dual-brake application, managing weight transfer, maintaining correct posture, utilizing strategic line-of-sight, and adapting to diverse road conditions, you can significantly enhance your safety and confidence on the road. Remember that while technologies like ABS are valuable aids, they are not substitutes for fundamental riding skills. Integrating these principles ensures you can achieve the shortest safe stopping distance while retaining full control, fulfilling your legal duties, and mitigating risks in unpredictable traffic situations.
Lesson content overview
Explore all units and lessons included in this driving theory course.
Explore search topics learners often look for when studying Principles of Emergency Braking (noodsremmen). These topics reflect common questions about road rules, driving situations, safety guidance, and lesson level theory preparation for learners in the Netherlands.
Browse additional driving theory lessons that cover connected traffic rules, road signs, and common driving situations related to this topic. Improve your understanding of how different rules interact across everyday traffic scenarios.
Explore advanced techniques for emergency braking (noodsremmen) on motorcycles, focusing on handling various road conditions, rider posture, and preventing skids. Essential theory for safe riding and the Dutch Category A exam.

This lesson outlines the step-by-step procedure for executing a controlled emergency stop in a straight line. It emphasizes keeping the motorcycle upright, looking ahead, and applying both brakes firmly and progressively up to the point of maximum traction (or ABS activation). Understanding this technique is critical for minimizing stopping distance in a sudden hazard scenario and is a key skill assessed in practical motorcycle training.

This lesson focuses on the physical skill of an emergency stop, building on previous braking lessons. You will learn to adopt a braced body position, keeping your arms straight and looking ahead, not down. The content details the technique of applying both brakes rapidly but progressively to the point of maximum traction, and how to trust and utilize ABS if your motorcycle is equipped with it.

This lesson provides a comprehensive guide to safe and effective deceleration on a motorcycle. You will learn the principles of controlled braking, including the progressive application of both the front and rear brakes to maximize stopping power while maintaining stability. The content also explains the role of engine braking in managing speed and how the Anti-lock Braking System (ABS) helps prevent wheel lock-up during hard braking.

This lesson prepares you for a critical situation: performing a maximum-force emergency stop. You will learn the correct body posture and braking technique to stop in the shortest possible distance without losing control. The content provides a clear explanation of how ABS works by rapidly pulsing the brakes to prevent the wheels from locking, allowing you to maintain steering control even during a panic stop.

This lesson teaches the technique for swerving when stopping is not possible. You will learn that a swerve is initiated with a decisive counter-steer: press right to go right, press left to go left. The content emphasizes the importance of separating braking from swerving—ideally, you brake first, then release the brakes to execute the swerve, maintaining maximum available traction for steering.

This lesson teaches the procedure for executing an emergency stop in response to a sudden, extreme hazard. You will learn how to apply maximum braking pressure quickly and decisively while keeping the steering wheel straight to maintain control. The role of the Anti-lock Braking System (ABS) in preventing wheel lock-up and allowing the driver to continue steering is explained. The lesson also covers the importance of checking mirrors, if time permits, and securing the vehicle safely after the stop.

This lesson explains how to apply the principle of counter-steering decisively in an emergency situation to perform a rapid swerve. It covers the importance of looking where you want to go, avoiding 'target fixation' on the obstacle, and executing a firm push on the appropriate handlebar to initiate a quick lean and change of direction. This skill is a critical component of collision avoidance for any motorcyclist.

This lesson teaches the technique of progressive braking, which involves applying the brakes smoothly and gradually rather than abruptly. This method allows the motorcycle's weight to transfer forward in a controlled manner, compressing the front suspension and increasing the size of the front tire's contact patch. This, in turn, maximizes available grip and allows for harder, safer braking without unsettling the chassis or locking a wheel.

This lesson moves beyond basic braking to teach advanced techniques for optimal stopping performance. You will learn that the front brake provides the majority of your stopping power due to forward weight transfer, but that skillful application of the rear brake is crucial for stability. The content covers the concept of progressive braking—squeezing the levers smoothly—to manage traction and prevent wheel lock, especially on motorcycles without ABS.
This lesson provides a detailed breakdown of high-speed braking techniques, emphasizing the correct balance and application of the front ('voorrem') and rear ('achterrem') brakes. It explains the physics of weight transfer under braking and why the front brake provides the majority of stopping power. Techniques for progressive, smooth application to avoid overloading the front tire and losing traction are covered, ensuring riders can slow down quickly and safely from any speed.
Learn how to adapt emergency braking (noodsremmen) and standard braking to diverse Dutch road conditions, traffic situations, and vehicle loads. Understand the theory behind calculating safe stopping distances and legal obligations.

This lesson reinforces the critical relationship between adverse conditions, reduced traction, and massively increased stopping distances. It provides a clear framework for how much riders need to increase their following distance and reduce their overall speed to maintain a safe margin for error. The curriculum teaches riders to constantly reassess their speed based on visual feedback from the road surface and the level of visibility, ensuring they can always stop within the distance they can clearly see.

The posted speed limit is a maximum, not a target. This lesson teaches the crucial skill of adapting your speed to prevailing conditions. You will learn how to assess factors like traffic density, poor weather (rain, fog), limited visibility (at night), and slippery road surfaces. Adjusting your speed downwards in these situations provides you with more time to react to hazards and significantly reduces the risk of losing control or being involved in a collision.
This lesson provides a detailed breakdown of high-speed braking techniques, emphasizing the correct balance and application of the front ('voorrem') and rear ('achterrem') brakes. It explains the physics of weight transfer under braking and why the front brake provides the majority of stopping power. Techniques for progressive, smooth application to avoid overloading the front tire and losing traction are covered, ensuring riders can slow down quickly and safely from any speed.
This lesson provides a comprehensive guide to safe and effective deceleration on a motorcycle. You will learn the principles of controlled braking, including the progressive application of both the front and rear brakes to maximize stopping power while maintaining stability. The content also explains the role of engine braking in managing speed and how the Anti-lock Braking System (ABS) helps prevent wheel lock-up during hard braking.

This lesson provides a theoretical understanding of the components that make up the total stopping distance. It explains how to calculate reaction distance (the distance traveled before applying the brakes) and braking distance (the distance traveled while braking). The content highlights how speed exponentially increases stopping distance and how other variables like rider alertness, road grip, and brake condition play a significant role in the final calculation.
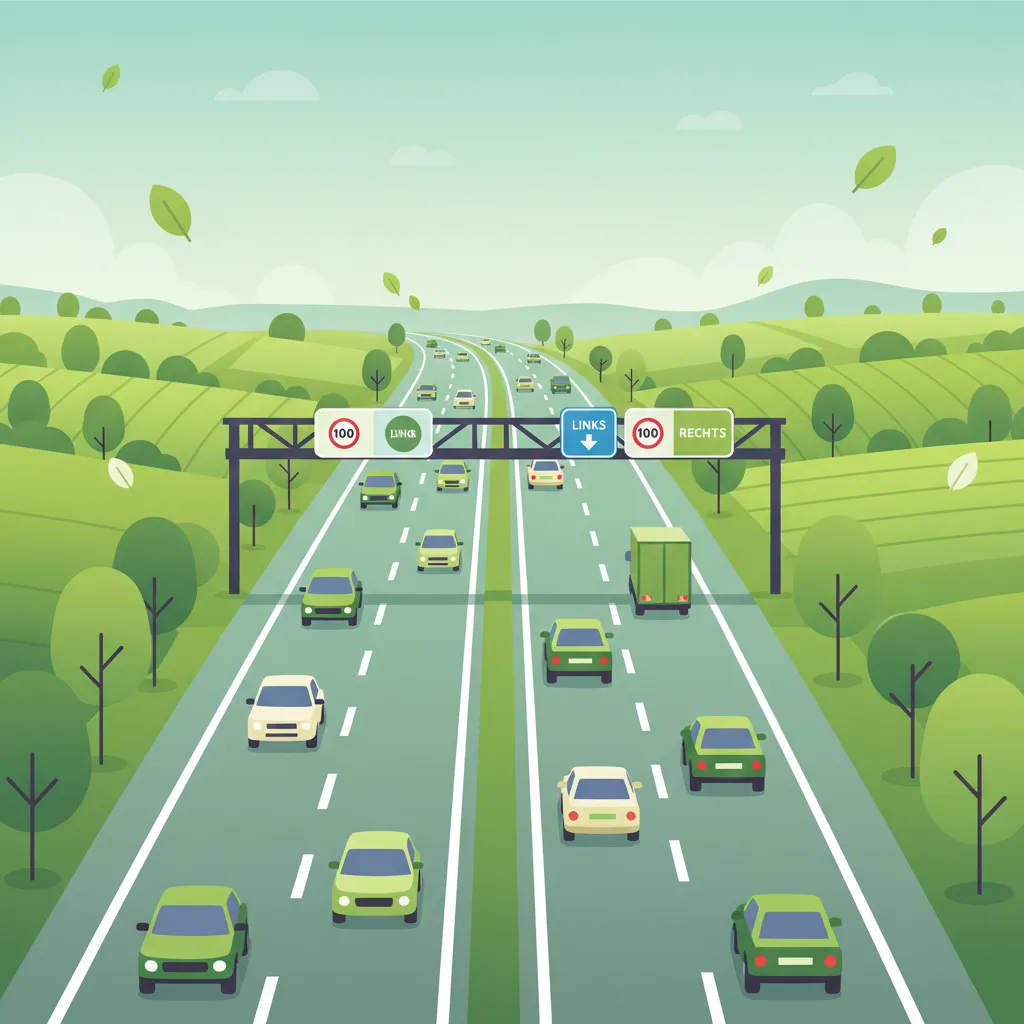
This lesson covers the specific articles of the Dutch Road Traffic Act that apply to motorways, with a primary focus on the strict rule of keeping to the rightmost available lane unless overtaking. It explains the legal and safety reasons for only passing on the left and discusses the correct positioning within a lane for maximum visibility and safety. The content also addresses the nuances of lane usage during heavy congestion, ensuring riders comply with the law and contribute to smooth traffic flow.

This lesson explains how to respond to variable speed limits shown on overhead electronic signs, which are used to manage traffic flow in real-time. You will learn why these limits are adjusted for factors like congestion, accidents, or bad weather, and the legal requirement to obey them. The content focuses on the importance of anticipatory riding, scanning far ahead for these signs to allow for smooth and safe speed adjustments.
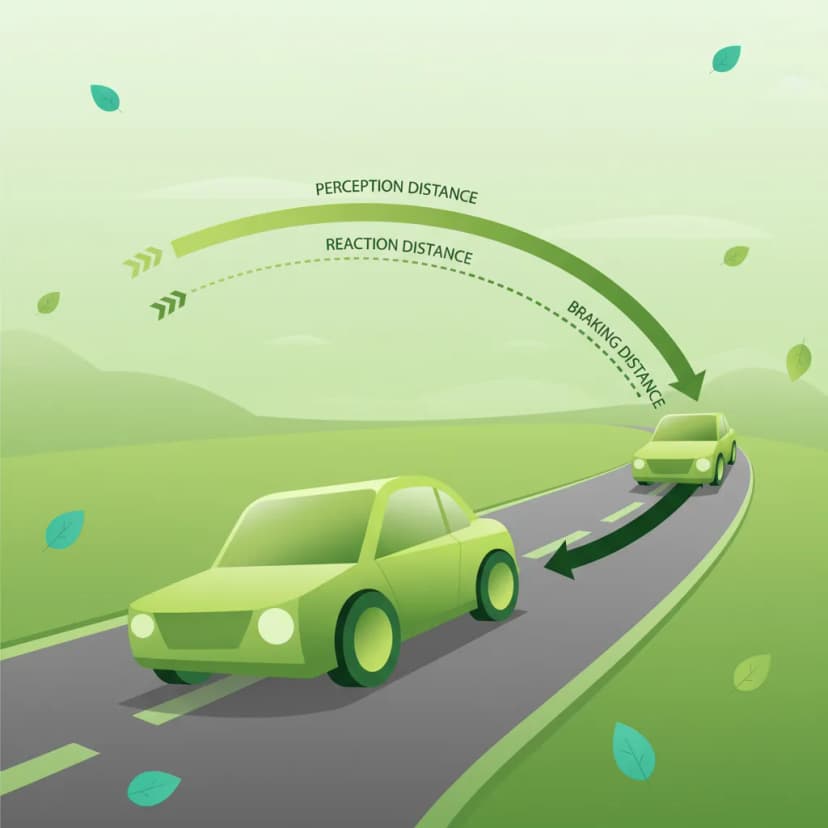
This lesson breaks down the concept of total stopping distance into its two key parts: the distance traveled during your reaction time and the distance the motorcycle travels after the brakes are applied. You will learn the formulas and rules of thumb for estimating these distances at various speeds. The content highlights how factors like rider fatigue, road surface conditions, and tyre quality can significantly increase your overall stopping distance.

This lesson emphasizes the critical importance of adapting your speed to prevailing conditions, which may require driving slower than the legal limit. You will learn how factors like rain, fog, snow, and darkness significantly increase braking distances and reduce visibility. The curriculum explains the dangers of aquaplaning on wet roads and black ice in winter. The core principle taught is that a safe driver always adjusts their speed to ensure they can stop within the distance they can see to be clear.

This lesson provides a detailed explanation of the two-second rule as a simple yet effective method for maintaining a safe following distance in good conditions. It breaks down the concept of total stopping distance into its two components: reaction distance (the distance traveled before applying the brakes) and braking distance (the distance traveled while braking). Understanding this calculation is fundamental for appreciating the need for a sufficient space cushion to react to sudden events ahead.
Find clear answers to common questions learners have about Principles of Emergency Braking (noodsremmen). Learn how the lesson is structured, which driving theory objectives it supports, and how it fits into the overall learning path of units and curriculum progression in the Netherlands. These explanations help you understand key concepts, lesson flow, and exam focused study goals.
The most crucial factor is maintaining control while applying maximum braking force. This involves braking in a straight line, keeping the bike upright, and using both brakes progressively. Looking ahead to where you want to go, rather than at the obstacle, also helps maintain stability and directional control.
Apply the front brake firmly and progressively, as it provides the most stopping power. Simultaneously, apply the rear brake firmly but be cautious not to lock it up, which can cause a skid. The goal is to use as much of the available grip as possible without exceeding it.
Yes, Anti-lock Braking Systems (ABS) are designed to prevent wheel lock-up during hard braking, allowing you to maintain steering control. While ABS significantly enhances safety, it's still vital to brake as hard and progressively as possible, allowing the system to work effectively.
The Dutch term for emergency braking on a motorcycle is 'noodsremmen'. Understanding this term is important as it may appear in the official CBR theory exam questions and is commonly used in traffic contexts in the Netherlands.
Yes, a slight forward lean or keeping your body rigid and aligned with the bike can help manage the forward weight transfer during hard braking. This helps keep the rear wheel firmly on the ground and maximizes the effectiveness of both brakes.