
This lesson dives into the critical skills of slowing down and stopping your A2 motorcycle safely and effectively. Understanding controlled braking is essential for preventing accidents and passing your Dutch motorcycle theory exam. We'll cover how to use your brakes in combination, the role of engine braking, and how ABS assists you in emergency situations.

Effective deceleration is a fundamental skill for every motorcyclist, especially for those navigating Dutch roads on an A2-category motorcycle (max 35 kW). It's not just about applying the brakes; it's a coordinated process involving physics, rider input, and sometimes electronic aids, all designed to bring your motorcycle to a controlled stop safely and efficiently. This lesson provides a comprehensive guide to understanding and mastering deceleration techniques, ensuring you can manage speed and respond to hazards with confidence.
Deceleration is the process of reducing your motorcycle's speed. This is achieved by converting kinetic energy into heat through friction brakes, or into engine resistance through engine braking. The goal is always to reduce speed smoothly and predictably, maintaining stability and control.
Progressive braking refers to the technique of incrementally increasing brake pressure, starting gently and building to the required level. This method allows the rider to feel the motorcycle's feedback, gauge available tire grip, and prevent sudden weight transfer that could destabilize the bike.
When you begin to brake, a sudden, heavy application can overwhelm the tires, leading to a lock-up or an uncontrolled skid. Instead, a progressive approach ensures that the tires maintain optimal grip as the load shifts and brake force increases. For instance, when approaching a pedestrian crossing in urban traffic, a rider would typically ease onto the rear brake first, then smoothly add front brake pressure to achieve a controlled stop. This technique is not just for emergencies; it's the standard for all forms of deceleration.
The distribution of braking force between the front and rear wheels, known as brake balance or brake bias, is crucial for maximising total stopping power while preserving steering ability. Due to the physics of weight transfer during deceleration, the front wheel bears significantly more load, and therefore can generate more stopping force, than the rear wheel.
Under normal, dry asphalt conditions, a typical motorcycle braking split is approximately 70% front and 30% rear. However, this balance is dynamic. On low-traction surfaces like wet roads or gravel, shifting more braking force to the rear (e.g., a 40% front / 60% rear split) can help prevent the front wheel from locking up, which would result in an immediate loss of steering control. The rear brake, while less powerful, also contributes to stability and helps settle the motorcycle during the initial phase of braking.
Engine braking is a deceleration technique that uses the resistance created by the engine when the throttle is closed and/or a lower gear is selected. Instead of relying solely on the friction brakes, the engine's internal compression and friction slow the motorcycle down.
This technique is particularly useful on long descents, as it helps prevent the friction brakes from overheating and experiencing brake fade – a reduction in braking effectiveness due to excessive heat. Engine braking also offers a smoother, more stable form of deceleration, especially on low-traction surfaces like wet roads or gravel, where aggressive use of friction brakes could easily lead to wheel lock-up. An A2-class motorcycle typically generates effective engine braking between 2,200 and 5,000 RPM. By closing the throttle and, if necessary, downshifting, you can control your speed without excessive reliance on your primary braking system.
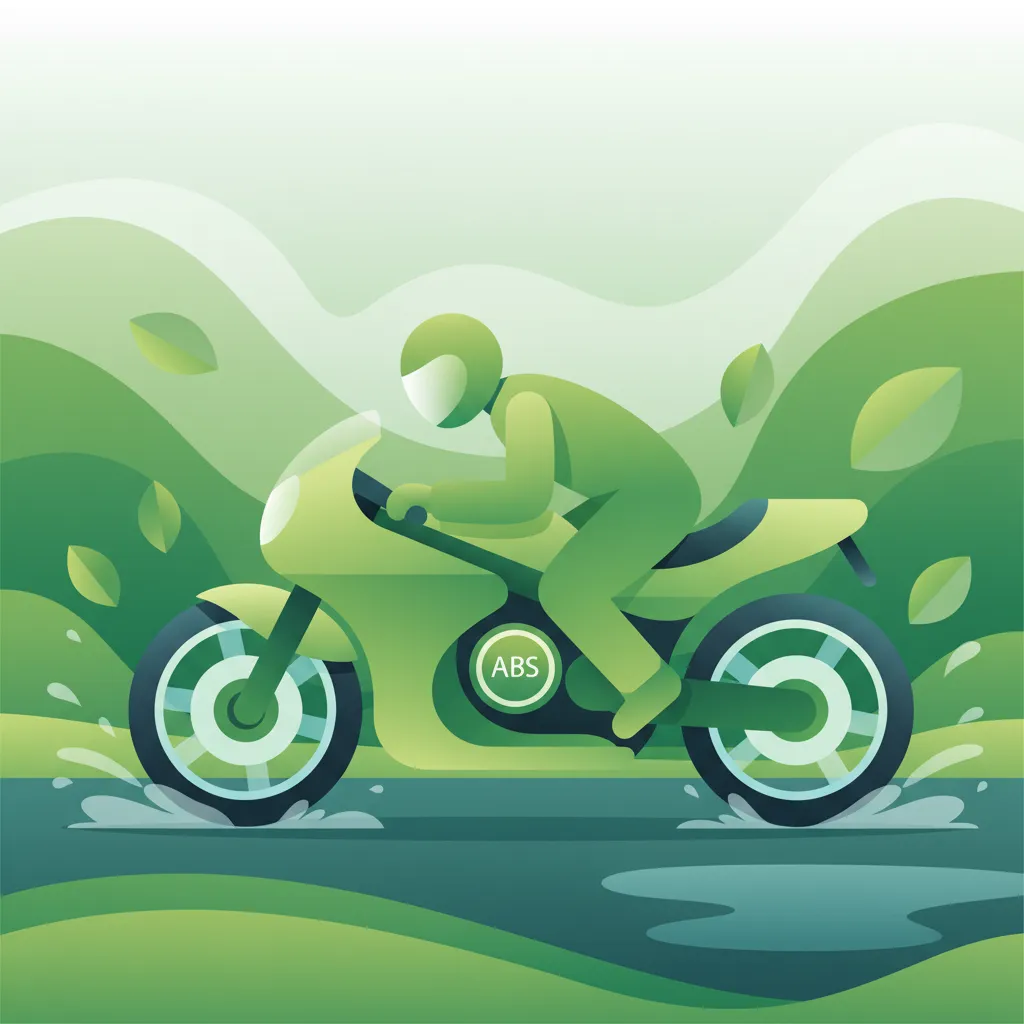
The Anti-lock Braking System (ABS) is an electronic safety system designed to prevent wheel lock-up during hard or emergency braking. It constantly monitors wheel speed and, if it detects that a wheel is about to lock, it rapidly modulates the brake pressure to that wheel. This pulsing action allows the wheel to continue rotating, maintaining traction and, crucially, steering control.
ABS is a significant safety enhancement, especially on slippery surfaces where maintaining grip is challenging. While ABS helps prevent loss of control, it does not remove the rider's responsibility to apply brakes progressively and anticipate hazards. The rider must still apply firm, consistent pressure to the brake lever or pedal, allowing the ABS to do its work by preventing lock-up. Some advanced systems, known as Combined ABS or Co-ABS, also link the front and rear brakes for even more coordinated modulation.
Understanding and managing weight transfer is fundamental to effective motorcycle deceleration. When a motorcycle brakes, its center of mass shifts significantly forward and downward. This dynamic load transfer increases the pressure on the front tire, enhancing its grip, while simultaneously reducing the load on the rear tire, decreasing its available grip.
Proper rider positioning plays a vital role. By leaning forward, bracing against the handlebars, and slightly tucking your elbows, you can actively assist in distributing your body weight. This action helps to keep the front tire firmly planted, maximizing its braking potential, and prevents the rear wheel from lifting off the ground during extremely hard braking, which could lead to instability. Failure to manage this weight shift can result in the rear wheel locking up prematurely or losing stability.
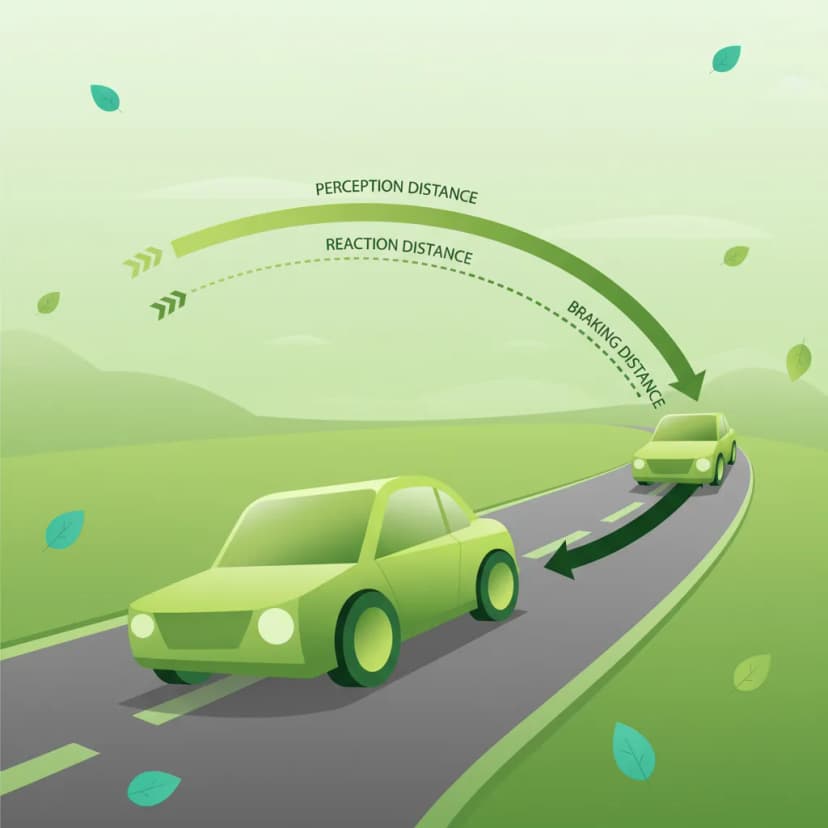
Stopping distance is the total distance your motorcycle travels from the moment you detect a hazard to the moment it comes to a complete stop. It is composed of two critical elements: perception-reaction distance (PRD) and braking distance (BD).
Perception-Reaction Distance (PRD): This is the distance travelled during the perception-reaction time (PRT), which is the interval from when a rider first detects a hazard to when they actually begin to apply the brakes. For an average, alert rider, PRT is estimated to be around 0.75 seconds (0.5 seconds for perception, 0.25 seconds for reaction). At 80 km/h (approximately 22.2 m/s), this translates to a PRD of about 16.65 metres. Factors like fatigue, distraction, or alcohol can significantly extend PRT, increasing the PRD.
Braking Distance (BD): This is the distance travelled once the brakes are applied until the motorcycle stops. It depends on various factors including initial speed, braking force, tire condition, road surface, and the presence of ABS. For an A2 motorcycle at 80 km/h on dry asphalt, a typical braking distance might be around 20-25 metres.
Therefore, at 80 km/h on dry pavement, the total stopping distance for an A2 motorcycle could be approximately 37-42 metres (PRD + BD). This composite distance underscores the importance of maintaining a safe following distance and constantly anticipating potential hazards.
Always aim to look far ahead and scan for potential hazards. The earlier you perceive a risk, the more time you have to react, reducing your perception-reaction distance and allowing for a safer, more controlled stop.
In the Netherlands, specific articles within the Reglement Verkeersregels en Verkeerstekens 1990 (RVV 1990) and other regulations govern how drivers, including motorcyclists, must operate their vehicles, encompassing safe deceleration. These regulations aim to ensure road safety for all users.
RVV 1990 – Artikel 7.3 states that "The driver shall bring the vehicle to a stop safely and without endangering other road users." This general rule underpins all deceleration techniques. It implies that a rider must use controlled, progressive braking to prevent skids, sudden swerving, or any other action that could surprise or endanger those around them.
RVV 1990 – Artikel 7.4 mandates that "Driving must be performed with respect for the vehicle’s capabilities and the road conditions." This article is crucial for adapting braking techniques to various environments. It means a rider must assess the road surface (dry, wet, icy, gravel), weather conditions, and their motorcycle's specific characteristics (e.g., tire grip, ABS presence) to choose the appropriate braking method.
While ABS is a significant safety feature, RVV 1990 – Artikel 7.5 implies that the driver must "use approved safety equipment and not rely only on electronic aids." This means that while ABS assists in preventing wheel lock-up, it does not absolve the rider of their responsibility to apply brakes correctly and maintain situational awareness. ABS is an aid, not a substitute for proper technique and hazard anticipation.
Beyond RVV 1990, practical guidance and other regulations also influence deceleration. The use of engine braking is generally encouraged for speed modulation, especially on descents, as it conserves friction brakes and enhances control. However, it must always be used within speed limits and without creating excessive noise.
For motorways (autosnelwegen), specific regulations aim to maintain smooth traffic flow. While the exact wording and numeric limits require verification, KDV 1998 – Article 5 suggests there may be a maximum deceleration limit, for example, "a motorcyclist must not decelerate more than 0.7 g unless necessary to avoid a collision." This rule prevents sudden, abrupt braking that could cause chain-reaction collisions among following traffic.
Effective deceleration is highly contextual. The optimal braking technique varies significantly depending on environmental factors, road type, and the motorcycle's loaded state.
Wet or icy surfaces drastically reduce tire grip. In these conditions, the fundamental principle is to reduce overall braking force and significantly alter the brake bias.
At night or in low visibility conditions (fog, heavy rain), your perception-reaction time typically increases due to delayed hazard detection.
The environment dictates braking approach:
Adding a passenger or heavy luggage significantly changes the motorcycle's dynamics.
The condition of your tires directly impacts braking performance.
When encountering pedestrians or cyclists, specific braking considerations apply.
Mistakes during deceleration can have serious consequences. Awareness of common errors is the first step to preventing them.
Effective deceleration is deeply rooted in physical laws and human capabilities. Understanding these underlying principles can significantly enhance your safety and riding proficiency.
Every moving object possesses kinetic energy, which is directly proportional to its mass and the square of its speed (). This means that doubling your speed quadruples your kinetic energy, requiring significantly more braking force and distance to stop. During deceleration, this kinetic energy is converted into heat through the friction of the brake pads against the discs, or into engine resistance. Distributing this force efficiently across both tires prevents any single tire from being overwhelmed and losing traction.
As discussed earlier, your perception-reaction time (PRT) is a vital component of total stopping distance. The average PRT of 0.75 seconds is based on an alert, undistracted rider. Factors such as fatigue, distraction, alcohol, drugs, or even intense emotions can extend this time to well over 1.2 seconds. This increase directly translates to a greater distance traveled before any braking even begins, highlighting the paramount importance of staying focused and alert while riding.
Anticipation is a psychological skill that transforms a reactive rider into a proactive one. By constantly scanning the road ahead, observing traffic flow, monitoring road signs, and predicting potential hazards, you can often begin the deceleration process earlier and more gently. This reduces the need for sudden, forceful braking, which is inherently more risky. For instance, noticing a brake light several cars ahead can allow you to start easing off the throttle or applying light engine braking much sooner than if you only reacted to the car directly in front of you. This smoother, earlier deceleration is safer for you and for other road users.
Deceleration on a motorcycle is a sophisticated skill that integrates several techniques to ensure safety and stability. It involves the coordinated application of progressive braking, carefully balancing the forces between the front and rear wheels (brake bias), and leveraging engine braking to manage speed and conserve friction brakes. The rider's ability to manage weight transfer through body positioning is critical, especially during hard braking, to maintain tire grip. Modern motorcycles are often equipped with an Anti-lock Braking System (ABS), which prevents wheel lock-up during emergency stops, though it remains crucial for the rider to apply brakes progressively and maintain situational awareness.
Understanding stopping distance, comprising both perception-reaction distance and braking distance, is vital for maintaining safe following gaps. The Dutch regulatory framework (RVV 1990, KDV 1998) provides legal mandates for safe and careful driving, emphasizing the need to adapt braking techniques to prevailing conditions. Moreover, effective deceleration requires constant adaptation to contextual variations such as weather, road type, lighting, and vehicle load. Recognizing and avoiding common braking violations—like rear-wheel lock-up or over-reliance on ABS—is essential for preventing accidents. Ultimately, mastering deceleration combines the physics of braking, an awareness of human factors like reaction time, and the psychological advantage of anticipation to ensure a safe and confident riding experience on any Dutch road.
Lesson content overview
Explore all units and lessons included in this driving theory course.
Explore search topics learners often look for when studying Deceleration Techniques and Controlled Braking. These topics reflect common questions about road rules, driving situations, safety guidance, and lesson level theory preparation for learners in the Netherlands.
Browse additional driving theory lessons that cover connected traffic rules, road signs, and common driving situations related to this topic. Improve your understanding of how different rules interact across everyday traffic scenarios.
Understand the theory behind progressive braking, brake bias, and engine braking for A2 motorcycles. Learn how ABS prevents wheel lock-up and enhances safety during deceleration in the Netherlands.
This lesson explains the function of an Anti-lock Braking System (ABS) on a motorcycle, detailing how it prevents wheel lock-up during heavy braking, thereby allowing the rider to maintain steering control. It clarifies that while ABS is a powerful safety aid, it does not defy physics and may sometimes increase stopping distances on loose surfaces. The content teaches riders to trust the system and apply the brakes fully and firmly in an emergency, letting the ABS manage traction.

This lesson prepares you for a critical situation: performing a maximum-force emergency stop. You will learn the correct body posture and braking technique to stop in the shortest possible distance without losing control. The content provides a clear explanation of how ABS works by rapidly pulsing the brakes to prevent the wheels from locking, allowing you to maintain steering control even during a panic stop.

This lesson explains the mechanical and hydraulic principles behind the common types of motorcycle brakes. It compares the operation and performance characteristics of disc brakes and drum brakes. The function of an Anti-lock Braking System (ABS) is also detailed, explaining how it prevents wheel lock-up during hard braking, thereby allowing the rider to maintain steering control and reduce stopping distances in many situations.

This lesson focuses on the physical skill of an emergency stop, building on previous braking lessons. You will learn to adopt a braced body position, keeping your arms straight and looking ahead, not down. The content details the technique of applying both brakes rapidly but progressively to the point of maximum traction, and how to trust and utilize ABS if your motorcycle is equipped with it.

This lesson covers braking techniques beyond simply applying the brake levers. You will learn about the concept of engine braking (decelerating by releasing the throttle or downshifting) for controlled slowing. It also explains the function of an Anti-lock Braking System (ABS), a safety feature on some models that prevents wheels from locking during hard braking, allowing you to maintain steering control and reduce the chance of a skid.

This lesson moves beyond basic braking to teach advanced techniques for optimal stopping performance. You will learn that the front brake provides the majority of your stopping power due to forward weight transfer, but that skillful application of the rear brake is crucial for stability. The content covers the concept of progressive braking—squeezing the levers smoothly—to manage traction and prevent wheel lock, especially on motorcycles without ABS.

This lesson outlines the step-by-step procedure for executing a controlled emergency stop in a straight line. It emphasizes keeping the motorcycle upright, looking ahead, and applying both brakes firmly and progressively up to the point of maximum traction (or ABS activation). Understanding this technique is critical for minimizing stopping distance in a sudden hazard scenario and is a key skill assessed in practical motorcycle training.

This lesson teaches the technique of progressive braking, which involves applying the brakes smoothly and gradually rather than abruptly. This method allows the motorcycle's weight to transfer forward in a controlled manner, compressing the front suspension and increasing the size of the front tire's contact patch. This, in turn, maximizes available grip and allows for harder, safer braking without unsettling the chassis or locking a wheel.

This lesson teaches the principles of performing a controlled emergency stop ('noodsremmen') to achieve the shortest possible stopping distance without losing control. It details the technique of applying both brakes firmly and progressively, managing the forward weight transfer, and maintaining an upright body posture to maximize braking efficiency. The content emphasizes braking in a straight line and looking ahead to where you want to stop, not at the obstacle.

This lesson explains the function of the clutch and gearbox in managing the motorcycle's power and speed. It details the correct techniques for upshifting and downshifting, including the concept of rev-matching for smoother transitions. The principles of engine braking are also covered, illustrating how releasing the throttle in gear provides controlled deceleration, which is a key skill for managing speed and reducing brake wear.
Explore the theory of stopping distance for A2 motorcycles, including perception-reaction time, road conditions, and load. Understand Dutch traffic regulations related to safe deceleration and speed.
This lesson breaks down the concept of total stopping distance into its two key parts: the distance traveled during your reaction time and the distance the motorcycle travels after the brakes are applied. You will learn the formulas and rules of thumb for estimating these distances at various speeds. The content highlights how factors like rider fatigue, road surface conditions, and tyre quality can significantly increase your overall stopping distance.

This lesson provides a detailed explanation of the two-second rule as a simple yet effective method for maintaining a safe following distance in good conditions. It breaks down the concept of total stopping distance into its two components: reaction distance (the distance traveled before applying the brakes) and braking distance (the distance traveled while braking). Understanding this calculation is fundamental for appreciating the need for a sufficient space cushion to react to sudden events ahead.

This lesson provides a theoretical understanding of the components that make up the total stopping distance. It explains how to calculate reaction distance (the distance traveled before applying the brakes) and braking distance (the distance traveled while braking). The content highlights how speed exponentially increases stopping distance and how other variables like rider alertness, road grip, and brake condition play a significant role in the final calculation.

This lesson explains why the standard two-second rule is insufficient in adverse conditions and requires extension. It details how factors like rain, fog, and darkness reduce both visibility and tire grip, thereby significantly increasing total stopping distance. The content provides practical guidelines, such as extending the following gap to four seconds or more in the wet, to ensure the rider always has enough time and space to stop safely, regardless of the conditions.

This lesson focuses on the crucial safety practice of maintaining an adequate following distance to the vehicle ahead. It explains the 'two-second rule' as a minimum baseline and emphasizes the need to increase this gap to three or four seconds in adverse conditions like rain or poor visibility. For a motorcyclist, this 'space cushion' is a critical buffer that provides the necessary time and space to react to sudden hazards or stop safely.
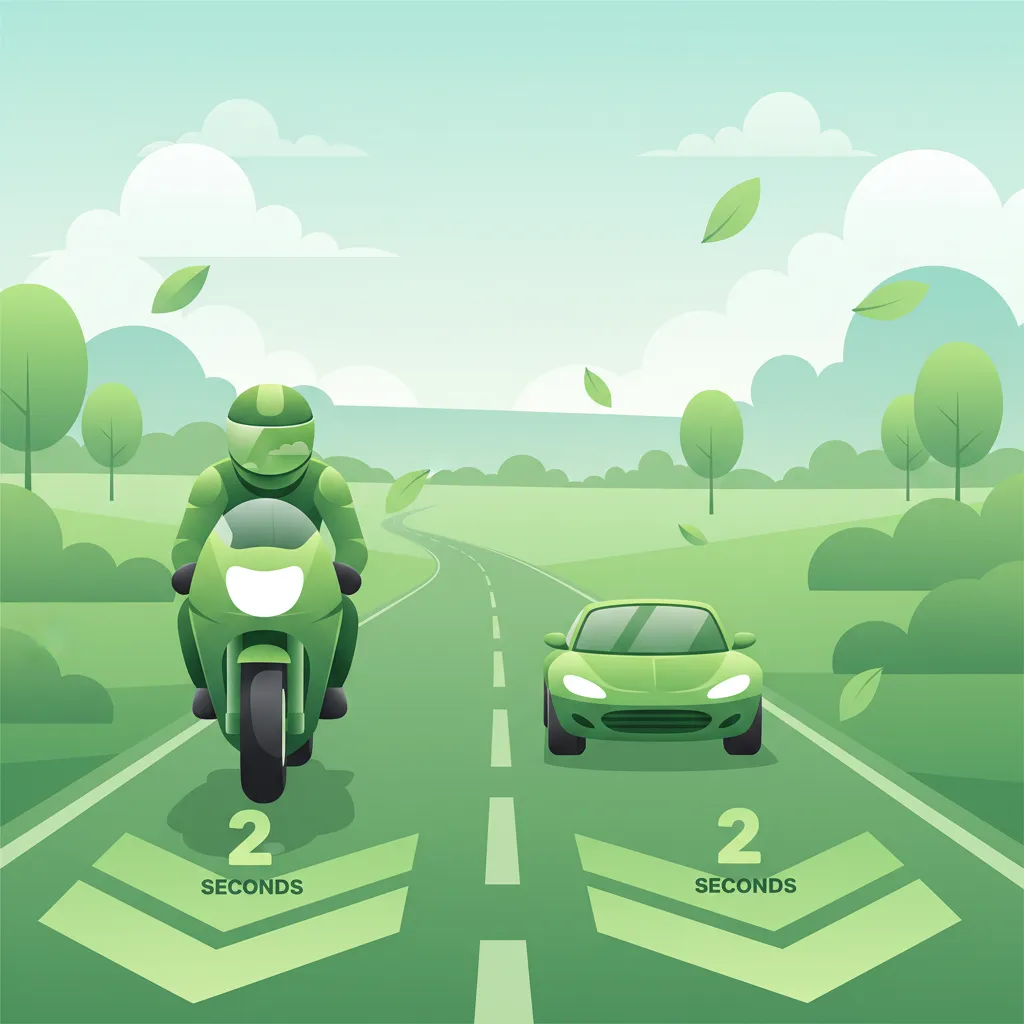
This lesson explains the two-second rule, a simple and effective technique for ensuring you have enough time to react and stop safely. You will learn how to use a fixed object on the roadside to measure the time gap between your motorcycle and the vehicle ahead. The content emphasizes why motorcyclists may need to extend this gap to three or more seconds in poor weather, at high speeds, or in heavy traffic.

This lesson reinforces the critical relationship between adverse conditions, reduced traction, and massively increased stopping distances. It provides a clear framework for how much riders need to increase their following distance and reduce their overall speed to maintain a safe margin for error. The curriculum teaches riders to constantly reassess their speed based on visual feedback from the road surface and the level of visibility, ensuring they can always stop within the distance they can clearly see.
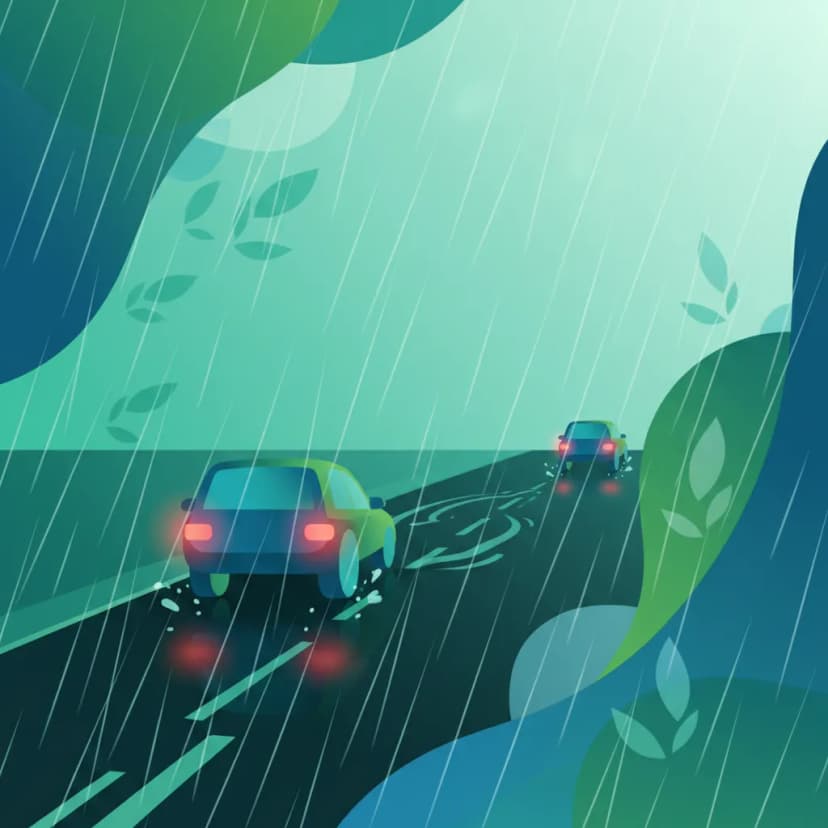
This lesson focuses on the crucial safety strategy of adjusting your riding for adverse conditions. You will learn that on wet roads, your braking distance can double, necessitating a much larger following distance (e.g., a four-second gap or more). The content covers the risks of reduced visibility in fog and at night, and the destabilizing effects of strong crosswinds, explaining how a greater space cushion provides the time and space needed to react safely.
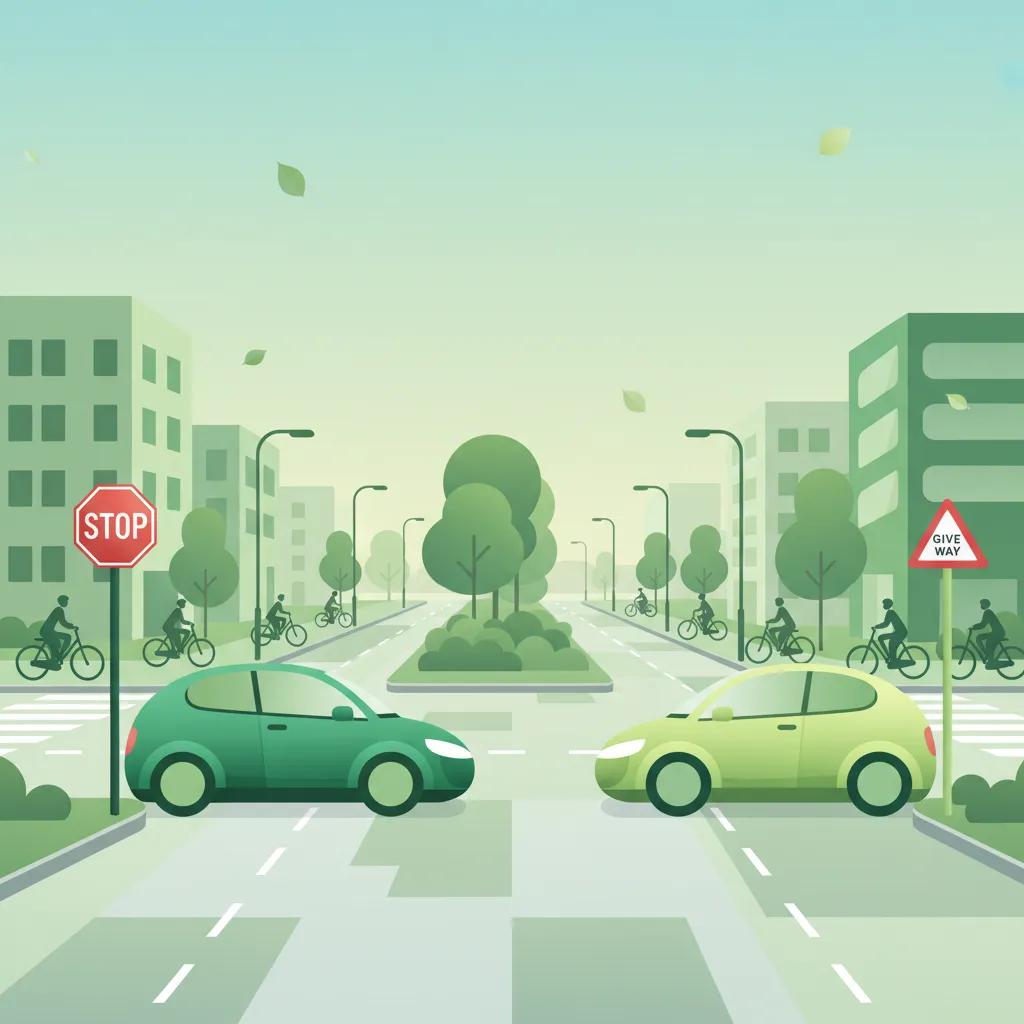
This lesson details the specific actions required at intersections controlled by 'Stop' and 'Give Way' signs. You will learn the legal requirement to come to a complete stop at a stop line (BORD 44) and the obligation to yield to all crossing traffic when encountering give-way markings ('haaientanden'). The content covers safe approach speeds and effective scanning techniques for motorcyclists to accurately assess gaps in traffic before proceeding.

This lesson focuses on Dutch regulatory signs that enforce mandatory rules and restrictions, particularly those impacting A2 motorcyclists. You will learn to recognize and obey prohibition signs, such as those indicating a motorcycle ban (BORD 40), speed limits, and overtaking restrictions (BORD 21). The content explains the legal consequences of non-compliance and how to apply these rules in practical riding scenarios to ensure full adherence to Dutch traffic law.
Find clear answers to common questions learners have about Deceleration Techniques and Controlled Braking. Learn how the lesson is structured, which driving theory objectives it supports, and how it fits into the overall learning path of units and curriculum progression in the Netherlands. These explanations help you understand key concepts, lesson flow, and exam focused study goals.
Controlled braking involves a progressive and balanced application of both brakes to slow down smoothly, maintaining stability. Emergency braking is a rapid, maximum-force application of both brakes to stop as quickly as possible, often initiated when a hazard appears suddenly. Both require understanding brake balance, but emergency braking prioritises speed of stopping over smoothness.
Engine braking occurs when you close the throttle and downshift. The engine's internal friction and the compression stroke of the pistons create a braking effect that slows the motorcycle without using the brakes. This is useful for maintaining speed on descents, reducing wear on your brake pads, and aiding in deceleration before a corner.
ABS (Anti-lock Braking System) prevents your wheels from locking up during hard braking, significantly reducing the risk of skidding and allowing you to maintain steering control. While it enhances safety and allows for stronger braking than you might safely achieve without it, it's still crucial to brake progressively and anticipate hazards. ABS is a safety aid, not a substitute for good riding technique and judgment.
The front brake provides the majority of stopping power (around 70-80%) on a motorcycle. It should be applied progressively and firmly. The rear brake is used to supplement the front brake, helping to stabilise the motorcycle and add a small amount of additional stopping force. Overuse of the rear brake can lead to skidding.
Carrying a passenger or luggage increases the motorcycle's weight, which in turn increases its stopping distance. You will need to apply the brakes earlier and with more force. This lesson covers the general principles of braking; other lessons might detail specific adjustments for load.