
Welcome to the lesson on Progressive Braking and Weight Transfer for your Dutch A1 motorcycle license. This crucial skill is key to controlling your motorcycle during deceleration and is frequently tested in the CBR theory exam. Understanding how to manage the motorcycle's weight during braking will significantly enhance your safety and confidence on the road.

Effective braking is a fundamental skill for safe motorcycle operation, particularly for new A1 riders navigating Dutch roads. This lesson delves into progressive braking, a crucial technique that ensures stable, efficient deceleration and helps prevent common accidents. We will explore how applying brakes smoothly and gradually influences the motorcycle's weight distribution, known as weight transfer, and how this dynamic interaction maximizes tire grip, leading to shorter and safer stopping distances. Understanding these principles is essential not only for passing your Dutch A1 motorcycle theory exam but, more importantly, for everyday road safety.
Progressive braking is the systematic and controlled increase of braking force, applied incrementally rather than abruptly. This technique is paramount for all motorcycle riders, as it allows for optimal deceleration while maintaining vehicle stability and maximizing tire traction. For A1 riders, who often operate lighter motorcycles with less sophisticated braking systems, mastering this skill is a cornerstone of safe riding.
Progressive braking involves a gradual, smooth application of brake pressure, typically starting with a light touch on the rear brake, followed by a steady, increasing squeeze on the front brake lever. The goal is to build braking force over a short period, allowing the motorcycle's chassis and tires to adapt to the deceleration. This method stands in contrast to sudden, abrupt braking, which can destabilize the motorcycle and lead to wheel lock-up.
For A1 motorcycles, which typically have engine capacities up to 125cc and power output of 11 kW, braking efficiency is vital. These lighter machines can be more susceptible to instability under sudden braking. Progressive braking prevents abrupt weight shifts that could overwhelm the tires or destabilize the chassis, reducing the risk of skidding, losing control, or even crashing. It also ensures compliance with Dutch traffic safety standards, which require riders to operate their vehicles safely and avoid endangering other road users.
One of the most critical aspects of motorcycle braking is understanding how weight transfers during deceleration. This dynamic shift of mass significantly impacts tire grip and overall stability.
Weight transfer, also known as load transfer, refers to the redistribution of normal forces acting on a vehicle's wheels during acceleration, deceleration, or cornering. In the context of braking, as a motorcycle decelerates, the inertial forces cause its effective center of mass to shift forward. This forward shift increases the load on the front tire and simultaneously reduces the load on the rear tire.
The magnitude of this weight transfer is influenced by several factors:
The approximate increase in load on the front wheel (ΔF_front) can be estimated by the formula: ΔF_front = (m · a · h) / L
This formula highlights why a controlled deceleration (smaller 'a' initially, then progressively larger) is so important: it allows the front tire to gradually receive the increased load, maximizing its grip potential without exceeding its limits.
The frictional grip a tire can generate is directly proportional to the normal load placed upon it, up to a certain limit. This relationship is expressed by the formula: F_friction = μ · N, where μ is the coefficient of friction between the tire and the road surface, and N is the normal load.
When you brake progressively, the forward weight transfer gradually increases the normal load (N) on the front tire. This increased load enlarges the tire's contact patch – the area of rubber touching the road – and enhances its ability to generate braking force. Simultaneously, the load on the rear tire decreases, reducing its available grip.
Maximizing Grip: Progressive braking allows the front tire to gain load gradually, increasing its contact patch and maximizing its grip potential. This means you can brake harder and more effectively without risking a sudden loss of traction.
However, there's a critical point: applying too much braking force too quickly can overload the front tire beyond its adhesion limit, even with increased load. This causes the tire to skid or "lock up," leading to a complete loss of steering control and stability. Progressive braking helps riders manage this delicate balance.
Achieving the correct brake balance and managing suspension dive are integral to stable and efficient braking on a motorcycle. These factors work in conjunction with progressive braking and weight transfer to ensure control.
Brake balance refers to the distribution of braking force between the front and rear wheels. Due to weight transfer, the front wheel of a motorcycle can generate significantly more braking force than the rear wheel during deceleration. For most A1 motorcycles on dry pavement, an optimal brake balance for maximal stopping power typically falls in the range of 60-70% front brake and 30-40% rear brake.
Avoid Rear Brake Only: Relying solely on the rear brake provides insufficient stopping power and can easily lead to rear wheel lock-up, especially under moderate to hard braking. Conversely, slamming only the front brake can cause immediate front wheel lock-up and a loss of control.
The ideal brake balance is dynamic and changes based on several conditions:
Suspension dive is the forward compression of the front forks during braking, a natural consequence of the forward weight transfer. While some dive is necessary for the suspension to absorb forces and maintain tire contact, excessive dive can negatively impact handling by altering the steering geometry and reducing ground clearance.
Riders can mitigate the effects of suspension dive through proper body positioning. By consciously shifting your body weight slightly backward or bracing yourself against the tank with your legs (tank grip), you can counteract the forward pitching motion, helping to keep the motorcycle more stable. This distributes the forces more evenly and prevents excessive load from being placed solely on the front wheel and suspension.
In the Netherlands, specific regulations and guidelines ensure that motorcycle braking is performed safely and responsibly. Adhering to these is crucial for obtaining your Dutch A1 motorcycle license and for safe road participation.
The Reglement Verkeersregels en Verkeerstekens 1990 (RVV 1990) outlines general duties for all drivers, which apply directly to motorcycle braking:
Beyond the RVV, Rijkswaterstaat (the Dutch Directorate-General for Public Works and Water Management) often issues guidelines for best practices. For A1 motorcycles, it generally recommends a front-rear brake torque split of 60-70% front for dry conditions. While advisory, these guidelines are based on optimal performance and safety.
Furthermore, EU Regulation No 168/2014 (Annex I), which applies to vehicle types including motorcycles, stipulates that motorcycles under 125cc may be equipped with ABS. If a motorcycle is fitted with an Anti-Lock Braking System (ABS), the rider has a responsibility to ensure it is functional and not disabled during operation. ABS actively prevents wheel lock-up by modulating brake pressure, complementing progressive braking by providing an extra layer of safety, especially in emergency situations or on low-grip surfaces.
Even experienced riders can make braking errors, but new A1 riders are particularly susceptible. Recognizing and avoiding these mistakes is crucial for safety.
Braking is not a one-size-fits-all technique. Riders must constantly adapt their progressive braking strategy based on environmental factors, road conditions, and vehicle load.
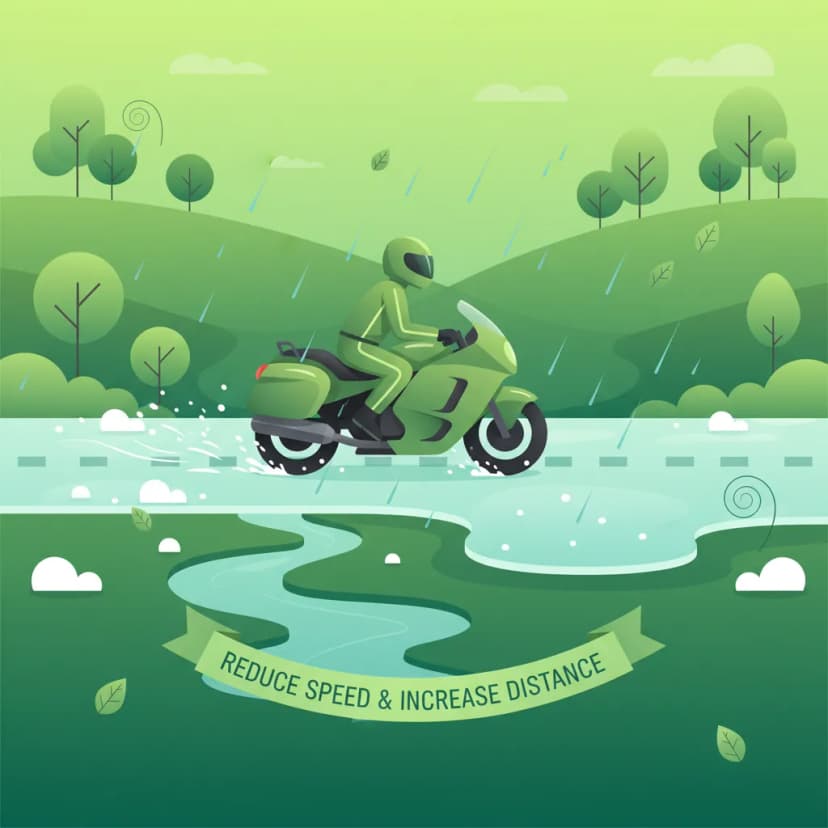
Rain, snow, ice, or even wet leaves drastically reduce the road surface's coefficient of friction (μ).
Reduced visibility requires heightened anticipation and earlier braking.
The chosen braking technique has direct and profound cause-and-effect relationships on a motorcycle's stability, stopping distance, and rider safety.
Mastering progressive braking and understanding weight transfer are indispensable for safe and confident motorcycle riding, especially within the Dutch A1 Motorcycle Theory curriculum. By applying braking force smoothly and incrementally, you not only comply with Dutch traffic laws (RVV 1990 Articles 7.7, 10.2, and 20.4) but also harness the physics of weight transfer to maximize your front tire's grip. This technique minimizes the risk of wheel lock-up, stabilizes the chassis, and ultimately leads to shorter, more controlled stopping distances in all conditions.
Always remember to adjust your brake balance based on the road surface and vehicle load, anticipate suspension dive with proper body positioning, and ensure your ABS system (if equipped) is functional. Consistent practice of progressive braking, combined with a deep understanding of these dynamics, will equip you with the skills to handle routine stops and emergency situations with greater safety and control on the road.
Lesson content overview
Explore all units and lessons included in this driving theory course.
Explore search topics learners often look for when studying Progressive Braking and Weight Transfer. These topics reflect common questions about road rules, driving situations, safety guidance, and lesson level theory preparation for learners in the Netherlands.
Browse additional driving theory lessons that cover connected traffic rules, road signs, and common driving situations related to this topic. Improve your understanding of how different rules interact across everyday traffic scenarios.
Explore the physics of weight transfer during motorcycle braking. Understand how it affects tire grip and learn to maximize stopping power safely according to Dutch theory standards.

This lesson explores the dynamic differences between using the front and rear brakes on a motorcycle. It explains that due to forward weight transfer under deceleration, the front brake provides the majority (around 70-80%) of the stopping power. The content details how to use both brakes in a coordinated manner for stable, effective braking, and clarifies the specific situations where the rear brake is particularly useful, such as for fine-tuning speed at low RPMs.
This lesson provides a detailed breakdown of high-speed braking techniques, emphasizing the correct balance and application of the front ('voorrem') and rear ('achterrem') brakes. It explains the physics of weight transfer under braking and why the front brake provides the majority of stopping power. Techniques for progressive, smooth application to avoid overloading the front tire and losing traction are covered, ensuring riders can slow down quickly and safely from any speed.

This lesson provides a comprehensive guide to safe and effective deceleration on a motorcycle. You will learn the principles of controlled braking, including the progressive application of both the front and rear brakes to maximize stopping power while maintaining stability. The content also explains the role of engine braking in managing speed and how the Anti-lock Braking System (ABS) helps prevent wheel lock-up during hard braking.

This lesson focuses on how you must adapt your riding style when the motorcycle is heavily loaded. You will learn that your braking distances will be significantly longer, requiring you to increase your following distance and begin braking earlier. The content also explains that acceleration will be slower, and cornering will require smoother, more deliberate inputs to avoid upsetting the motorcycle's altered balance.

This lesson explains the function of the clutch and gearbox in managing the motorcycle's power and speed. It details the correct techniques for upshifting and downshifting, including the concept of rev-matching for smoother transitions. The principles of engine braking are also covered, illustrating how releasing the throttle in gear provides controlled deceleration, which is a key skill for managing speed and reducing brake wear.

This lesson moves beyond basic braking to teach advanced techniques for optimal stopping performance. You will learn that the front brake provides the majority of your stopping power due to forward weight transfer, but that skillful application of the rear brake is crucial for stability. The content covers the concept of progressive braking—squeezing the levers smoothly—to manage traction and prevent wheel lock, especially on motorcycles without ABS.

Riding on two wheels requires special care on surfaces with reduced grip. This lesson teaches you how to handle challenging conditions like rain, ice, wet leaves, or tram tracks. Key principles include reducing speed significantly, making all control inputs (braking, accelerating, steering) much more smoothly and gradually, and increasing your following distance to allow for much longer stopping distances. Recognizing potentially slippery areas is a critical part of proactive hazard perception.

This lesson focuses on the physical skill of an emergency stop, building on previous braking lessons. You will learn to adopt a braced body position, keeping your arms straight and looking ahead, not down. The content details the technique of applying both brakes rapidly but progressively to the point of maximum traction, and how to trust and utilize ABS if your motorcycle is equipped with it.

This lesson teaches the principles of performing a controlled emergency stop ('noodsremmen') to achieve the shortest possible stopping distance without losing control. It details the technique of applying both brakes firmly and progressively, managing the forward weight transfer, and maintaining an upright body posture to maximize braking efficiency. The content emphasizes braking in a straight line and looking ahead to where you want to stop, not at the obstacle.

This lesson explains the physics of how weight distribution affects a motorcycle's stability. You will learn the golden rule of packing: keep the weight as low and as close to the motorcycle's center of gravity as possible. The content provides practical advice on loading panniers evenly, placing heavier items in a tank bag rather than a high top case, and respecting the manufacturer's maximum load capacity.
Learn how to adjust your braking strategy for various road surfaces, weather, and lighting conditions. Essential theory for safe motorcycle operation in the Netherlands.

This lesson reinforces the critical relationship between adverse conditions, reduced traction, and massively increased stopping distances. It provides a clear framework for how much riders need to increase their following distance and reduce their overall speed to maintain a safe margin for error. The curriculum teaches riders to constantly reassess their speed based on visual feedback from the road surface and the level of visibility, ensuring they can always stop within the distance they can clearly see.
Riding on two wheels requires special care on surfaces with reduced grip. This lesson teaches you how to handle challenging conditions like rain, ice, wet leaves, or tram tracks. Key principles include reducing speed significantly, making all control inputs (braking, accelerating, steering) much more smoothly and gradually, and increasing your following distance to allow for much longer stopping distances. Recognizing potentially slippery areas is a critical part of proactive hazard perception.
This lesson provides survival strategies for riding in the most challenging weather conditions, including heavy rain, snow, and potential ice. It emphasizes the importance of mental preparation, drastically reduced speeds, and hyper-smooth inputs for throttle, brakes, and steering. The content also covers identifying high-risk areas for 'black ice,' such as bridges and shaded spots, and the critical role of appropriate waterproof and insulated gear in preventing hypothermia and maintaining concentration.

The posted speed limit is a maximum, not a target. This lesson teaches the crucial skill of adapting your speed to prevailing conditions. You will learn how to assess factors like traffic density, poor weather (rain, fog), limited visibility (at night), and slippery road surfaces. Adjusting your speed downwards in these situations provides you with more time to react to hazards and significantly reduces the risk of losing control or being involved in a collision.

This lesson provides practical advice for driving in challenging weather. You will learn about the risk of aquaplaning in heavy rain and how to react, as well as how to manage the effects of strong crosswinds. The curriculum covers winter driving, explaining the danger of black ice, the benefits of winter tires, and techniques for avoiding and correcting a skid. A key focus is on adjusting driving style: increasing following distances, reducing speed, and making gentle steering and braking inputs.

This lesson emphasizes the critical importance of adapting your speed to prevailing conditions, which may require driving slower than the legal limit. You will learn how factors like rain, fog, snow, and darkness significantly increase braking distances and reduce visibility. The curriculum explains the dangers of aquaplaning on wet roads and black ice in winter. The core principle taught is that a safe driver always adjusts their speed to ensure they can stop within the distance they can see to be clear.

This lesson explains the science behind reduced grip on wet surfaces and the dangerous phenomenon of hydroplaning, where a tire rides on a layer of water instead of the road. It details the critical roles of tire tread depth, tire pressure, and riding speed in maintaining contact with the asphalt. Riders will learn techniques for riding in the rain, including using exceptionally smooth control inputs and proactively reducing speed when approaching standing water.
This lesson provides a comprehensive guide to safe and effective deceleration on a motorcycle. You will learn the principles of controlled braking, including the progressive application of both the front and rear brakes to maximize stopping power while maintaining stability. The content also explains the role of engine braking in managing speed and how the Anti-lock Braking System (ABS) helps prevent wheel lock-up during hard braking.

This lesson provides a detailed guide to riding in wet and low-visibility conditions. You will learn to make all your control inputs—braking, accelerating, and steering—exceptionally smooth to avoid breaking traction on slippery surfaces. The content covers the dangers of painted lines and manhole covers when wet, and the importance of increasing your following distance dramatically to account for longer braking distances.

This lesson explains how to counteract the effects of strong winds, which can easily upset a motorcycle's stability. It covers techniques like maintaining a relaxed grip on the handlebars and leaning into a steady crosswind. The lesson also addresses the impact of temperature, explaining how cold weather affects both the rider (risk of hypothermia, reduced concentration) and the motorcycle (reduced tire grip until warmed up), and emphasizes the need for appropriate protective gear.
Find clear answers to common questions learners have about Progressive Braking and Weight Transfer. Learn how the lesson is structured, which driving theory objectives it supports, and how it fits into the overall learning path of units and curriculum progression in the Netherlands. These explanations help you understand key concepts, lesson flow, and exam focused study goals.
Motorcycles have only two wheels, making them inherently less stable than cars. Progressive braking allows the rider to manage the significant weight transfer that occurs when decelerating. This controlled transfer loads the front suspension, increasing the front tire's grip and allowing for much harder, safer braking without skidding or unsettling the bike. Abrupt braking can easily lead to a loss of control.
When you brake, the motorcycle's momentum tries to continue forward, causing the front to dip and the rear to lift slightly. This shifts more of the bike's weight onto the front wheel. A heavier wheel means a larger contact patch with the road and more friction available, which translates directly to increased grip for braking.
The front suspension compresses significantly under braking. This compression is a direct result of the weight transfer. By allowing the suspension to compress progressively, you ensure the front tire remains firmly planted, maximizing its contact with the road surface and thus its ability to provide grip for deceleration. It also helps absorb imperfections in the road surface.
Yes, locking the front wheel is a significant risk if you apply braking force too suddenly or excessively. This is precisely why progressive braking is crucial. By gradually increasing brake pressure, you can feel how the suspension compresses and how much grip is available, allowing you to brake harder without exceeding the tire's traction limits.
Yes, understanding progressive braking is still essential even with ABS (Anti-lock Braking System). ABS prevents the wheels from locking up, but it doesn't magically increase the available grip. Progressive application ensures you're using the available grip most effectively, and ABS will intervene if you approach the limit, maintaining steering control. Learning to brake progressively helps you understand the bike's behaviour even when ABS is assisting.
The CBR exam may present scenarios where you need to choose the safest braking method, identify hazards related to braking, or understand the factors affecting stopping distance. Questions might test your knowledge of how weight transfer, suspension, and progressive application of brakes all contribute to effective and safe deceleration.