
This lesson addresses critical aspects of motorcycle braking beyond just technique: brake fade and system maintenance. Understanding how to prevent overheating and perform routine checks is vital for both your Dutch A1 CBR theory exam and ensuring your safety on the road. It builds upon previous lessons on braking dynamics, helping you maintain optimal braking performance.

Understanding your motorcycle's braking system is paramount for safe riding, especially for those pursuing their Dutch A1 motorcycle licence. While knowing how to brake effectively is crucial, it's equally important to understand what can compromise your braking performance and how to prevent it. This lesson delves into brake fade, a temporary loss of braking power, and outlines the essential maintenance and pre-ride inspection procedures to keep your motorcycle's brakes in optimal condition.
Safe braking is not just about technique; it's also about a well-maintained system. Overheating can drastically reduce stopping capability, turning a controlled descent into a perilous slide. By mastering the concepts of brake fade, its causes, and the necessary checks, you ensure your motorcycle remains roadworthy and safe, in compliance with Dutch CBR (Centraal Bureau Rijvaardigheidsbewijzen) requirements.
Brake fade refers to the temporary reduction in your motorcycle's braking effectiveness. This phenomenon primarily occurs due to the overheating of brake components, such as the brake pads, rotors (discs), drums, or the brake fluid itself. When brakes overheat, their ability to convert kinetic energy into thermal energy and dissipate it efficiently is compromised, leading to a noticeable decrease in stopping power.
Recognizing the signs of brake fade is critical for rider safety. You might experience a longer stopping distance, a softer or "spongy" feel at the brake lever or pedal, or even a distinct smell of burning brake material. Ignoring these warning signs can lead to dangerously extended stopping distances and potentially loss of control.
Brake fade manifests in two primary forms, both stemming from excessive heat but affecting different parts of the system:
Friction fade occurs when the coefficient of friction between the brake pads (or shoes in a drum brake system) and the rotor or drum decreases significantly as temperatures rise. Brake pad materials are designed to operate efficiently within a specific temperature range. When this range is exceeded, the pad material can begin to "glaze" or gas out, effectively reducing its gripping capability.
Different pad materials have varying tolerances for heat. Organic pads, for example, typically reach their thermal limit sooner but are gentler on rotors. Semi-metallic or sintered pads can withstand higher temperatures but may generate more noise and wear rotors faster. Regardless of the material, every pad has a thermal capacity, beyond which its ability to provide consistent friction rapidly diminishes. This type of fade means you need to apply more force at the lever or pedal to achieve the same deceleration.
Fluid fade is arguably the more dangerous form of brake fade because it can lead to a sudden and dramatic loss of braking power. It occurs when the brake fluid inside the hydraulic system reaches its boiling point and begins to vaporize. Unlike liquid, vapor (gas) is compressible. When you apply the brake lever, instead of directly transmitting hydraulic pressure to the caliper, some of that force is absorbed by compressing the vapor bubbles in the fluid.
This compression results in a "spongy" or "mushy" feeling at the lever, requiring significantly more travel and effort to generate any braking force. In severe cases, the lever might even pull all the way to the handlebar without any effective braking.
There are two subcategories of fluid fade:
Preventing brake fade is a combination of good riding technique and diligent maintenance. Your riding style directly impacts how much heat is generated in your braking system.
As you learned in earlier lessons (e.g., Lesson 6.3 Progressive Braking and Weight Transfer), progressive braking involves gradually increasing brake pressure. This technique is not only crucial for control but also for managing heat. By applying brakes progressively and intermittently, especially on long descents, you allow the braking components short periods to cool down.
Using both the front and rear brakes in a coordinated manner also helps distribute the braking load and heat more evenly across the entire system. Over-reliance on the front brake alone, particularly on descents, will rapidly overheat the front rotor and caliper, making it the first point of fade.
One of the most effective ways to prevent brake fade on long descents or during sustained deceleration is to use engine braking. By shifting into a lower gear, you allow the engine's natural compression to help slow the motorcycle. This reduces the need for constant application of the friction brakes, allowing them to cool down and maintain their effectiveness for when you truly need them, such as for an emergency stop.
When riding downhill, anticipate your speed and gear down early. Use a gear that keeps the engine revs in a safe, controlled range without over-revving, and let the engine do most of the work to manage your speed.
Brake fade isn't limited to mountain roads. Stop-and-go city traffic with frequent light braking can also lead to cumulative heat buildup, especially if brake pads are worn or fluid is old. Hot ambient temperatures also reduce the cooling margin for your brakes, making them more susceptible to fade.
When carrying a heavy load, such as a passenger or luggage, your motorcycle's inertia increases. This means your brakes have to work harder to slow down, generating more heat. Adjust your braking balance and allow for longer stopping distances, being even more vigilant for signs of fade. On wet roads, while water might initially cool the brakes, reduced tire friction means you'll need even more controlled braking, and brake fade can combine with low grip to create a dangerous situation.
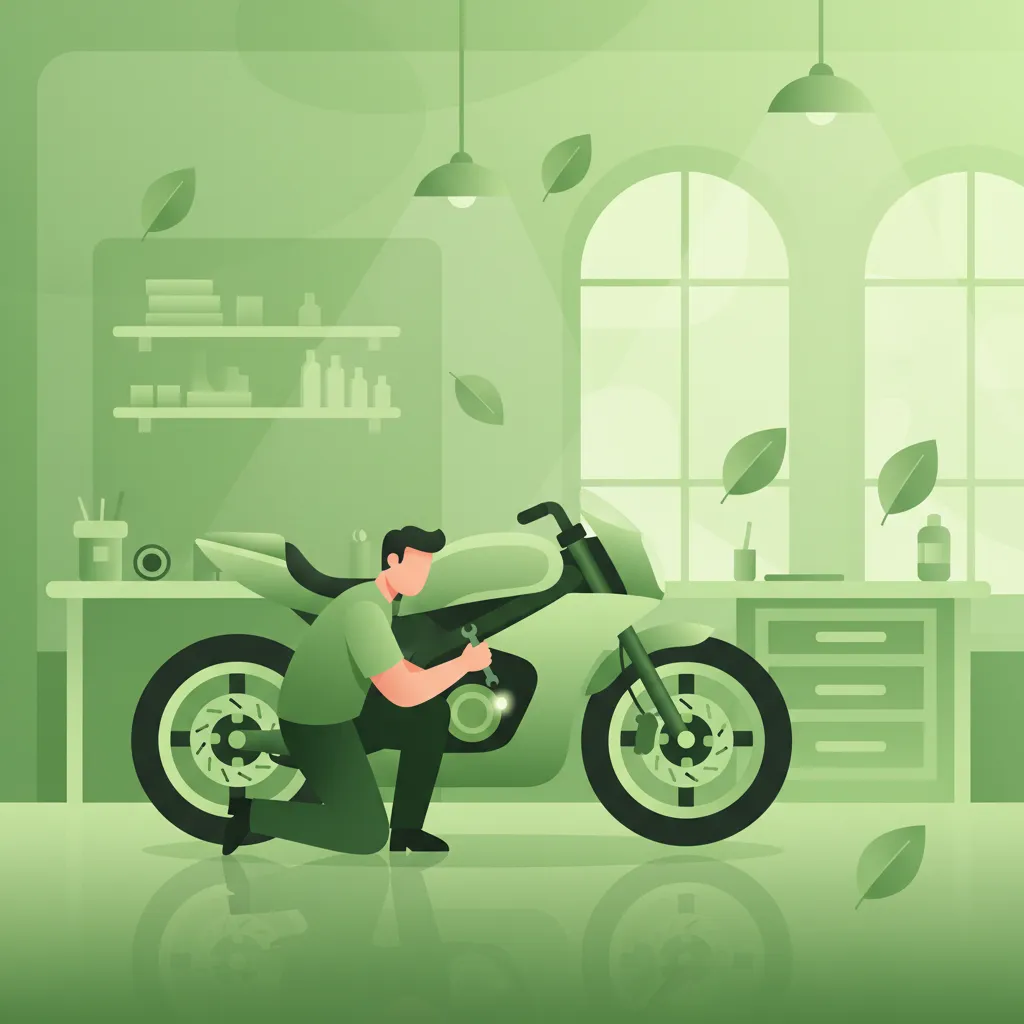
Regular and thorough maintenance is the cornerstone of a safe and reliable braking system. Dutch traffic law (Rijwegcode/RVV 1990) obliges riders to keep their vehicle in a condition that does not endanger road safety. This includes meticulously maintained brakes.
Brake fluid is a critical component, and its condition directly impacts your braking effectiveness.
As mentioned, brake fluid absorbs moisture over time, lowering its boiling point. This process happens regardless of how much you ride. Old, contaminated fluid is a prime candidate for fluid fade. Furthermore, moisture can lead to corrosion within the braking system, damaging components like the master cylinder and caliper pistons.
Regularly check the brake fluid level in the reservoirs (typically one for the front brake on the handlebar, and one for the rear brake, usually near the foot pedal). The fluid level should be between the "MIN" and "MAX" lines. A low level could indicate a leak or severely worn brake pads. The fluid itself should be relatively clear, with a slight amber tint for most DOT-4 fluids. Dark, murky fluid suggests contamination and an urgent need for replacement.
The CBR typically recommends replacing brake fluid every two years or 12,000 km for most motorcycles. However, always consult your motorcycle's owner's manual for the precise manufacturer-specified interval, as this can vary.
Brake pads (for disc brakes) and shoes (for drum brakes) are consumables that wear down with use.
It is crucial to regularly inspect the thickness of your brake pads. Most pads have wear indicator grooves or lines. If the friction material is level with these indicators, or if the thickness is below the manufacturer's specified minimum, replacement is necessary.
Under Dutch roadworthiness rules, brake pad thickness below 1 mm (or as specified by the manufacturer) is generally considered unsafe and requires immediate replacement. Riding with excessively worn pads drastically reduces braking efficiency and can damage your rotors.
When inspecting, check all pads (inner and outer) for even wear. Uneven wear can indicate a problem with the caliper, such as a seized piston or slider pins.
The flexible brake lines or hoses transmit hydraulic pressure from your master cylinder to the brake calipers. Their integrity is vital.
Routinely inspect all brake lines for signs of damage, including cracks, abrasions, cuts, bulges, or leaks. Pay close attention to areas where lines flex or are routed near moving parts. Rubber hoses can also harden and crack with age, reducing their flexibility and increasing the risk of failure. Braided steel lines offer better durability and feel but can still suffer external damage. Any visible compromise to a brake line constitutes a defect under Dutch traffic law and requires immediate replacement.
The brake rotors (discs) or drums are also subject to wear and damage.
Inspect rotors for scoring, deep grooves, or discoloration (which can indicate severe overheating). Rotors also have a minimum thickness limit stamped on them; if they wear below this, their ability to dissipate heat and withstand braking forces is compromised. For drum brakes, check for excessive scoring inside the drum. Warped rotors can cause a pulsating feel at the brake lever and reduce braking effectiveness.
A systematic pre-ride inspection of your braking system is a mandatory responsibility for all riders before entering traffic, as stipulated by RVV 1990, Article 7. This quick check can identify potential problems before they lead to an unsafe situation.
If your motorcycle is equipped with an Anti-Lock Braking System (ABS), it's a crucial safety feature. ABS is designed to prevent wheel lock-up during hard braking, especially on slippery surfaces. However, ABS does not prevent brake fade. A persistent ABS warning light indicates a fault within the system, and it should be diagnosed and repaired before riding further, as the system may not provide its intended anti-lock benefits. While ABS helps prevent loss of control, it relies on a healthy hydraulic system and effective pads to function correctly.
Neglecting your motorcycle's braking system can have severe consequences, ranging from increased accident risk to legal penalties.
Failure to maintain your brakes and ensure your vehicle is roadworthy can lead to legal liability in the event of an accident and may result in fines or other penalties under Dutch traffic law. Your safety, and the safety of other road users, depends on well-functioning brakes.
Mastering your motorcycle's braking system involves more than just knowing how to pull the lever. It demands an understanding of the physics behind brake fade, proactive maintenance, and diligent pre-ride inspections.
By integrating these principles into your riding habits, you contribute to safer roads for everyone and ensure you are prepared for the Dutch A1 Motorcycle Theory exam and beyond.
Lesson content overview
Explore all units and lessons included in this driving theory course.
Explore search topics learners often look for when studying Brake Fade, Maintenance, and Inspection. These topics reflect common questions about road rules, driving situations, safety guidance, and lesson level theory preparation for learners in the Netherlands.
Browse additional driving theory lessons that cover connected traffic rules, road signs, and common driving situations related to this topic. Improve your understanding of how different rules interact across everyday traffic scenarios.
Learn essential maintenance and pre-ride inspection for motorcycle brakes. Understand how to check fluid levels, pad wear, and brake lines to ensure roadworthiness and compliance with Dutch traffic laws.

This lesson teaches riders how to conduct regular visual inspections of their motorcycle's braking system, a critical safety routine. It covers how to check the thickness of brake pads and look for signs of wear or damage on brake discs. The curriculum also explains the importance of monitoring the brake fluid level and condition, as old fluid can compromise braking performance, ensuring the system is always ready for an emergency.

This lesson provides an overview of the most important routine maintenance tasks a rider should be aware of. It covers the why and how of regularly checking and lubricating the drive chain to prevent premature wear. Additionally, it explains how to check the engine oil level and recognize the signs that brake pads or fluid need attention, empowering riders to keep their motorcycles in a safe and reliable condition between professional services.

Your brakes are your most important safety feature. This lesson explains how to conduct a basic inspection of your braking system. For hydraulic brakes, you will learn how to check the brake fluid level and condition through the reservoir sight glass. The lesson also covers a visual inspection of brake pads for wear and checking brake discs for scoring or damage. Finally, it describes how to test the feel of the brake levers for firmness, ensuring the system is functioning correctly.

This lesson highlights the importance of adhering to the manufacturer's recommended maintenance schedule, which can be found in the owner's manual. It explains that regular servicing by qualified technicians is vital for long-term reliability and safety. The lesson also discusses the benefits of keeping a detailed service log, which not only helps track maintenance needs but also preserves the motorcycle's resale value.

This lesson explains the mechanical and hydraulic principles behind the common types of motorcycle brakes. It compares the operation and performance characteristics of disc brakes and drum brakes. The function of an Anti-lock Braking System (ABS) is also detailed, explaining how it prevents wheel lock-up during hard braking, thereby allowing the rider to maintain steering control and reduce stopping distances in many situations.

This lesson introduces a systematic pre-ride check, often remembered by the acronym T-CLOCS (Tires, Controls, Lights, Oil, Chassis, Stands). It provides a structured routine to ensure a motorcycle is safe to ride before every trip. Learners will understand how to quickly and efficiently inspect tire pressure and condition, verify all lights and controls are working, check fluid levels, and ensure the chassis and stand are secure.

This lesson provides a comprehensive guide to safe and effective deceleration on a motorcycle. You will learn the principles of controlled braking, including the progressive application of both the front and rear brakes to maximize stopping power while maintaining stability. The content also explains the role of engine braking in managing speed and how the Anti-lock Braking System (ABS) helps prevent wheel lock-up during hard braking.
This lesson details the systematic procedure for checking the functionality of all lights and indicators before a ride. This simple but critical safety check includes verifying the operation of the high and low beam headlight, the taillight, the brake light (using both front and rear brake activators), and all four turn signals. Ensuring all lights are working is a legal requirement and fundamental for visibility and communicating intentions to other road users.
This lesson explains the legal framework for the mandatory periodic technical inspection (APK) as it applies to motorcycles in the Netherlands, although noting its specific applicability rules. It outlines the key safety and environmental components that are scrutinized during the inspection, such as brakes, tires, lighting, and exhaust emissions. Understanding these criteria helps riders maintain their vehicle in a constant state of roadworthiness and prepare for the formal inspection when required.
This lesson covers the mandatory lighting and signaling equipment for A2 motorcycles under Dutch law, ensuring you remain visible and communicate your intentions correctly. You will learn the rules for using headlights, taillights, turn signals, and brake lights in various conditions, including daytime and adverse weather. The content also addresses the importance of maintaining this equipment and using hand signals as a valid secondary method of communication in traffic.
Understand how to prevent brake fade on your motorcycle. This lesson covers progressive braking, engine braking, and adapting riding style to manage heat and maintain braking effectiveness in various conditions.
This lesson provides a comprehensive guide to safe and effective deceleration on a motorcycle. You will learn the principles of controlled braking, including the progressive application of both the front and rear brakes to maximize stopping power while maintaining stability. The content also explains the role of engine braking in managing speed and how the Anti-lock Braking System (ABS) helps prevent wheel lock-up during hard braking.

This lesson teaches the technique of progressive braking, which involves applying the brakes smoothly and gradually rather than abruptly. This method allows the motorcycle's weight to transfer forward in a controlled manner, compressing the front suspension and increasing the size of the front tire's contact patch. This, in turn, maximizes available grip and allows for harder, safer braking without unsettling the chassis or locking a wheel.

This lesson explains the function of the clutch and gearbox in managing the motorcycle's power and speed. It details the correct techniques for upshifting and downshifting, including the concept of rev-matching for smoother transitions. The principles of engine braking are also covered, illustrating how releasing the throttle in gear provides controlled deceleration, which is a key skill for managing speed and reducing brake wear.

This lesson focuses on the physical skill of an emergency stop, building on previous braking lessons. You will learn to adopt a braced body position, keeping your arms straight and looking ahead, not down. The content details the technique of applying both brakes rapidly but progressively to the point of maximum traction, and how to trust and utilize ABS if your motorcycle is equipped with it.

This lesson provides a detailed breakdown of high-speed braking techniques, emphasizing the correct balance and application of the front ('voorrem') and rear ('achterrem') brakes. It explains the physics of weight transfer under braking and why the front brake provides the majority of stopping power. Techniques for progressive, smooth application to avoid overloading the front tire and losing traction are covered, ensuring riders can slow down quickly and safely from any speed.

This lesson teaches the principles of performing a controlled emergency stop ('noodsremmen') to achieve the shortest possible stopping distance without losing control. It details the technique of applying both brakes firmly and progressively, managing the forward weight transfer, and maintaining an upright body posture to maximize braking efficiency. The content emphasizes braking in a straight line and looking ahead to where you want to stop, not at the obstacle.

This lesson moves beyond basic braking to teach advanced techniques for optimal stopping performance. You will learn that the front brake provides the majority of your stopping power due to forward weight transfer, but that skillful application of the rear brake is crucial for stability. The content covers the concept of progressive braking—squeezing the levers smoothly—to manage traction and prevent wheel lock, especially on motorcycles without ABS.
This lesson teaches riders how to conduct regular visual inspections of their motorcycle's braking system, a critical safety routine. It covers how to check the thickness of brake pads and look for signs of wear or damage on brake discs. The curriculum also explains the importance of monitoring the brake fluid level and condition, as old fluid can compromise braking performance, ensuring the system is always ready for an emergency.

This lesson covers braking techniques beyond simply applying the brake levers. You will learn about the concept of engine braking (decelerating by releasing the throttle or downshifting) for controlled slowing. It also explains the function of an Anti-lock Braking System (ABS), a safety feature on some models that prevents wheels from locking during hard braking, allowing you to maintain steering control and reduce the chance of a skid.

This lesson outlines the step-by-step procedure for executing a controlled emergency stop in a straight line. It emphasizes keeping the motorcycle upright, looking ahead, and applying both brakes firmly and progressively up to the point of maximum traction (or ABS activation). Understanding this technique is critical for minimizing stopping distance in a sudden hazard scenario and is a key skill assessed in practical motorcycle training.
Find clear answers to common questions learners have about Brake Fade, Maintenance, and Inspection. Learn how the lesson is structured, which driving theory objectives it supports, and how it fits into the overall learning path of units and curriculum progression in the Netherlands. These explanations help you understand key concepts, lesson flow, and exam focused study goals.
Brake fade is a temporary reduction or complete loss of braking power caused by excessive heat in the braking system, usually from prolonged or hard braking. It's highly dangerous on a motorcycle because it can dramatically increase your stopping distance, leading to a loss of control or inability to stop in an emergency. Recognizing and preventing it is crucial for safety.
For the Dutch A1 licence, you'll need to know that brake fluid levels should be checked regularly, ideally during your pre-ride inspection, and changed according to the manufacturer's schedule (typically every one to two years). Brake pads should also be inspected frequently for wear, both during pre-ride checks and scheduled maintenance, as wear rates vary depending on riding style and conditions.
While brake fade is most commonly associated with conventional disc brakes due to fluid boiling or pad material overheating, drum brakes can also experience fade due to heat buildup. ABS systems primarily prevent wheel lock-up, but they don't inherently prevent the underlying heat buildup that causes fade in the brake components themselves. Proper technique and maintenance are key for all systems.
Key signs include a reduction in braking efficiency, a grinding or squealing noise when braking (due to wear indicators or metal-on-metal contact), increased lever travel, or visible thinning of the pad material below the manufacturer's minimum thickness line. Regularly checking your pads during maintenance is essential to catch these signs early.
Yes, understanding vehicle checks, including brake inspections, is an important part of the Dutch CBR theory exam for the A1 motorcycle licence. Questions may cover topics like what to check, why it's important, and how to identify potential brake issues before riding. This ensures you comprehend your responsibility for road safety.