
Welcome to the essential lesson on motorcycle braking dynamics for your A1 licence theory exam. Building on previous discussions of braking systems, this lesson focuses specifically on how the front and rear brakes function differently and how to use them together for maximum safety and efficiency on the road in the Netherlands.

Mastering effective braking is paramount for safe motorcycle riding, particularly for those pursuing a Dutch A1 Motorcycle Theory licence. Unlike cars, motorcycles require a nuanced approach to braking, primarily due to the dynamic distribution of weight that occurs under deceleration. This lesson explores the critical differences between using the front and rear brakes, detailing how to combine them for optimal stopping power and stability.
When you apply the brakes on a motorcycle, the vehicle's inertia causes a significant shift in its centre of gravity (CoG) towards the front wheel. This phenomenon, known as weight transfer or load transfer, is fundamental to understanding motorcycle braking dynamics.
At rest, a motorcycle's weight is distributed relatively evenly between its front and rear wheels, depending on the design and rider position. However, the moment you begin to decelerate, the motorcycle's momentum tries to continue moving forward. This force is counteracted by the braking system, leading to a forward pitch of the motorcycle. Consequently, the load on the front wheel increases significantly, while the load on the rear wheel simultaneously decreases.
This dynamic shift means the front tyre gains a substantial amount of normal force—the force exerted perpendicular to the road surface. More normal force translates directly into greater potential for traction, which is the maximum braking force a tyre can exert before it begins to slip.
The practical implication of weight transfer is profound: the front wheel becomes capable of generating significantly more stopping power than the rear wheel during braking. This is a critical concept for all motorcyclists, especially those operating A1-category motorcycles (up to 125 cc and 11 kW), where efficient braking is essential for safety.
Relying solely on the rear brake, or maintaining an even 50/50 brake distribution, would be inefficient and unsafe. The rear tyre, with its reduced load, would quickly lose traction and lock up, leading to a loss of control, while the front tyre's superior braking potential would remain underutilised.
Always remember that during deceleration, the front tyre gains traction, and the rear tyre loses it. This dictates the optimal brake force distribution.
Given the physics of weight transfer, motorcycle braking strategy revolves around utilising the front brake as the primary source of stopping power. This is known as front brake dominance.
Under typical dry road conditions, the front brake alone can provide approximately 70% to 80% of the motorcycle's total stopping power. The remaining 20% to 30% comes from the rear brake. This ideal brake force distribution of roughly 70% front and 30% rear is a widely accepted guideline for achieving the shortest and most stable stops on a dry surface.
The principle that the front brake contributes the majority (typically 70-80%) of a motorcycle's total stopping power due to forward weight transfer during deceleration.
This distribution is not a fixed rule but a dynamic target. Your braking technique should aim to progressively apply more pressure to the front brake lever while simultaneously, but more gently, applying pressure to the rear brake pedal. The goal is to utilise as much of the available traction from both tyres as possible without causing either wheel to lock up.
The 70/30 distribution is an ideal starting point for dry, optimal conditions. However, a skilled rider constantly adjusts this ratio based on the specific circumstances. Factors such as road surface, weather, vehicle load, and the presence of an Anti-Lock Braking System (ABS) all influence the optimal brake force distribution.
For instance, on wet or slippery surfaces like gravel or sand, the overall traction available to both tyres is significantly reduced. In such situations, aggressively using the front brake can easily lead to a front-wheel lock-up and a loss of steering control. Here, a rider might shift the distribution slightly, perhaps to 60% front and 40% rear, or even more cautiously balance the inputs, reducing the absolute pressure on the front brake.
Effective braking on a motorcycle is a coordinated effort involving both hands and feet, requiring precision and finesse. The technique of progressive braking is central to achieving stable and efficient stops.
Progressive braking involves gradually increasing the pressure on the brake levers and pedals rather than grabbing them abruptly. This technique allows for a smoother transfer of weight, preventing sudden jolts that could destabilise the motorcycle.
A common approach involves initiating braking with the front brake, applying light pressure to "load" the front suspension and tyre. As the weight transfers forward and the front tyre gains grip, you gradually increase pressure on the front brake lever. Simultaneously, or just moments after, you begin to apply the rear brake with gentle pressure. The key is a smooth, continuous increase in pressure until the desired deceleration is achieved, or just before the point of wheel lock-up.
This gradual application allows the tyres to find their maximum grip progressively, providing the rider with valuable feedback through the levers and pedals. It also gives the rider time to react and modulate pressure if a wheel begins to slip.
A braking technique where pressure on the brake levers and pedals is increased gradually and smoothly, typically starting with the front brake, to maintain motorcycle stability and maximise traction without causing wheel lock-up.
While the front brake is dominant, the rear brake plays a crucial supporting role. It helps to settle the motorcycle's chassis, preventing the rear wheel from lifting excessively during hard front braking and contributing additional stopping force.
In emergency situations, it's natural to react instinctively. However, training your muscle memory to apply both brakes progressively and with the correct front-dominant bias is vital for reducing stopping distances and maintaining control. For A1 motorcycle riders, practicing these coordinated movements in a safe environment is highly recommended.
Despite the front brake's dominance, there are specific situations where the rear brake is exceptionally useful, or even takes on a more prominent role.
At very low speeds, such as navigating slow-moving traffic, performing U-turns, or manoeuvring in parking lots, the rear brake can be invaluable for controlling your speed without needing to use the clutch or modulate the throttle extensively.
In conditions where overall traction is severely limited, such as on snow, ice, or loose gravel, the rear brake often becomes a more cautious choice for initial deceleration.
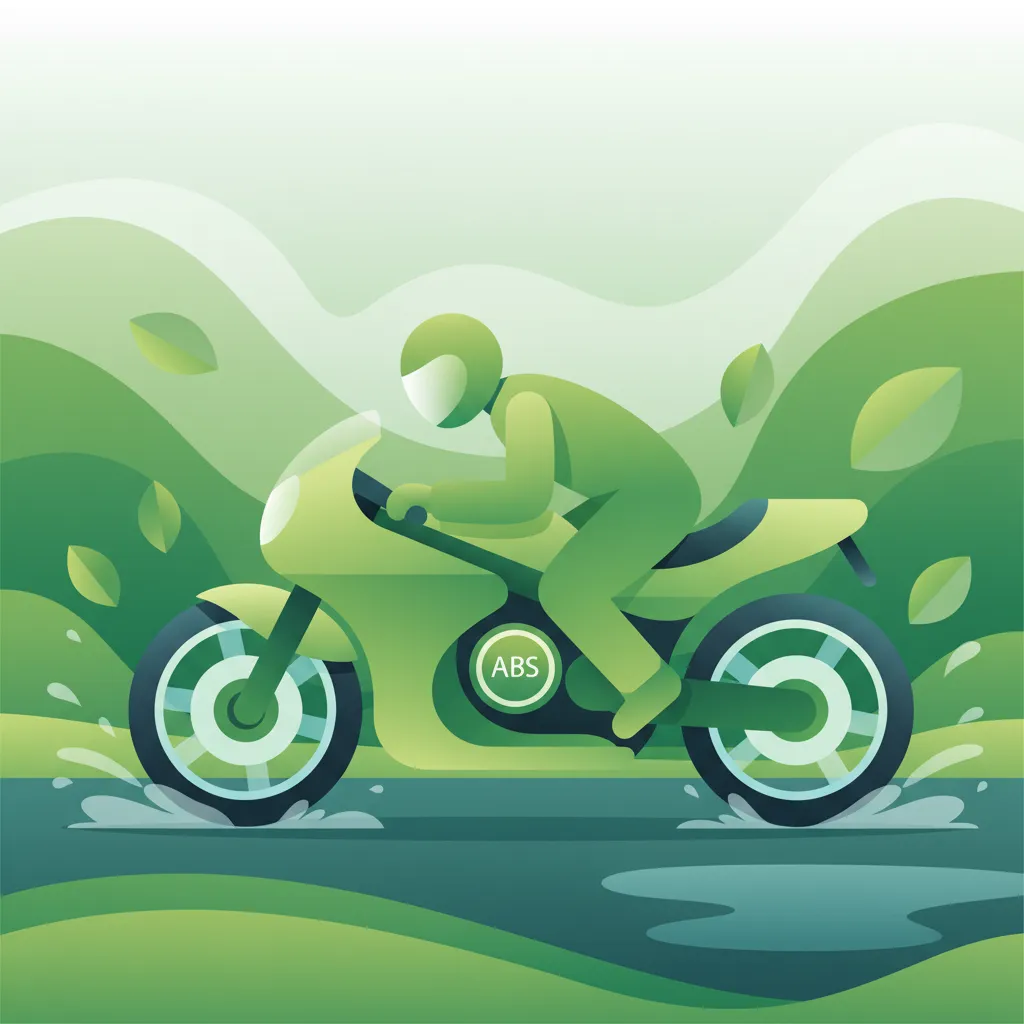
Modern motorcycles, including many A1 models, are increasingly equipped with an Anti-Lock Braking System (ABS). This electronic safety feature significantly enhances braking safety and performance.
ABS is designed to prevent wheel lock-up during braking. It continuously monitors the speed of each wheel. If a wheel begins to decelerate too rapidly—indicating an imminent lock-up—ABS momentarily reduces the hydraulic pressure to that brake. It then reapplies the pressure once traction is regained, repeating this cycle many times per second.
An electronic safety system that monitors wheel speed and modulates brake pressure to prevent wheel lock-up, maintaining tyre grip and steering control during braking.
This rapid modulation keeps the tyre rotating at an optimal slip ratio (the slight difference between wheel speed and vehicle speed), which maximises braking friction while preserving steering control (for the front wheel) and stability (for both wheels).
While ABS is a powerful safety net, it does not replace proper braking technique. Riders of ABS-equipped motorcycles should still practice progressive and coordinated braking.
Never intentionally disable your ABS if your motorcycle is equipped with it, especially in normal road conditions. It is a vital safety feature.
Adhering to correct braking techniques is not only a matter of personal safety but also a legal requirement under Dutch traffic law (RVV 1990) and recommended practice by the CBR.
The Dutch Road Traffic Regulations and Traffic Signs (Reglement Verkeersregels en Verkeerstekens 1990, or RVV 1990) generally require all road users, including motorcyclists, to be able to stop within a sufficient stopping distance appropriate to their speed, the road conditions, and the vehicle's state. While no specific article dictates the precise front-to-rear brake ratio, Article 3.6 of RVV 1990 implies that a rider must use their vehicle's capabilities optimally to ensure safety.
Furthermore, if your motorcycle is sold with ABS in the Netherlands, Article 59 of RVV 1990 mandates that this equipment must be operational. This underscores the legal expectation that safety features contributing to effective braking are maintained and used.
The Centraal Bureau Rijvaardigheidsbewijzen (CBR), responsible for driving examinations in the Netherlands, heavily emphasises safe and effective braking techniques. Their guidelines align with the principles discussed:
Failure to demonstrate adequate braking control, resulting in excessively long stopping distances or loss of control, can lead to serious consequences during the CBR practical exam and, more importantly, poses a significant safety risk on public roads.
Even experienced riders can sometimes fall into bad braking habits. Awareness of these common errors is the first step to correcting them.
Rear-Brake-Only Stopping:
Excessive Front Braking Leading to Front-Wheel Lock-up (without ABS):
Using Rear Brake Aggressively on Loose Gravel or Sand:
Disabling ABS (if equipped):
Braking While Cornering with Front Brake Fully Applied:
Neglecting Brake Maintenance:
Effective motorcycle braking is highly adaptable. Here's how different contexts influence your front-vs.-rear braking approach:
| Context | Variation in Principle | Reasoning |
|---|---|---|
| Wet / Slippery Surface | Reduce front-brake proportion (e.g., 60% front / 40% rear) and rely more on ABS if available. | Lower friction coefficient reduces overall tyre grip. A more balanced distribution helps prevent rapid front-wheel lock-up, which is difficult to recover from. |
| Loose Gravel / Sand | Use very light rear pressure for stabilization; rely on front for primary, delicate deceleration. | Front tyre generally has better grip on compacted parts; rear tyre easily loses grip on loose material, leading to slides. |
| Urban Stop-and-Go (Low Speed) | Rear brake can be used more dominantly (up to 50% front) for fine speed modulation and to avoid engine stalling. | At very low speeds, engine braking is less effective, and front braking can be too abrupt. Rear brake offers smoother, precise speed control without disrupting balance. |
| High Load (Passenger + Luggage) | Adjust static weight distribution: slightly increase rear brake proportion (e.g., 65% front / 35% rear). | Added weight at the rear shifts the motorcycle's static centre of gravity backwards, allowing the rear tyre to handle more braking force before locking up. |
| Steep Downhill (≥ 5% Grade) | Use front brake as primary hold, rear brake lightly for speed control; avoid continuous rear-only braking. | Gravity increases forward load, enhancing front tyre traction. Rear brake alone can overheat and lose effectiveness, or cause a slide. |
| ABS Disabled (older bike) | Rely heavily on rider's feel and progressive modulation; keep front brake pressure within lower limits. | Without electronic assistance, the rider must manually manage tyre slip to prevent lock-up, requiring heightened awareness and skill. |
| Single-Channel ABS (Front only) | Rear brake usage must be more cautious; maintain lower rear pressure, especially on low-grip surfaces. | Only the front wheel is protected from lock-up; the rear wheel remains vulnerable and requires manual modulation to prevent skidding. |
| Emergency Braking While Cornering | Reduce front pressure, possibly apply rear brake only, to maintain lateral grip and avoid a low-side crash. | High lateral forces already consume a significant portion of the front tyre's available traction. Additional front braking can quickly exceed this limit. |
Understanding the dynamic interplay between the front and rear brakes is fundamental to becoming a safe and proficient motorcycle rider. For your Dutch A1 Motorcycle Theory licence, internalising these concepts is not just about passing an exam; it's about building a foundation for a lifetime of safe riding.
Remember the core principles:
By integrating these dynamics into your riding technique, you will gain the confidence and control necessary to navigate the roads safely and effectively, ready for your CBR licence exam and beyond.
Lesson content overview
Explore all units and lessons included in this driving theory course.
Explore search topics learners often look for when studying Front vs. Rear Braking Dynamics. These topics reflect common questions about road rules, driving situations, safety guidance, and lesson level theory preparation for learners in the Netherlands.
Browse additional driving theory lessons that cover connected traffic rules, road signs, and common driving situations related to this topic. Improve your understanding of how different rules interact across everyday traffic scenarios.
Understand the crucial role of weight transfer in motorcycle braking. Learn how to effectively use front and rear brakes together for stable, controlled stops. Covers ABS and Dutch A1 theory requirements.

This lesson provides a comprehensive guide to safe and effective deceleration on a motorcycle. You will learn the principles of controlled braking, including the progressive application of both the front and rear brakes to maximize stopping power while maintaining stability. The content also explains the role of engine braking in managing speed and how the Anti-lock Braking System (ABS) helps prevent wheel lock-up during hard braking.

This lesson teaches the technique of progressive braking, which involves applying the brakes smoothly and gradually rather than abruptly. This method allows the motorcycle's weight to transfer forward in a controlled manner, compressing the front suspension and increasing the size of the front tire's contact patch. This, in turn, maximizes available grip and allows for harder, safer braking without unsettling the chassis or locking a wheel.
This lesson explains the function of an Anti-lock Braking System (ABS) on a motorcycle, detailing how it prevents wheel lock-up during heavy braking, thereby allowing the rider to maintain steering control. It clarifies that while ABS is a powerful safety aid, it does not defy physics and may sometimes increase stopping distances on loose surfaces. The content teaches riders to trust the system and apply the brakes fully and firmly in an emergency, letting the ABS manage traction.

This lesson prepares you for a critical situation: performing a maximum-force emergency stop. You will learn the correct body posture and braking technique to stop in the shortest possible distance without losing control. The content provides a clear explanation of how ABS works by rapidly pulsing the brakes to prevent the wheels from locking, allowing you to maintain steering control even during a panic stop.

This lesson moves beyond basic braking to teach advanced techniques for optimal stopping performance. You will learn that the front brake provides the majority of your stopping power due to forward weight transfer, but that skillful application of the rear brake is crucial for stability. The content covers the concept of progressive braking—squeezing the levers smoothly—to manage traction and prevent wheel lock, especially on motorcycles without ABS.

This lesson explains the mechanical and hydraulic principles behind the common types of motorcycle brakes. It compares the operation and performance characteristics of disc brakes and drum brakes. The function of an Anti-lock Braking System (ABS) is also detailed, explaining how it prevents wheel lock-up during hard braking, thereby allowing the rider to maintain steering control and reduce stopping distances in many situations.

This lesson focuses on the physical skill of an emergency stop, building on previous braking lessons. You will learn to adopt a braced body position, keeping your arms straight and looking ahead, not down. The content details the technique of applying both brakes rapidly but progressively to the point of maximum traction, and how to trust and utilize ABS if your motorcycle is equipped with it.

This lesson outlines the step-by-step procedure for executing a controlled emergency stop in a straight line. It emphasizes keeping the motorcycle upright, looking ahead, and applying both brakes firmly and progressively up to the point of maximum traction (or ABS activation). Understanding this technique is critical for minimizing stopping distance in a sudden hazard scenario and is a key skill assessed in practical motorcycle training.

This lesson covers braking techniques beyond simply applying the brake levers. You will learn about the concept of engine braking (decelerating by releasing the throttle or downshifting) for controlled slowing. It also explains the function of an Anti-lock Braking System (ABS), a safety feature on some models that prevents wheels from locking during hard braking, allowing you to maintain steering control and reduce the chance of a skid.

This lesson explains the function of the clutch and gearbox in managing the motorcycle's power and speed. It details the correct techniques for upshifting and downshifting, including the concept of rev-matching for smoother transitions. The principles of engine braking are also covered, illustrating how releasing the throttle in gear provides controlled deceleration, which is a key skill for managing speed and reducing brake wear.
Explore advanced braking strategies for different road conditions like wet surfaces and low-speed manoeuvres. Learn when and how to adapt your use of front and rear brakes for optimal control and safety in the Netherlands.
This lesson provides a comprehensive guide to safe and effective deceleration on a motorcycle. You will learn the principles of controlled braking, including the progressive application of both the front and rear brakes to maximize stopping power while maintaining stability. The content also explains the role of engine braking in managing speed and how the Anti-lock Braking System (ABS) helps prevent wheel lock-up during hard braking.
This lesson moves beyond basic braking to teach advanced techniques for optimal stopping performance. You will learn that the front brake provides the majority of your stopping power due to forward weight transfer, but that skillful application of the rear brake is crucial for stability. The content covers the concept of progressive braking—squeezing the levers smoothly—to manage traction and prevent wheel lock, especially on motorcycles without ABS.
This lesson teaches the technique of progressive braking, which involves applying the brakes smoothly and gradually rather than abruptly. This method allows the motorcycle's weight to transfer forward in a controlled manner, compressing the front suspension and increasing the size of the front tire's contact patch. This, in turn, maximizes available grip and allows for harder, safer braking without unsettling the chassis or locking a wheel.
This lesson outlines the step-by-step procedure for executing a controlled emergency stop in a straight line. It emphasizes keeping the motorcycle upright, looking ahead, and applying both brakes firmly and progressively up to the point of maximum traction (or ABS activation). Understanding this technique is critical for minimizing stopping distance in a sudden hazard scenario and is a key skill assessed in practical motorcycle training.
This lesson focuses on the physical skill of an emergency stop, building on previous braking lessons. You will learn to adopt a braced body position, keeping your arms straight and looking ahead, not down. The content details the technique of applying both brakes rapidly but progressively to the point of maximum traction, and how to trust and utilize ABS if your motorcycle is equipped with it.

Riding on two wheels requires special care on surfaces with reduced grip. This lesson teaches you how to handle challenging conditions like rain, ice, wet leaves, or tram tracks. Key principles include reducing speed significantly, making all control inputs (braking, accelerating, steering) much more smoothly and gradually, and increasing your following distance to allow for much longer stopping distances. Recognizing potentially slippery areas is a critical part of proactive hazard perception.

This lesson teaches the principles of performing a controlled emergency stop ('noodsremmen') to achieve the shortest possible stopping distance without losing control. It details the technique of applying both brakes firmly and progressively, managing the forward weight transfer, and maintaining an upright body posture to maximize braking efficiency. The content emphasizes braking in a straight line and looking ahead to where you want to stop, not at the obstacle.
This lesson provides a detailed breakdown of high-speed braking techniques, emphasizing the correct balance and application of the front ('voorrem') and rear ('achterrem') brakes. It explains the physics of weight transfer under braking and why the front brake provides the majority of stopping power. Techniques for progressive, smooth application to avoid overloading the front tire and losing traction are covered, ensuring riders can slow down quickly and safely from any speed.
This lesson prepares you for a critical situation: performing a maximum-force emergency stop. You will learn the correct body posture and braking technique to stop in the shortest possible distance without losing control. The content provides a clear explanation of how ABS works by rapidly pulsing the brakes to prevent the wheels from locking, allowing you to maintain steering control even during a panic stop.
This lesson prepares you to deal with sudden changes in road surface that can cause a loss of traction. You will learn to scan for these hazards and, if they cannot be avoided, how to ride over them safely. The key technique is to keep the motorcycle upright and maintain smooth, steady control inputs—no abrupt braking, accelerating, or steering—to minimize the risk of a skid.
Find clear answers to common questions learners have about Front vs. Rear Braking Dynamics. Learn how the lesson is structured, which driving theory objectives it supports, and how it fits into the overall learning path of units and curriculum progression in the Netherlands. These explanations help you understand key concepts, lesson flow, and exam focused study goals.
During braking, the motorcycle's weight shifts forward onto the front wheel. This increased load on the front tyre allows it to generate much greater braking force before losing grip, compared to the rear tyre, which experiences less load and therefore has less stopping potential. Typically, the front brake contributes about 70-80% of the total stopping power.
While the front brake is the primary stopping force, relying on it exclusively can be risky, especially in emergencies or on slippery surfaces. Using both brakes in a coordinated manner provides maximum stability and stopping efficiency. The rear brake is also useful for subtle speed adjustments, particularly at low speeds or when decelerating gently.
The rear brake is useful for maintaining balance and fine-tuning speed, especially at low speeds or during slow-speed manoeuvres like parking or navigating tight turns. It can also help stabilise the motorcycle during the initial phase of heavy braking or when coming to a complete stop.
Applying the rear brake too aggressively, particularly on slippery surfaces or during heavy braking, can cause the rear wheel to lock up and skid. This loss of traction can lead to instability and potentially a loss of control, making it crucial to apply the rear brake smoothly and progressively.
Exam questions often test your understanding of braking dynamics, focusing on scenarios where correct brake application is crucial for safety and stopping distance. Knowing the different roles of the front and rear brake, and how weight transfer affects them, will help you choose the correct answers in questions about emergency stops and safe braking techniques.