Logo
Dutch Driving Theory Courses

Lesson 5 of the Roadway Access & Navigation unit

Dutch Driving Theory AM: Interaction with Public Transport (Trams)

Navigating Dutch city roads often involves sharing space with trams, which require special attention. This lesson focuses on understanding the unique rules and safety measures needed when riding your moped or scooter near trams, including their priority and how to handle tram tracks safely. It's a vital part of mastering urban navigation for your AM category theory exam.

tramspublic transporturban ridingpriorityAM category
Dutch Driving Theory AM: Interaction with Public Transport (Trams)
Dutch Driving Theory AM

Interacting Safely with Trams in the Netherlands: A Guide for Moped & Scooter Riders

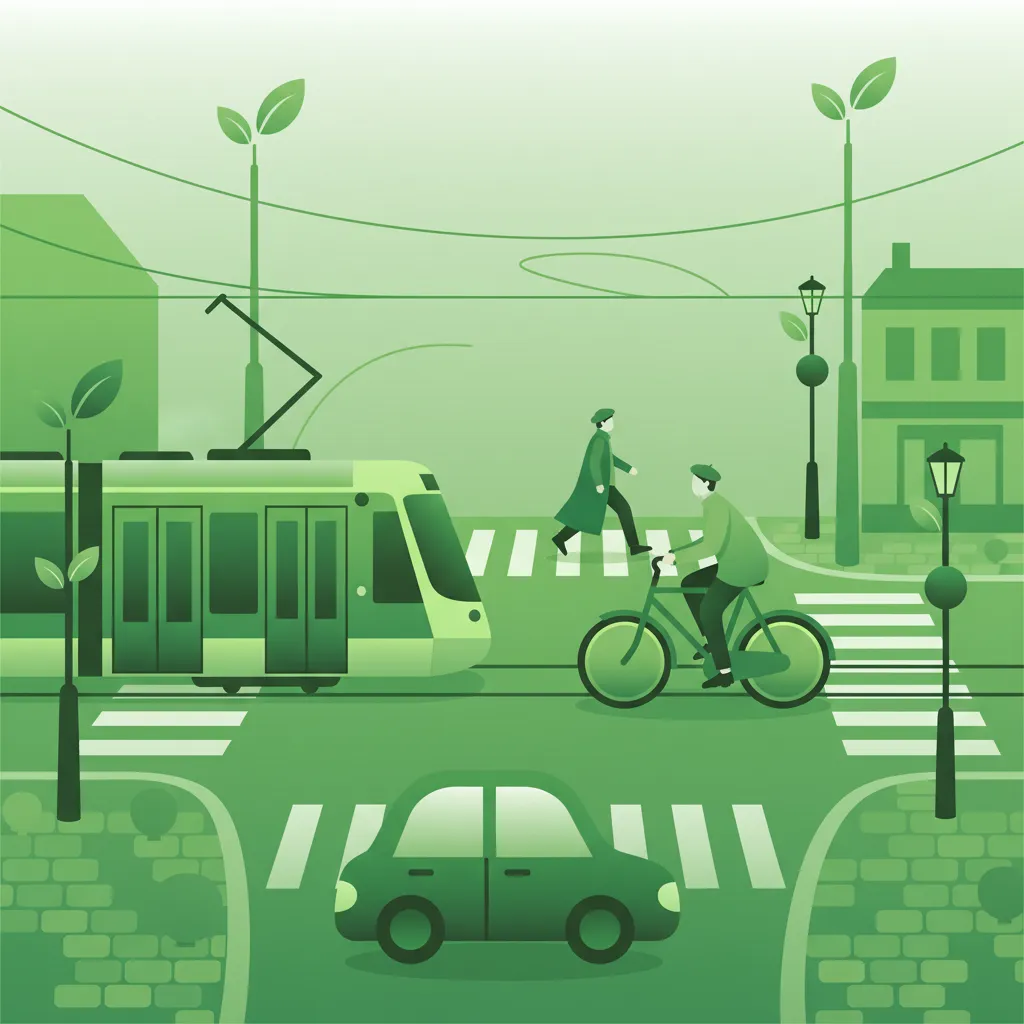
Riding a moped or scooter in Dutch cities invariably means encountering trams. These heavy, rail-bound vehicles are an integral part of urban public transport but present unique challenges and risks for two-wheeled vehicle operators like those with a Category AM license. This lesson is crucial for mastering safe interaction with trams, a skill rigorously assessed in your Dutch Category AM theory exam. Understanding tram priority, interpreting their specific signals, and knowing how to safely navigate their tracks are fundamental to safe urban riding.

Understanding Tram Priority in Dutch Traffic

Trams operate on fixed tracks, making them incapable of swerving to avoid obstacles. Due to their significant mass, they also have considerably longer braking distances compared to other road users. For these reasons, Dutch traffic law grants trams absolute priority in most situations. This means that, as a moped or scooter rider, you must yield to an approaching tram unless specific signs or signals explicitly state otherwise.

Why Trams Have Absolute Right of Way

The fundamental logic behind granting trams absolute priority is deeply rooted in safety and physics. A tram, weighing many tons and moving on steel rails, cannot deviate from its path. If a collision is imminent, it is the more agile, two-wheeled vehicle that must take evasive action. Prioritising trams significantly reduces the risk of severe accidents, which can result in serious injuries, vehicle damage, and disruptions to public transport. The Dutch Road Traffic Act (Wegenverkeerswet) and the traffic regulations (RVV 1990) are designed to facilitate the smooth and safe operation of public transport while protecting vulnerable road users.

Recognising Tram Priority Signs and Situations

The default rule in the Netherlands is that trams have priority over all other road users. This absolute priority applies at intersections, along tram-adjacent lanes, and in designated tram-only zones. You must assume a tram has priority unless a specific sign or signal clearly indicates otherwise.

In some specific locations, conditional priority might be indicated, for instance, by a sign stating "Tram has priority except when traffic light is red." However, these are exceptions, and the general rule of absolute priority must always be your guiding principle. Always be prepared to stop or give way before entering tram tracks or crossing points if a tram is approaching from any direction. It is a common misconception to believe that a green traffic light for other vehicles also grants right-of-way to a tram; this is incorrect as tram signals take precedence.

Warning

Always assume a tram has absolute priority. Only disregard this rule if explicitly overridden by a specific traffic sign or tram signal. Your safety, and the safety of others, depends on this critical understanding.

Decoding Tram Traffic Signals for Two-Wheeled Vehicles

At many intersections where tram tracks intersect with other traffic lanes, you will encounter dedicated tram traffic signals. These distinct visual signals govern tram movement and are positioned on or near the tram tracks. As a moped or scooter rider, it is essential to recognise and obey these signals, as they have precedence over general road traffic lights.

Specific Tram Signals and Their Meaning

Tram signals typically use unique symbols or configurations to indicate specific actions for the tram driver, which in turn dictate your required behaviour as a road user:

  • Green Light (Tram Go): Often displayed as a vertical bar, arrow, or specific symbol. This means the tram may proceed, and consequently, all other road users (including mopeds and scooters) must give way to the tram. You must stop before the stop line and wait for the tram to clear.
  • Red Light (Tram Stop): Usually a horizontal bar or 'X' symbol. This indicates the tram must stop. If the tram signal is red, and it is safe to do so, other road users may cross the tracks, provided no other conflicting traffic rules apply.
  • Flashing Amber Light (Caution): Often a single flashing amber light or a specific symbol. This signal indicates that the tram may proceed, but with caution, or that it is about to stop or start. As a rider, you must be extremely vigilant, prepared to stop, and maintain a safe distance, assuming the tram will move.
  • Special Signals: You might also encounter signs like "Tram priority" (Sign 1.3.13 in some municipalities) or "Stop on tram" markings painted on the road, further reinforcing the need to yield to trams.

The Hierarchy of Tram and Road Traffic Lights

One of the most critical rules to remember is the signal hierarchy: tram-specific signals always take precedence over standard road traffic lights when both apply at an intersection. This means if the general car traffic light is green, but the tram signal is red, you must stop and yield to the tram. Conversely, if the car light is red, but the tram signal is green, the tram will proceed, and you must remain stopped. Always prioritise the tram's intention as indicated by its dedicated signal. Ignoring this hierarchy is a common cause of accidents involving trams and two-wheeled vehicles.

Tip

When approaching an intersection with tram tracks, consciously look for the tram signals. Do not rely solely on the general traffic lights.

Essential Techniques for Crossing Tram Tracks

Crossing tram tracks safely is a fundamental skill for moped and scooter riders. The grooves in tram rails are a significant hazard, capable of trapping your wheels and causing a fall, especially if approached incorrectly.

Choosing the Safest Crossing Angle

The most crucial factor in safely crossing tram tracks is the crossing angle. This refers to the angle at which your vehicle traverses the rails relative to their direction.

  • Perpendicular Crossing (90°): This is the ideal and safest method. Crossing at a 90-degree angle ensures that your wheel passes over the rail groove as quickly as possible, minimising the chance of it getting stuck. Always aim for this angle if the road geometry allows.
  • Oblique Crossing (≥45°): If a perfect 90-degree angle is not possible due to road layout (e.g., at curved intersections), you must aim for the steepest possible angle, ideally 45 degrees or more. This still significantly reduces the risk compared to shallower angles.
  • Reduce Speed: Regardless of the angle, always reduce your speed when crossing tram tracks. Slower speeds give you more control and reduce the impact if your wheel does momentarily catch in a groove.

Steps for Safe Tram Track Crossing

  1. Scan Ahead: Identify the presence of tram tracks well in advance.
  2. Assess Angle: Determine the safest crossing angle available, aiming for 90 degrees.
  3. Reduce Speed: Slow down significantly, especially if the crossing angle is shallow or conditions are wet.
  4. Look and Listen: Check for approaching trams from both directions. Listen for bells.
  5. Maintain Straight Trajectory: Keep your handlebars straight as you cross the rails. Avoid turning while on the tracks.
  6. Cross Decisively: Once clear, cross smoothly and maintain your balance.

Preventing Wheel Entrapment: Risks and Solutions

Wheel entrapment occurs when your moped or scooter wheel falls into the groove between tram rails, leading to an immediate loss of control, often resulting in a fall or crash.

  • Causes of Entrapment:

    • Shallow Crossing Angles (<30°): This is the leading cause. When a wheel approaches a groove at a shallow angle, there's a higher chance for the tire to slip into and get caught in the rail.
    • High Speed: Crossing at speed reduces your reaction time and makes it harder to recover from a sudden loss of traction or control.
    • Wet or Icy Rails: Water, ice, or even leaves on the rails drastically reduce tire grip, making entrapment more likely even at slightly steeper angles.
    • Riding on the Rail: Never attempt to ride directly on the rail or use it as a "shortcut." This is extremely dangerous and illegal.
  • Mitigation Strategies:

    • Steep Angles: Prioritise crossing at 90 degrees, or at least 45 degrees. If you cannot achieve a safe angle, look for an alternative route or a designated crossing point.
    • Controlled Speed: Reduce your speed to a crawl if necessary, especially in adverse conditions.
    • Straight Wheel Alignment: Ensure your front wheel is perfectly straight as you approach and cross the rails. Avoid any steering input while on the tracks.
    • Vigilance: Always anticipate the possibility of your wheel getting stuck and be ready to react.

Warning

Crossing tram tracks at a shallow angle (<30°) at speed is highly dangerous. It is a leading cause of moped and scooter accidents involving trams, resulting in falls and potential collisions with the tram itself or other traffic.

Maintaining Safe Distances from Trams

Maintaining adequate distance from trams is essential for preventing collisions and ensuring your safety, whether you are riding behind, alongside, or overtaking one. Trams, like all large vehicles, have blind spots and can create air turbulence, especially at higher speeds.

Longitudinal and Lateral Clearances

Dutch guidelines specify minimum safe distances you must observe:

  • Longitudinal (Rear-Following Distance): When riding behind a moving tram, maintain a minimum distance of 3 metres. This provides sufficient reaction time if the tram brakes suddenly. At 30 km/h, your scooter travels approximately 13 metres in 1.5 seconds, highlighting why the 3-metre minimum is crucial for emergency braking. In adverse conditions like rain, fog, or at night, this distance should be increased to at least 5 metres.
  • Lateral (Overtaking / Side-by-Side): When riding alongside a tram, or when overtaking one, maintain a minimum lateral clearance of at least 1 metre from the nearest rail or the tram's body. This distance accounts for the tram's potential side-to-side movement, the swing of its pantograph (the apparatus on the roof collecting power), and the opening of doors at stops.

Hazards of Riding Too Close to Trams

Riding too close to a tram can expose you to several specific hazards:

  • Sudden Braking: Trams, especially in urban environments, can stop abruptly due to unexpected obstacles or passenger requirements. Insufficient following distance can lead to a rear-end collision.
  • Pantograph Swing: The pantograph, which connects the tram to the overhead catenary (power lines), can swing outwards, particularly on curves. Riding too close laterally could result in a dangerous collision with this component.
  • Door Opening: At tram stops, doors can open quickly. If you are riding too close alongside a stationary tram, you risk colliding with passengers or the opening doors.
  • Air Turbulence: Moving trams can generate air currents that can destabilise a two-wheeled vehicle, especially if you are riding too close and are caught in the wake.
  • Blind Spots: Tram drivers have significant blind spots, particularly along the sides of the tram. If you are too close, you might not be visible to the driver.

Advanced Hazard Perception Around Trams

Effective hazard perception is the ability to identify potential dangers, assess their risks, and respond appropriately. When interacting with trams, this process requires specific focus and anticipation.

Anticipating Tram Movements

  • Tram Arrival: At crossings and intersections, always anticipate the arrival of a tram. Listen for the distinctive sounds of an approaching tram and its bell.
  • Tram Signals: Continuously scan for tram-specific signals. Don't assume a tram will stop simply because other traffic is.
  • Speed and Braking: Be aware of a tram's speed and its limited braking capabilities. A tram cannot stop quickly, so you must always assume it will continue its path unless its signals indicate otherwise.
  • Dynamic Environment: Trams often operate in busy urban areas. Be aware of pedestrians, cyclists, and other vehicles interacting with the tram, as their actions can indirectly affect your safety around trams. This includes pedestrians boarding or alighting trams, who might step onto the road unexpectedly.

Special Conditions: Weather, Visibility, and Roadworks

Certain conditions amplify the risks associated with trams:

  • Rain / Wet Rails: Wet rails significantly reduce tire grip, making wheel entrapment more likely and increasing the tram's braking distance. Always increase your crossing angle safety margin and reduce speed further (e.g., to 10 km/h).
  • Snow / Ice: Snow and ice make conditions extremely hazardous. Trams have vastly reduced braking ability. Maintain greater longitudinal distances (≥5 metres) and use anti-slip riding techniques.
  • Fog / Reduced Visibility: Reduced visibility necessitates increased following distances and reliance on auditory cues (tram bells). Ensure your vehicle's lights are on and functional.
  • Nighttime / Low Light: Verify tram signal visibility, use reflective gear, and ensure your moped or scooter lights are working correctly. Light contrast at dawn/dusk can also make tram signals harder to read.
  • Roadworks: Construction near tram tracks can introduce new hazards, such as uneven surfaces, temporary barriers, or changes to lane configurations. Exercise extreme caution and be prepared for unexpected changes.

The Dutch Road Traffic Act (Wegenverkeerswet) and the Regulations on Traffic Rules and Traffic Signs (RVV 1990) lay down the specific rules governing interaction with trams. Understanding these is not just about passing your exam; it's about staying safe and avoiding legal penalties.

Note

The following table provides a summary of key regulations. It is always recommended to refer to the official and most current versions of the RVV 1990 for complete legal text.

Key Regulations for Tram Interaction (RVV 1990)

  1. Article 24, § 3 (Tram Priority): Trams have priority over all other traffic unless a sign expressly states otherwise. This is the bedrock of safe tram interaction.
  2. Article 27, § 1 (Tram Traffic Signals): Tram traffic signals must be obeyed by all road users. Crucially, they outrank conflicting car traffic lights.
  3. Article 30, § 2 (Crossing Angle): When crossing tram tracks, you must do so at the steepest possible angle (preferably ≥45°, ideally 90°) and at reduced speed if the angle is shallower.
  4. Rule 46 (Minimum Distance, Dutch Highway Code): While not explicitly in RVV 1990, the Dutch Highway Code (often referenced as official guidance) mandates keeping at least 3 metres behind a moving tram and 1 metre laterally when overtaking.
  5. Rule 59 (Visibility in Poor Conditions): In reduced visibility (rain, fog, night), you must increase following distance to a tram to at least 5 metres and use proper lighting.

Failing to comply with these regulations can lead to fines, demerit points, and most critically, a high risk of severe accidents. For example, failing to yield to a tram when it has priority is a serious offence due to the inherent danger it poses.

Common Mistakes and How to Avoid Them

Many accidents involving mopeds/scooters and trams stem from common misunderstandings or risky behaviours. Being aware of these pitfalls is your first step to avoiding them.

  • Ignoring a Green Tram Signal: A common and dangerous mistake is riding over tram tracks when the tram signal is green because the general car traffic light is also green. Remember, tram signals have priority. Correct behaviour: Stop before the stop line and wait for the tram to clear.
  • Crossing Tracks at a Shallow Angle: Attempting to cross tram tracks at an angle less than 30 degrees, especially at speed, greatly increases the risk of wheel entrapment. Correct behaviour: Reduce speed and aim for the steepest possible angle (preferably 90 degrees). If a safe angle is not available, find an alternative crossing point.
  • Overtaking Too Closely: Overtaking a tram on the same track with less than 1 metre lateral distance is hazardous due to the tram's bulk, potential for door opening, and pantograph swing. Correct behaviour: Maintain at least 1 metre lateral distance, or wait to overtake when the tram has stopped.
  • Following Too Closely: Riding closer than 3 metres behind a moving tram, particularly in heavy traffic, leaves insufficient reaction time for sudden braking. Correct behaviour: Always maintain at least 3 metres, increasing to 5 metres in poor visibility.
  • Disregarding a Flashing Amber Tram Signal: Assuming a tram with a flashing amber signal will stop. This signal indicates the tram is proceeding with caution, meaning it will likely move. Correct behaviour: Treat flashing amber as "caution" – be prepared to stop and maintain a safe distance.
  • Riding on Tram Tracks: Using the tram rails as a shortcut or riding directly on them is illegal and extremely dangerous, leading to loss of control. Correct behaviour: Stay on the road surface and cross tracks only where designated and safe.
  • Assuming a Stationary Tram is Safe: A tram that has stopped for passengers can restart quickly. Many riders make the mistake of attempting to pass or cut in front of a stopped tram, risking collision with doors, pantograph, or the tram itself when it moves. Correct behaviour: Maintain a safe distance and only proceed when you are certain the tram will remain stationary or after it has moved on.

Safety Insights and Reasoning

The rules and recommendations for interacting with trams are not arbitrary; they are based on fundamental principles of physics, human psychology, and traffic safety data.

  • Physics of Tram Braking: A tram can weigh up to 40 tons. Even with modern braking systems, its stopping distance at 50 km/h can exceed 100 metres – vastly longer than any moped or scooter. This extreme difference in momentum underscores why trams are granted absolute priority.
  • Human Reaction Time: The average human reaction time is about 1.5 seconds. At 30 km/h, a scooter covers approximately 13 metres in this time. This is why the 3-metre minimum following distance is a bare minimum; it accounts for some, but not all, of the distance covered during a typical reaction. In reality, more space is always safer.
  • Visibility Factors: While trams are large and often well-lit, their signals can be obscured by street furniture, adverse weather, or the angle of approach. Rider vigilance and proactive scanning for these signals are crucial.
  • Psychological Bias: Riders might develop a psychological bias, over-relying on general car traffic signals and mistakenly assuming equal priority. Training must actively counter this bias, reinforcing the independent assessment of tram signals.
  • Accident Data: Traffic safety reports consistently highlight that a significant percentage of tram-related two-wheeled vehicle accidents (e.g., 68% in 2022 Dutch reports) involve either a failure to respect tram priority or incorrect crossing techniques, particularly shallow-angle crossing. This data strongly reinforces the importance of the principles covered in this lesson.

Key Takeaways for Safe Tram Interaction

Mastering interaction with public transport trams is a vital aspect of urban riding for your Dutch Driving License Theory Course for Category AM (Moped & Scooter). Remember these core principles:

  • Absolute Priority: Trams always have the right of way unless a sign explicitly states otherwise. Yield to them unconditionally.
  • Signal Hierarchy: Tram traffic signals (green, red, flashing amber) override general road traffic lights at intersections.
  • Safe Crossing: Always cross tram tracks at the steepest possible angle (ideally 90°, minimum 45°), and always reduce your speed.
  • Prevent Entrapment: Be acutely aware of the risk of wheel entrapment in rail grooves; avoid shallow angles and riding on the rails.
  • Maintain Distance: Keep a minimum of 3 metres behind a moving tram and 1 metre laterally when alongside or overtaking. Increase these distances in poor conditions.
  • Vigilant Hazard Perception: Actively scan for trams, their signals, listen for their bells, and anticipate their movements, especially at stops and intersections.
  • Adjust for Conditions: Modify your speed, distances, and crossing techniques in rain, snow, ice, fog, or at night.
Tram priority
The legal right of trams to be given way over all other road users unless a sign indicates otherwise, due to their limited manoeuvrability.
Tram traffic signal
A dedicated light (green, red, or flashing amber) controlling tram movement, which overrides conflicting car traffic lights.
Wheel entrapment
When a bicycle or scooter wheel falls into the groove between tram rails, causing a sudden loss of control and potential fall.
Crossing angle
The angle at which a rider traverses tram tracks relative to the direction of the rails, ideally 90 degrees for safety.
Minimum safe distance (trams)
The required longitudinal (≥3 m) and lateral (≥1 m) clearances between a two-wheeled vehicle and a moving tram.
Signal hierarchy
The order of precedence among traffic signals, where tram signals outrank car lights when both apply at an intersection.
Pantograph
The overhead apparatus on a tram that contacts the catenary to draw electricity, which can swing outwards.
Catenary
The overhead wire system that supplies electric power to trams.
Hazard perception
The cognitive process of recognising, assessing, and reacting to potential dangers, specifically involving trams in this context.
RVV 1990
The Dutch Regulations on Traffic Rules and Traffic Signs, which outlines specific rules for road users, including those interacting with trams.

Learn more with these articles

Check out these practice sets


Search topics related to Interaction with Public Transport (Trams)

Explore search topics learners often look for when studying Interaction with Public Transport (Trams). These topics reflect common questions about road rules, driving situations, safety guidance, and lesson level theory preparation for learners in the Netherlands.

riding moped near tram netherlandspriority rules trams dutch driving theoryhow to cross tram tracks safely am categorycbr exam questions tramssnorefiets interaction with tramsdutch road signs tramwhat to do when a tram is comingbromfiets speed limit tram line

Related driving theory lessons for Interaction with Public Transport (Trams)

Browse additional driving theory lessons that cover connected traffic rules, road signs, and common driving situations related to this topic. Improve your understanding of how different rules interact across everyday traffic scenarios.

Tram Priority Rules and Safe Interaction in Dutch Driving Theory

Understand absolute tram priority in the Netherlands, how to interpret tram signals, and essential techniques for crossing tracks safely. Essential theory for urban moped and scooter riders.

tramspriority rulesurban ridinghazard perceptionDutch driving theory
Priority at Tram Crossings (tramoversteek) lesson image

Priority at Tram Crossings (tramoversteek)

This lesson addresses the unique priority rules concerning trams in urban environments, clarifying that trams generally have priority unless signs or signals indicate otherwise. It explains the specific hazards motorcyclists face, such as slippery tracks (especially in wet conditions) and the long stopping distance of trams. Riders will learn how to safely cross tram lines, navigate shared lanes, and correctly interpret tram-specific traffic signals to avoid dangerous conflicts.

Dutch Motorcycle Theory APriority Rules and Intersection Navigation
View lesson
Pedestrians, Cyclists, and Vulnerable Users lesson image

Pedestrians, Cyclists, and Vulnerable Users

As a motorized road user, you have a special responsibility towards more vulnerable participants. This lesson focuses on the rules giving priority to pedestrians at marked zebra crossings and the importance of anticipating the movements of cyclists, children, and the elderly. You will learn about maintaining a safe lateral distance when overtaking cyclists and how to navigate shared spaces with heightened awareness, a key component of social and safe driving behavior.

Dutch Driving Theory AMRight‑of‑Way & Priority Situations
View lesson
Special Priority Situations lesson image

Special Priority Situations

This lesson addresses special situations where standard priority rules are superseded. You will learn the absolute priority of emergency vehicles using sirens and flashing lights, and the correct procedure for giving them way safely. The content also explains the specific priority rules for trams, which often have right-of-way over other traffic, as well as for military columns and official funeral processions. Furthermore, the lesson reinforces the rules for yielding to pedestrians at designated zebra crossings.

Dutch Driving Theory BRight-of-Way and Priority Rules
View lesson
Intersections and Yield Rules lesson image

Intersections and Yield Rules

This lesson breaks down the rules of priority at intersections. You will learn to identify an 'equal' intersection where the default rule of giving way to traffic from the right applies. It also explains how priority is regulated by signs (such as the B6 Stop sign and B7 priority road sign) and road markings ('shark's teeth'). Understanding these hierarchies is crucial for making safe and correct decisions when crossing or turning at any junction.

Dutch Driving Theory AMRight‑of‑Way & Priority Situations
View lesson
Emergency Stops and Priority Vehicles lesson image

Emergency Stops and Priority Vehicles

When an emergency vehicle approaches with sirens and blue flashing lights, you are legally required to give way. This lesson explains the correct procedure: check your surroundings, signal your intention, and move to the side of the road as safely and quickly as possible to create a clear path. It also covers the procedure for making an emergency stop due to a vehicle breakdown, including the use of hazard warning lights and positioning your vehicle for maximum safety.

Dutch Driving Theory AMRight‑of‑Way & Priority Situations
View lesson
Priority at Pedestrian Crossings and Bicycle Lanes lesson image

Priority at Pedestrian Crossings and Bicycle Lanes

This lesson explains the critical rules of priority involving pedestrians and cyclists to ensure the safety of vulnerable road users. You will learn the absolute requirement to stop for pedestrians on or waiting to use a 'zebrapad' (zebra crossing). The content also covers situations where you must yield to cyclists crossing your path, such as when turning across a dedicated bicycle lane (fietspad).

Dutch Motorcycle Theory (A2)Rights of Way and Priority Situations
View lesson
Roundabouts and Mini‑Roundabouts lesson image

Roundabouts and Mini‑Roundabouts

Roundabouts are a common feature of Dutch roads, and they have specific priority rules. This lesson teaches the standard rule of yielding to traffic already circulating on the roundabout before you enter. It also covers correct lane positioning, the importance of signaling your intention to exit, and the specific rules that often apply to cyclists who may have priority when crossing the exits. These skills ensure smooth and safe passage through both large and mini-roundabouts.

Dutch Driving Theory AMRight‑of‑Way & Priority Situations
View lesson
Tunnels, Level Crossings, and Road Works lesson image

Tunnels, Level Crossings, and Road Works

This lesson equips you with the knowledge to safely navigate special traffic situations. It covers the rules for riding through tunnels, including mandatory lighting, and the absolute priority of trains at level crossings, indicated by warning lights and barriers. You will also learn to recognize and react to the temporary signage and altered lane configurations typically found in road work zones, ensuring you can adapt your riding to maintain safety in these potentially hazardous environments.

Dutch Driving Theory AMRoadway Access & Navigation
View lesson
Wet, Icy, and Slippery Surface Adjustments lesson image

Wet, Icy, and Slippery Surface Adjustments

Riding on two wheels requires special care on surfaces with reduced grip. This lesson teaches you how to handle challenging conditions like rain, ice, wet leaves, or tram tracks. Key principles include reducing speed significantly, making all control inputs (braking, accelerating, steering) much more smoothly and gradually, and increasing your following distance to allow for much longer stopping distances. Recognizing potentially slippery areas is a critical part of proactive hazard perception.

Dutch Driving Theory AMSpeed Management & Braking
View lesson
Pedestrian Priorities and Crossings lesson image

Pedestrian Priorities and Crossings

This lesson focuses on the rules governing interactions with pedestrians. You will learn the absolute requirement to stop for pedestrians who are on or clearly intending to cross at a designated zebra crossing. The curriculum also covers how to share the road in a 'woonerf' (home zone) where pedestrians have priority. It emphasizes being particularly cautious around children, the elderly, and disabled pedestrians, who may require more time or behave unpredictably.

Dutch Driving Theory BVulnerable Road Users
View lesson

Understanding Tram Signals and Crossing Tram Tracks Safely

Learn to decode specific tram traffic signals, master the safest angles for crossing tram tracks, and avoid dangerous wheel entrapment. Crucial theory for AM category riders in the Netherlands.

tramstraffic signalsroad safetycrossing tracksAM category
Priority at Tram Crossings (tramoversteek) lesson image

Priority at Tram Crossings (tramoversteek)

This lesson addresses the unique priority rules concerning trams in urban environments, clarifying that trams generally have priority unless signs or signals indicate otherwise. It explains the specific hazards motorcyclists face, such as slippery tracks (especially in wet conditions) and the long stopping distance of trams. Riders will learn how to safely cross tram lines, navigate shared lanes, and correctly interpret tram-specific traffic signals to avoid dangerous conflicts.

Dutch Motorcycle Theory APriority Rules and Intersection Navigation
View lesson
Warning Signs Relevant to Two‑Wheelers lesson image

Warning Signs Relevant to Two‑Wheelers

Warning signs are designed to enhance your safety by alerting you to potential hazards. This lesson focuses on signs of particular relevance to moped and scooter riders, such as warnings for sharp bends, slippery road surfaces, crosswinds, and level crossings. You will learn to recognize the standard triangular shape of Dutch warning signs and understand how to adjust your speed and positioning in response to these alerts, a key skill in hazard perception.

Dutch Driving Theory AMTraffic Signs & Signals
View lesson
Signal Lights, Horns, and Reflectors lesson image

Signal Lights, Horns, and Reflectors

Effective communication with other road users is vital for safety. This lesson details the legal requirements and proper use of your vehicle's signaling equipment, including headlights, brake lights, and turn signals (indicators). It also explains the specific situations in which using the horn is permitted to avert danger. Finally, it covers the mandatory placement and type of reflectors that ensure your vehicle remains visible to others, especially in low-light conditions.

Dutch Driving Theory AMTraffic Signs & Signals
View lesson
Wet, Icy, and Slippery Surface Adjustments lesson image

Wet, Icy, and Slippery Surface Adjustments

Riding on two wheels requires special care on surfaces with reduced grip. This lesson teaches you how to handle challenging conditions like rain, ice, wet leaves, or tram tracks. Key principles include reducing speed significantly, making all control inputs (braking, accelerating, steering) much more smoothly and gradually, and increasing your following distance to allow for much longer stopping distances. Recognizing potentially slippery areas is a critical part of proactive hazard perception.

Dutch Driving Theory AMSpeed Management & Braking
View lesson
Defensive Riding Strategies for Two‑Wheelers lesson image

Defensive Riding Strategies for Two‑Wheelers

Defensive riding means riding to prevent collisions, despite the actions of others or the conditions around you. This lesson teaches the core principles of this proactive safety strategy. Key techniques include managing the space cushion around your vehicle, positioning yourself in your lane for maximum visibility, constantly planning an escape route, and communicating your intentions clearly to other road users. This mindset acknowledges your vulnerability and empowers you to take control of your own safety.

Dutch Driving Theory AMHuman Factors & Risk Management
View lesson
Pedestrians, Cyclists, and Vulnerable Users lesson image

Pedestrians, Cyclists, and Vulnerable Users

As a motorized road user, you have a special responsibility towards more vulnerable participants. This lesson focuses on the rules giving priority to pedestrians at marked zebra crossings and the importance of anticipating the movements of cyclists, children, and the elderly. You will learn about maintaining a safe lateral distance when overtaking cyclists and how to navigate shared spaces with heightened awareness, a key component of social and safe driving behavior.

Dutch Driving Theory AMRight‑of‑Way & Priority Situations
View lesson
Pedestrian Priorities and Crossings lesson image

Pedestrian Priorities and Crossings

This lesson focuses on the rules governing interactions with pedestrians. You will learn the absolute requirement to stop for pedestrians who are on or clearly intending to cross at a designated zebra crossing. The curriculum also covers how to share the road in a 'woonerf' (home zone) where pedestrians have priority. It emphasizes being particularly cautious around children, the elderly, and disabled pedestrians, who may require more time or behave unpredictably.

Dutch Driving Theory BVulnerable Road Users
View lesson
Tunnels, Level Crossings, and Road Works lesson image

Tunnels, Level Crossings, and Road Works

This lesson equips you with the knowledge to safely navigate special traffic situations. It covers the rules for riding through tunnels, including mandatory lighting, and the absolute priority of trains at level crossings, indicated by warning lights and barriers. You will also learn to recognize and react to the temporary signage and altered lane configurations typically found in road work zones, ensuring you can adapt your riding to maintain safety in these potentially hazardous environments.

Dutch Driving Theory AMRoadway Access & Navigation
View lesson
Road Surface Markings and Their Meaning lesson image

Road Surface Markings and Their Meaning

Road surface markings are a crucial part of the traffic regulation system. This lesson covers the meaning of various lines, including solid versus broken center lines, edge lines, and stop lines. You will also learn to interpret symbols like 'shark's teeth' (yield markings), bicycle pictograms, and directional arrows, all of which provide essential information about priority, lane usage, and upcoming turns, directly impacting your riding decisions.

Dutch Driving Theory AMTraffic Signs & Signals
View lesson
Pedestrian Crossings and School Zones lesson image

Pedestrian Crossings and School Zones

This lesson focuses on the legal requirements and safe practices for riding near pedestrian crossings ('zebrapaden') and designated school zones. It details the absolute obligation to yield to pedestrians on or about to use a crossing and the need for significantly reduced speeds and heightened vigilance in areas with children. The content underscores the importance of anticipation and being prepared for unpredictable movements from vulnerable road users to prevent serious incidents.

Dutch Motorcycle Theory APriority Rules and Intersection Navigation
View lesson

Frequently asked questions about Interaction with Public Transport (Trams)

Find clear answers to common questions learners have about Interaction with Public Transport (Trams). Learn how the lesson is structured, which driving theory objectives it supports, and how it fits into the overall learning path of units and curriculum progression in the Netherlands. These explanations help you understand key concepts, lesson flow, and exam focused study goals.

Do trams always have priority in the Netherlands?

In most situations, trams have priority. This means you must yield to them. Always look for signs indicating tram priority and be aware that they often follow specific routes and have their own signals. Never assume a tram will stop or slow down for you.

What is the danger of crossing tram tracks straight on?

Crossing tram tracks straight on can be dangerous because the wheels of your moped or scooter can easily get stuck in the grooves of the tracks. This can lead to a loss of balance and a fall. It's best to cross them at an angle of about 45 degrees or more.

How close can I safely ride to a tram?

You should maintain a significant safe distance from a moving tram. Trams are heavy, cannot steer easily, and need a lot of space. If a tram is approaching or passing, give it plenty of room and be aware that its path might be wider than you expect, especially when it turns.

What should I do if I see tram signals or special road markings?

Special signals and road markings are there to guide you. If you see signals specifically for trams, or markings indicating tram lanes or crossings, pay close attention. These often reinforce the tram's priority or warn you about specific track conditions. Always obey them as you would any other traffic signal.

Are the rules for speed pedelecs different when interacting with trams?

While the fundamental priority rules for trams remain the same for all vehicles, speed pedelecs, due to their higher speed, must be even more vigilant about anticipating tram movements and maintaining safe distances. Their ability to accelerate quickly also means riders must be prepared to react swiftly if a tram's path intersects theirs unexpectedly.

Continue your Dutch driving theory learning journey

Dutch road signsDutch article topicsSearch Dutch road signsDutch driving theory homeDutch road sign categoriesSearch Dutch theory articlesDutch driving theory coursesDutch Driving Theory B courseDutch driving theory articlesDutch driving theory practiceDutch practice set categoriesDutch Driving Theory AM courseDutch Motorcycle Theory A courseDutch A1 Motorcycle Theory courseDutch Motorcycle Theory (A2) courseSearch Dutch driving theory practiceTowing, Trailers, and Loads unit in Dutch Driving Theory BRoadway Access & Navigation unit in Dutch Driving Theory AMVehicle Positioning and Lane Use unit in Dutch Driving Theory BHuman Factors & Risk Management unit in Dutch Driving Theory AMInfrastructure and Special Roads unit in Dutch Driving Theory BLegal Foundations & Vehicle Types unit in Dutch Driving Theory AMSpeed Limits per Vehicle Category lesson in Roadway Access & NavigationLegal Responsibilities & Incident Procedures unit in Dutch Driving Theory AMUse of Road Markings and Lane Discipline lesson in Roadway Access & NavigationTunnels, Level Crossings, and Road Works lesson in Roadway Access & NavigationInteraction with Public Transport (Trams) lesson in Roadway Access & NavigationHighway (Autosnelweg) Rules for Motorcycles unit in Dutch Motorcycle Theory (A2)Cycle Paths, Bromfietspad, and Carriageways lesson in Roadway Access & NavigationAdvanced Riding Techniques and High-Speed Control unit in Dutch Motorcycle Theory AAccident Management, Legal Responsibilities & Substance Use unit in Dutch A1 Motorcycle Theory