
This lesson is crucial for A2 motorcycle riders, preparing you for real-world cornering challenges on Dutch roads. It builds upon your understanding of curve negotiation by focusing on how to manage unexpected hazards. You’ll learn to identify tightening corners, react to obstacles like gravel or wet patches mid-curve, and always ride with a safety margin, ensuring you're ready for complex situations both on the road and in your CBR theory exam.

Navigating curves safely is a fundamental skill for every motorcycle rider, especially on diverse Dutch roads that present a mix of tight urban bends, sweeping rural turns, and varying weather conditions. While ideal cornering techniques focus on smooth lines and consistent speed, real-world riding often introduces unexpected challenges. This lesson prepares you for these real-world scenarios, teaching you how to identify potential dangers, adapt your riding strategy, and maintain a crucial margin of safety when conditions are less than perfect. Understanding and applying these principles is vital for securing your Dutch Category A2 motorcycle license and ensuring your safety on the road.
Every time a motorcycle leans into a curve, it relies on the friction between its tyres and the road surface to generate the necessary centripetal force. This force keeps the motorcycle on its curved path. The amount of grip available is finite and depends on several factors, including tyre condition, road surface, and the degree of lean. When a hazard, such as a tightening curve or a patch of gravel, reduces the available grip or increases the demand for it, the risk of a slide or loss of control rises significantly.
The physics dictates that centripetal force increases with the square of your speed and decreases with the radius of the curve. This means even a small increase in speed or a slight tightening of the curve demands a disproportionately larger amount of grip. On Dutch roads, where curve radii can change unexpectedly and surface conditions vary, mastering dynamic assessment and adaptation is not just about skill; it's about survival.
Successfully managing hazards in curves is an intricate blend of perception, assessment, and swift, precise action. It requires integrating your understanding of how to detect a potential problem, evaluate its impact on your riding, and then execute appropriate adjustments while always preserving a safety margin.
Dynamic curve assessment involves the continuous evaluation of the curve's characteristics as you approach and navigate it. This includes judging its radius, camber (the slope of the road into the bend), and surface condition. The goal is to detect any changes, such as a curve that tightens unexpectedly, early enough to adjust your speed and line. This proactive approach prevents you from being surprised mid-corner and having to make emergency, high-risk corrections.
A margin of error, often referred to as an "escape route," is the deliberate space you maintain between your motorcycle's trajectory and the absolute limits of tyre grip or the edge of the road. This buffer provides the essential room needed to react to unexpected hazards, such as an oil spill or loose gravel, without losing control or leaving your lane. Maintaining this margin often means adopting a slightly wider entry line and maintaining a speed that allows for some deceleration if needed.
The intentional excess space (both lateral and longitudinal) left by the rider to allow corrective action without leaving the lane or exceeding tyre grip limits.
The road surface is rarely uniform. Wet patches, gravel, oil, or even fallen leaves can drastically reduce tyre-road friction. Surface-condition adaptation means immediately adjusting your riding technique – primarily speed, throttle input, and body lean – whenever the road surface changes. This is crucial for maintaining traction and preventing a slide, even if it means temporarily deviating from the 'ideal line'.
Proactive hazard anticipation is the skill of using all available information, from road signs and environmental cues to your peripheral vision, to predict potential hazards before they become directly visible. This allows for smoother, earlier corrective actions, reducing the need for sudden braking or swerving, which can be dangerous in a lean. For instance, spotting a "slippery road" sign or noticing standing water ahead can prompt an early speed reduction.
The process of using visual scanning, road signage, and environmental cues to predict hazards before they become directly observable.
One of the most critical principles is controlled deceleration, which means applying brakes before reaching a hazard or entering a demanding section of a curve, ideally while the motorcycle is still upright or only lightly leaned. This preserves the maximum tyre contact patch for braking and ensures that when you do lean, your tyres can dedicate their full grip to cornering forces, not simultaneously braking. Applying heavy braking while leaned dramatically increases the risk of losing traction.
When faced with a hazard in a curve, you may need to adjust your intended line. A practical hierarchy guides these adjustments:
Not all curves maintain a constant radius. Many curves, particularly on Dutch urban or rural roads, can "tighten" or "decrease in radius" as you progress through them. This means the curve becomes sharper, demanding more centripetal force and thus more grip, as you ride deeper into it.
A dynamic radius change refers to a curve whose tightness (radius) varies along its length. A "tightening curve" is one where the radius progressively shrinks, requiring increasingly more lean angle or a lower speed to maintain the same path. Conversely, a "widening curve" (increasing radius) becomes less demanding.
Recognizing a tightening curve requires advanced visual scanning. Look for:
When you identify a tightening curve, your primary response should be to reduce speed early, ideally before initiating your lean.
Failing to anticipate a tightening curve and maintaining excessive speed is a common cause of riders "running wide" or crossing into the opposite lane, a serious violation of Dutch traffic law (RVV 1990, Art. 9).
Road surface hazards are among the most unpredictable and dangerous challenges for motorcyclists, especially when encountered mid-corner while the bike is already leaned over. Any condition that reduces the tyre-road friction can lead to a sudden loss of grip and a slide.
When you encounter a low-friction surface mid-curve, or anticipate one, the goal is to minimize the demands on your tyres.
Sometimes, hazards like debris, potholes, or even fallen branches appear without warning.
Anticipating hazards rather than reacting to them is a hallmark of skilled, safe riding. This proactive approach gives you more time to process information, make decisions, and execute smooth, controlled adjustments.
Your eyes are your most important safety tool.
Dutch road signs provide crucial warnings. Pay close attention to:
These signs indicate the presence of a sharp curve. Sometimes, supplemental panels may provide additional information, such as "nat wegdek" (wet road surface) or "gevaarlijk" (dangerous). These are explicit calls for increased caution and reduced speed.
When you see a curve warning sign, mentally prepare to reduce speed more than usual and to perform a thorough visual scan for additional hazards within the curve itself.
The principle of "brake before you lean" is even more critical when managing hazards in curves. Applying effective deceleration techniques before you reach a problematic section ensures maximum stability and tyre grip when you need it most for cornering.
Braking performed while the motorcycle is upright or at a low lean angle, before entering a curve or a known hazardous section.
While the "ideal line" (outside-inside-outside) is optimal for smooth, fast cornering under perfect conditions, hazards often necessitate a deviation for safety. These adjusted line strategies are about compromising for safety rather than speed.
The ideal line is a template, not an immutable rule. When facing hazards like gravel, a tightening radius, or a wet patch, adapting your line is crucial.
As discussed, the decision-making process for adjusting your line should follow a hierarchy:
Any significant adjustment to your riding line, especially moving laterally within your lane, requires you to signal your intent to other road users (RVV 1990, Art. 2).
Regardless of your chosen line, maintaining an escape route is paramount. This means:
The Dutch Traffic Rules and Traffic Signs Regulation (Reglement Verkeersregels en Verkeerstekens 1990, or RVV 1990) sets the legal framework for safe road use. Several articles are particularly relevant to managing hazards in curves.
Managing hazards in curves is not a one-size-fits-all skill. The specific actions you take must be dynamically adjusted based on prevailing conditions.
Understanding the 'why' behind these principles reinforces their importance:
v² factor in centripetal force. This non-linear relationship highlights why even small speed adjustments are critical for safety.Lesson content overview
Explore all units and lessons included in this driving theory course.
Explore search topics learners often look for when studying Managing Hazards in Curves. These topics reflect common questions about road rules, driving situations, safety guidance, and lesson level theory preparation for learners in the Netherlands.
Browse additional driving theory lessons that cover connected traffic rules, road signs, and common driving situations related to this topic. Improve your understanding of how different rules interact across everyday traffic scenarios.
Explore advanced techniques for identifying and managing unexpected curve hazards. Learn to adapt to tightening radii, slippery surfaces like gravel or oil, and maintain a crucial safety margin according to Dutch traffic laws.

This lesson details the interpretation of Dutch warning signs, which alert riders to potential dangers and changing road conditions. You will study signs indicating sharp curves, road narrowing (BORD 30), and temporary hazards like road works (BORD 36), learning to adjust speed and road position proactively. The content emphasizes how the A2 motorcycle's characteristics require earlier hazard recognition and response compared to other vehicles for maintaining control.
This lesson prepares you to deal with sudden changes in road surface that can cause a loss of traction. You will learn to scan for these hazards and, if they cannot be avoided, how to ride over them safely. The key technique is to keep the motorcycle upright and maintain smooth, steady control inputs—no abrupt braking, accelerating, or steering—to minimize the risk of a skid.

This lesson addresses the specific challenge of cornering when road grip is compromised. It teaches riders how to identify potential low-traction surfaces like wet manhole covers, painted lines, gravel, or oil patches. The content focuses on techniques to mitigate risk, such as reducing speed, minimizing lean angle, and applying all control inputs—braking, steering, and throttle—with exceptional smoothness to avoid overwhelming the available grip.

This lesson prepares you for the unique dangers of high-speed highway riding. You will learn to scan for and navigate road hazards like debris, potholes, and slippery steel expansion joints on bridges. The content also addresses the powerful air turbulence created by large trucks that can upset a motorcycle's stability and the mental challenge of maintaining focus on long, monotonous stretches of road.

This lesson covers A-code signs, which are designed to warn drivers of potential hazards on the road ahead. For motorcyclists, warnings about sharp bends, slippery surfaces, crosswinds, or falling rocks are especially critical for maintaining control and stability. The content explains how to interpret these triangular signs to anticipate changing conditions, adjust speed, and adopt a defensive riding posture well in advance of the hazard.

This lesson focuses on the critical relationship between speed, braking, and throttle control in cornering. You will learn the golden rule: complete your braking while the motorcycle is still upright, before initiating your lean. The content then explains how to use a neutral or slightly positive 'maintenance throttle' to keep the suspension settled mid-corner, followed by smoothly rolling on the throttle as you exit the turn to aid stability.

This lesson focuses on the rules and techniques for safely navigating Dutch roundabouts, a common feature of the road network. You will learn that traffic circulating on the roundabout typically has priority and that you must yield before entering. The content covers correct lane selection for your intended exit, proper use of turn signals, and maintaining awareness of cyclists who may have priority on adjacent paths.

This lesson clarifies the specific Dutch regulations concerning stopping and parking for motorcycles, including designated parking bays and rules for parking on pavements. It also covers the mandatory procedures for safely navigating tunnels, such as required lighting, lane discipline, and actions to take during a breakdown or emergency. By understanding these rules, riders can avoid fines and navigate these specific traffic situations with confidence.

This lesson delves into the hierarchy of priority rules on Dutch roads, clarifying who has the right-of-way in various intersection scenarios. It explains the meaning of signs like 'voorrangsweg' and road markings such as shark's teeth ('haaientanden'). Special attention is given to the correct procedure for entering, navigating, and exiting roundabouts on a motorcycle, including proper signaling and lane choice to ensure safe and efficient passage.
This lesson focuses on the meaning of different road markings and their implications for motorcycle lane discipline. You will learn the legal distinction between solid and broken lines regarding overtaking, how to interpret directional arrows for lane choice, and the rules for using special lanes. The content emphasizes maintaining a safe and strategic position within the lane to maximize visibility and create a safety buffer from other vehicles.
Understand how various factors like weather, road type, and vehicle load influence safe curve riding. This lesson covers the legal requirements under RVV 1990 for maintaining reasonable speed and lane discipline in curves.
This lesson addresses the specific challenge of cornering when road grip is compromised. It teaches riders how to identify potential low-traction surfaces like wet manhole covers, painted lines, gravel, or oil patches. The content focuses on techniques to mitigate risk, such as reducing speed, minimizing lean angle, and applying all control inputs—braking, steering, and throttle—with exceptional smoothness to avoid overwhelming the available grip.
This lesson focuses on the critical relationship between speed, braking, and throttle control in cornering. You will learn the golden rule: complete your braking while the motorcycle is still upright, before initiating your lean. The content then explains how to use a neutral or slightly positive 'maintenance throttle' to keep the suspension settled mid-corner, followed by smoothly rolling on the throttle as you exit the turn to aid stability.

This lesson teaches a systematic approach to cornering by breaking it down into three distinct phases: entry, apex, and exit. It explains how to choose the correct road position and entry speed, identify the safest apex (not always the geometric one), and apply the throttle smoothly on exit to maximize stability and safety. This 'slow in, fast out' methodology provides a structured, repeatable process for navigating any corner with confidence and control.

This lesson delves into the critical skill of determining a safe and appropriate speed for navigating curves and bends. It explains the physical principles involved, including the relationship between speed, lean angle, and available traction, and teaches riders how to assess a corner's radius and camber visually. Techniques such as using the 'vanishing point' to judge a curve's tightness are covered, enabling riders to select a safe entry speed and maintain control throughout the turn.

This lesson details the correct, systematic procedure for safely navigating a corner. It teaches the 'slow in, fast out' principle, where all necessary braking and downshifting is completed before entering the turn. The content covers how to choose the correct line, identify the apex, and use smooth throttle application on the exit to maintain stability and traction, ensuring a safe and controlled passage through the bend.

Proper cornering technique is vital for safety and stability on a two-wheeler. This lesson explains the physics of turning, including the concepts of lean angle and counter-steering. You will learn the importance of adjusting your speed before the turn, looking where you want to go, and maintaining a smooth throttle through the corner. These techniques help you maximize grip and maintain control, ensuring you can navigate bends safely.
This lesson focuses on the rules and techniques for safely navigating Dutch roundabouts, a common feature of the road network. You will learn that traffic circulating on the roundabout typically has priority and that you must yield before entering. The content covers correct lane selection for your intended exit, proper use of turn signals, and maintaining awareness of cyclists who may have priority on adjacent paths.

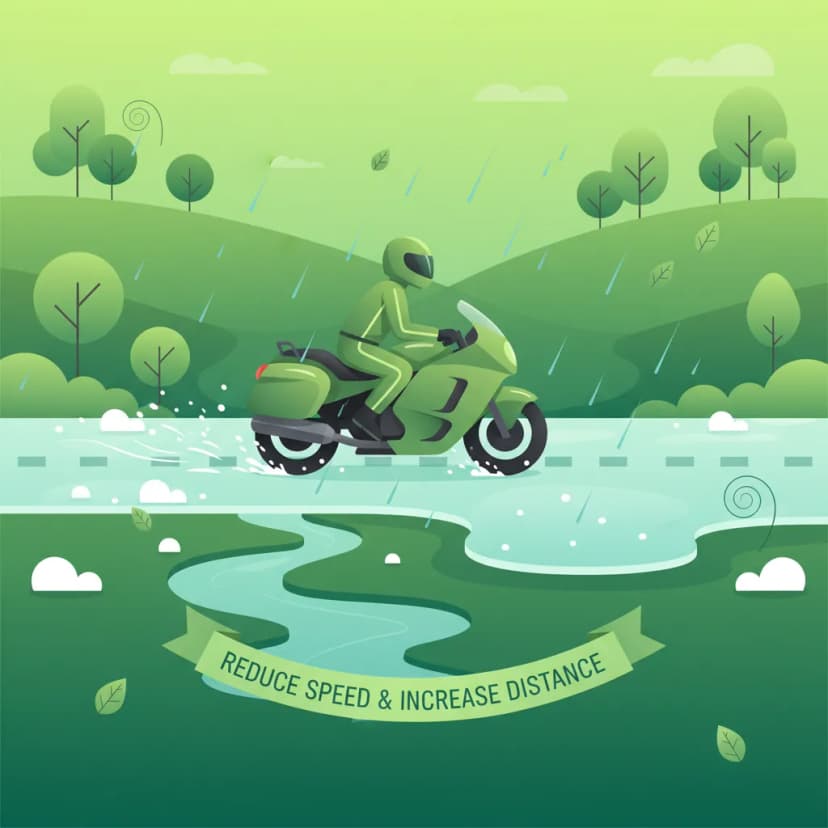
This lesson provides a detailed guide to riding in wet and low-visibility conditions. You will learn to make all your control inputs—braking, accelerating, and steering—exceptionally smooth to avoid breaking traction on slippery surfaces. The content covers the dangers of painted lines and manhole covers when wet, and the importance of increasing your following distance dramatically to account for longer braking distances.
This lesson provides survival strategies for riding in the most challenging weather conditions, including heavy rain, snow, and potential ice. It emphasizes the importance of mental preparation, drastically reduced speeds, and hyper-smooth inputs for throttle, brakes, and steering. The content also covers identifying high-risk areas for 'black ice,' such as bridges and shaded spots, and the critical role of appropriate waterproof and insulated gear in preventing hypothermia and maintaining concentration.
This lesson prepares you to deal with sudden changes in road surface that can cause a loss of traction. You will learn to scan for these hazards and, if they cannot be avoided, how to ride over them safely. The key technique is to keep the motorcycle upright and maintain smooth, steady control inputs—no abrupt braking, accelerating, or steering—to minimize the risk of a skid.
Find clear answers to common questions learners have about Managing Hazards in Curves. Learn how the lesson is structured, which driving theory objectives it supports, and how it fits into the overall learning path of units and curriculum progression in the Netherlands. These explanations help you understand key concepts, lesson flow, and exam focused study goals.
A decreasing radius turn, also known as a tightening curve, is one that becomes sharper as you progress through it. On an A2 motorcycle, if you enter too fast, you risk running wide. The best reaction is to look further ahead, gently apply the rear brake to slow down, and adjust your lean angle to tighten your line, always keeping an escape route in mind.
Encountering gravel mid-corner on your A2 motorcycle requires a very gentle touch. Avoid sudden braking or steering. Instead, roll off the throttle smoothly, keep the motorcycle upright as much as possible, and look towards your escape route. Trying to steer sharply or brake hard will likely cause a loss of traction. A light touch on the controls is key.
An escape route is a clear path you can take to avoid an unexpected hazard. In curves, this means riding in a position that leaves you room to manoeuvre, either to widen your line, reduce speed, or even straighten up if necessary. For your Dutch A2 license, always riding with this margin allows you critical reaction time and space when a hazard, like a fallen branch or spilled oil, appears suddenly.
Yes, the CBR theory exam for the A2 motorcycle license often includes situational questions that assess your judgment and reactions to unexpected hazards in curves. These questions might describe scenarios involving tightening turns, slippery surfaces, or obstacles, requiring you to choose the safest and most legally correct course of action. Understanding these concepts is vital for passing.
The biggest mistake A2 riders often make is target fixation and panic braking or steering. Instead of looking at the hazard, riders should quickly scan for an escape route. Panic braking, especially on the front wheel in a lean, can cause a loss of traction. Smooth, controlled actions while looking where you want to go, not at the hazard, are crucial for safe recovery.