
A vehicle breakdown is an unexpected and potentially hazardous situation. This lesson in Unit 9, 'Legal Responsibilities & Incident Procedures', focuses on the critical safety protocols and your legal duties immediately following a roadside breakdown on Dutch roads.

A sudden vehicle breakdown is more than an inconvenience; it's an unexpected and dangerous situation that demands immediate, correct action. For riders of Category AM vehicles, such as mopeds and scooters, understanding the specific duties following a roadside breakdown is crucial for your safety and the safety of other road users. This comprehensive lesson details the essential steps you must take to manage a breakdown safely and legally on Dutch roads.
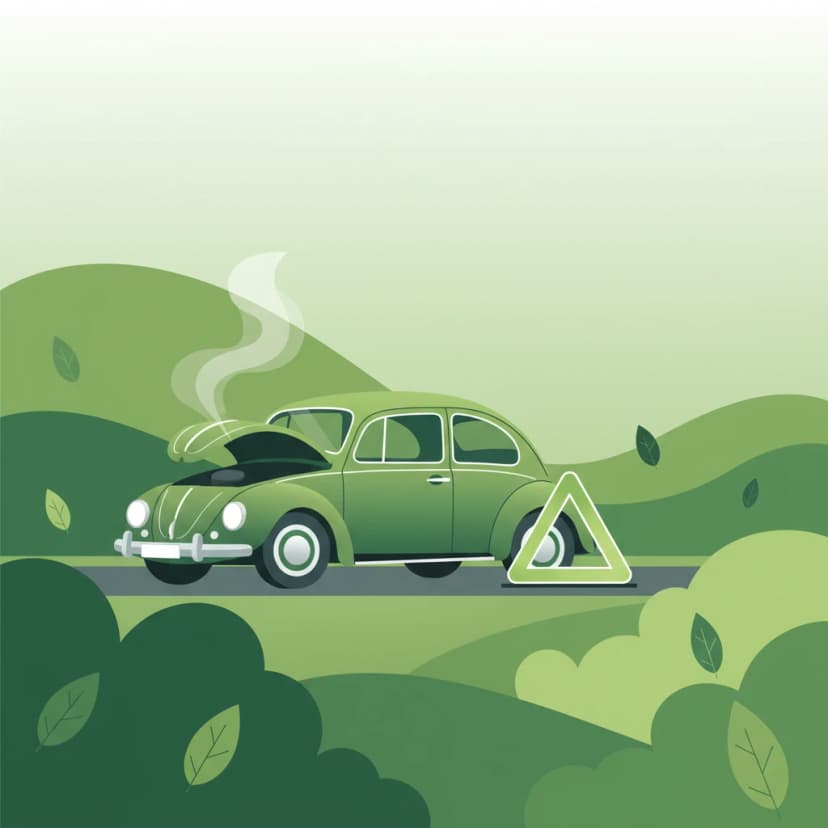
When your moped or scooter unexpectedly stops or becomes inoperable on a public road, it transforms from a mobile vehicle into a stationary obstruction. This static hazard can create significant risks, especially for approaching traffic that may not anticipate a stopped vehicle. Other drivers might have insufficient time to react, potentially leading to rear-end collisions or swerving maneuvers that endanger others.
Properly handling a breakdown involves rapidly shifting your mindset from a moving road user to managing a fixed obstacle. The primary goal is to make your vehicle visible, clear the traffic lane if possible, and protect yourself from secondary incidents, such as being hit by passing vehicles.
Failing to follow proper breakdown procedures not only increases the risk of accidents but can also lead to fines and legal liability under Dutch traffic law.
The duties of a driver experiencing a breakdown are clearly outlined in Dutch legislation, primarily the Reglement verkeersregels en verkeerstekens 1990 (RVV 1990) and the Wegverkeerswet (Road Traffic Act). These laws are designed to ensure road safety by requiring drivers to make a broken-down vehicle visible, move it off the traffic lane where feasible, and protect themselves and others from harm. Compliance with these regulations is not just about avoiding penalties; it's about responsible road citizenship and preventing serious accidents.
The first few moments after a breakdown are critical. Your immediate actions can significantly reduce the risk of further incidents.
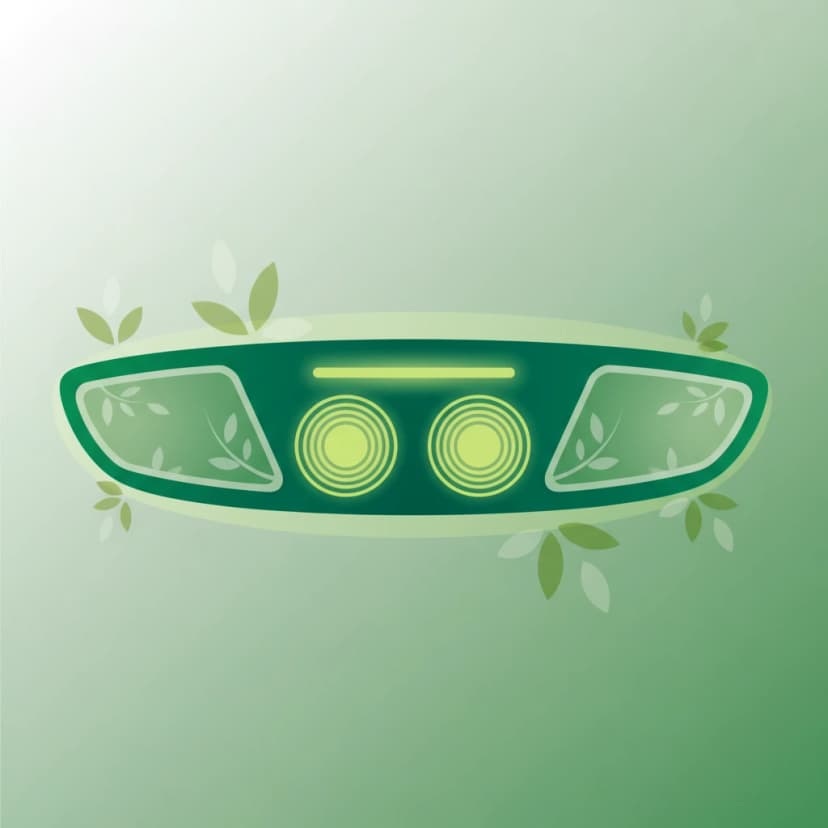
Amber flashing lights on a vehicle, activated simultaneously, designed to warn other road users of an emergency, breakdown, or unusual hazard.
The instant you recognize your vehicle has broken down, your hazard warning lights (known as alarmlichten in Dutch) must be switched on. This is the very first step, regardless of whether you can move your vehicle or not.
These flashing amber lights serve as an immediate visual signal to all road users that your moped or scooter is becoming, or has become, a stationary obstruction. It alerts drivers behind you to anticipate reduced speed, and other users may prepare to change lanes early to avoid your vehicle. Delaying activation, even for a few seconds, reduces the crucial warning time for following traffic.
Most modern mopeds and scooters are equipped with built-in hazard lights. However, if your vehicle's electrical system has failed, making the hazard lights inoperable, you must use an alternative. A handheld warning device, such as a portable flashing amber light, is permitted in such circumstances to fulfill the immediate signalling requirement. Simply flashing your regular headlight is not considered sufficient.
After activating your hazard lights, the next priority is to move your vehicle out of the main flow of traffic, if it is safe and possible to do so.
A dedicated lane adjacent to the main carriageway, typically on motorways or dual carriageways, reserved for emergency stops, breakdowns, and emergency vehicles. On other roads, this might be referred to as the road edge.
If your moped or scooter is still somewhat operable, or if you can safely push it, you are legally obliged to move it as far to the right as possible. This means aiming for the hard shoulder (vluchtstrook) or emergency lane on highways. On roads without a designated shoulder, you should push the vehicle as close to the rightmost edge of the road surface as practically possible. The goal is to clear the main traffic lane, minimizing collision risk and allowing traffic to flow smoothly.
Before attempting to move your vehicle, quickly check your surroundings for oncoming traffic to ensure your relocation attempt doesn't create a new hazard.
There may be situations where moving your vehicle is impossible, perhaps due to severe damage, being on a narrow road without a shoulder, or if attempting to move it would put you in immediate danger (e.g., on a busy motorway with no safe escape route). In such cases, your vehicle must remain where it is, positioned fully parallel to the road edge if you managed a partial move. The subsequent steps, particularly warning triangle deployment, become even more critical to compensate for the vehicle's position.
Once your vehicle is signalled and, if possible, relocated, your personal safety becomes the paramount concern. Many secondary accidents after breakdowns involve individuals who remain near their vehicles.
The most crucial step for your personal safety is to leave the immediate vicinity of your broken-down moped or scooter and move to a location that minimizes your exposure to passing traffic.
On motorways or roads with safety barriers (such as concrete walls or metal guardrails), you should immediately move behind these barriers. They are designed to absorb impact and provide a physical shield from passing vehicles. On urban or rural roads without barriers, seek refuge on a pedestrian footpath, or if no footpath is available, move to the opposite side of the carriageway, as far away from the traffic flow as possible. Avoid standing directly behind your vehicle, as this can be a "blind spot" for approaching drivers.
While not strictly mandatory by law for private citizens in the Netherlands, wearing high-visibility clothing, such as a reflective vest or jacket, is strongly recommended whenever you are outside your vehicle on a roadway, especially in low-light conditions, at night, or in adverse weather (rain, fog). This greatly increases your visibility to other drivers, giving them more time to react to your presence.
The warning triangle is a vital safety device, providing an additional visual cue for approaching traffic beyond your hazard lights. Its correct deployment is a legal requirement for all motor vehicles, including mopeds and scooters, when a breakdown occurs on the carriageway.
An orange, retro-reflective, triangular device that must be placed on the road behind a broken-down vehicle to warn approaching traffic.
Dutch law mandates the use of a warning triangle (gevarendriehoek) under specific circumstances. This device dramatically increases the visual warning for drivers approaching at speed, providing crucial extra reaction time.
A legally approved warning triangle must be orange, retro-reflective, and typically has minimum dimensions of 75 x 75 cm when unfolded. It is designed to be highly visible, especially when illuminated by vehicle headlights in low light conditions. You should always carry a warning triangle with you when riding your moped or scooter.
The distance at which you place the warning triangle behind your vehicle depends on the type of road and the speed limit. This is crucial for providing adequate warning to fast-approaching traffic.
On roads with a speed limit of 80 km/h or less, the warning triangle must be placed 50 metres (approximately 50-60 large steps) behind your broken-down vehicle. This distance is common for rural roads, provincial roads (N-roads), and some urban arterial roads.
On highways (snelwegen) or roads with a speed limit greater than 80 km/h, the warning triangle must be placed 100 metres (approximately 100-120 large steps) behind your vehicle. This longer distance is necessary due to the higher speeds and longer braking distances of vehicles on these roads.
There is an exception to these distances: if your vehicle cannot be moved beyond the near edge of the carriageway (e.g., it's stuck partially in a lane on a narrow street), the triangle may be placed a minimum of 30 metres away, provided it does not obstruct traffic or cause a greater hazard itself. This shorter distance is generally reserved for urban environments with lower speeds and limited space.
Failure to place the warning triangle correctly, or not placing it at all when required, is a legal offense and can significantly increase the risk of a secondary accident.
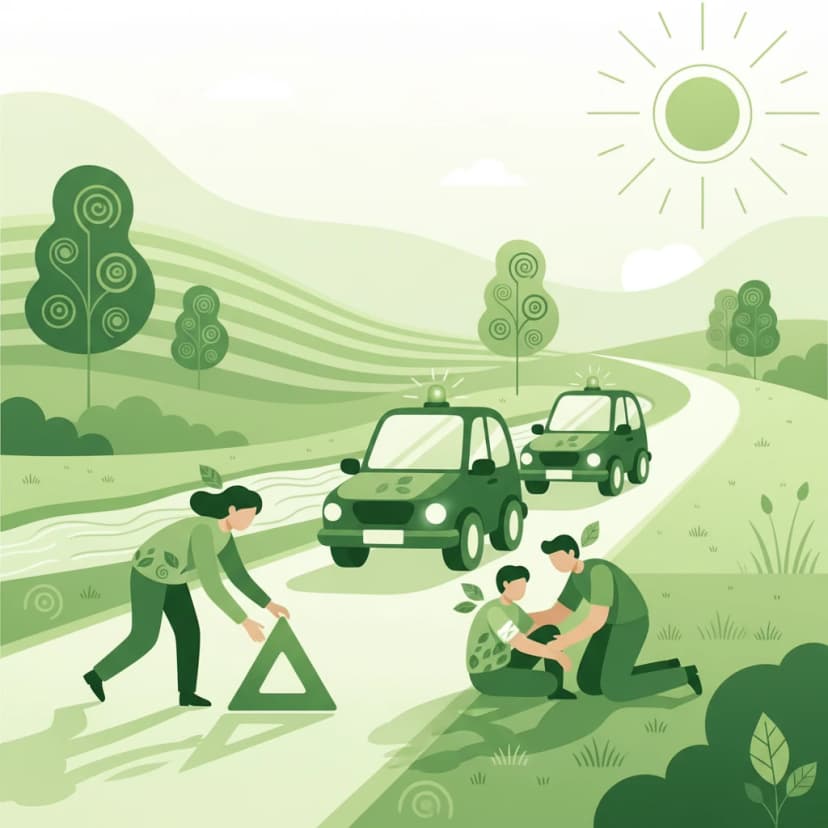
Once your vehicle is secured and you are in a safe position, the next step is to call for assistance. Prompt notification helps ensure the swift removal of the obstruction, reducing ongoing risks to other road users.
A service (e.g., provided by ANWB in the Netherlands) that offers immediate assistance for vehicle breakdowns, including minor repairs or towing.
When you call for assistance, be prepared to provide precise and accurate information:
Adhering to the specific duties outlined in Dutch traffic law is not just a recommendation; it is a legal obligation. Non-compliance can lead to significant consequences.
The Wegverkeerswet (Road Traffic Act), particularly Article 7, lays down a general "duty of care" for all road users to act reasonably and avoid endangering others. This broad principle underpins the specific duties outlined in the RVV 1990 (Regulation on Traffic Rules and Traffic Signs).
Specifically, RVV 1990 Article 41 details the obligations for drivers whose vehicles become stationary obstacles on the roadway:
Breaching these articles can result in fines and, in some cases, demerit points on your driving record. Furthermore, if an accident occurs due to your non-compliance, you may face civil liability for damages.
Many drivers, including moped and scooter riders, unknowingly make mistakes during a breakdown that increase risk and lead to penalties.
The general breakdown protocol must be adapted to specific environmental and road conditions to maximize safety.
In conditions of reduced visibility, such as heavy rain, dense fog, or during nighttime, all warning measures must be amplified:
Handling a breakdown on Dutch roads requires a clear, step-by-step approach focused on safety and legal compliance. By following these duties, you protect yourself and contribute to the safety of all road users.
Lesson content overview
Explore all units and lessons included in this driving theory course.
Explore search topics learners often look for when studying Duties after a Roadside Breakdown. These topics reflect common questions about road rules, driving situations, safety guidance, and lesson level theory preparation for learners in the Netherlands.
Browse additional driving theory lessons that cover connected traffic rules, road signs, and common driving situations related to this topic. Improve your understanding of how different rules interact across everyday traffic scenarios.
Understand crucial safety steps and legal obligations for moped and scooter breakdowns in the Netherlands. Learn immediate actions, vehicle relocation, personal safety, and warning triangle placement to ensure road safety and avoid fines.
This lesson provides a clear action plan for when your car breaks down. You will learn to pull over to a safe location, preferably the hard shoulder on a motorway, and immediately activate your hazard warning lights. The curriculum explains the legal requirement to place a warning triangle a suitable distance behind the vehicle (if safe to do so) and the strong recommendation to wear a high-visibility jacket. Crucially, it instructs that all occupants should exit the vehicle on the safe side and wait behind the guardrail for assistance.

When an emergency vehicle approaches with sirens and blue flashing lights, you are legally required to give way. This lesson explains the correct procedure: check your surroundings, signal your intention, and move to the side of the road as safely and quickly as possible to create a clear path. It also covers the procedure for making an emergency stop due to a vehicle breakdown, including the use of hazard warning lights and positioning your vehicle for maximum safety.

Holding a license and owning a vehicle comes with continuous legal responsibilities. This lesson reminds you of the importance of renewing your driving license before it expires and ensuring your vehicle's insurance policy remains active. It also covers your duty to inform the relevant authorities (like the RDW) of any changes, such as a change of address. Fulfilling these administrative obligations is essential to remaining a legal and responsible road user in the Netherlands.
This lesson covers the full range of lights and signals required on a vehicle for visibility and communication. You will learn about the mandatory requirements for headlights, taillights, brake lights, indicators, and reflectors. The curriculum emphasizes the driver's legal responsibility to ensure all lights are clean and functional before every journey. The correct use and function of the horn as an audible warning device in case of imminent danger are also explained.

This lesson details the specific regulations for driving on Dutch motorways, identifiable by the G1 sign. You will learn the correct procedure for joining the flow of traffic using the acceleration lane and for leaving via the deceleration lane. The curriculum reinforces the 'keep right unless overtaking' rule for lane discipline. It also explains that stopping is strictly forbidden, and the hard shoulder (vluchtstrook) may only be used for genuine emergencies.

Safely merging and changing lanes requires a systematic approach known as 'mirror-signal-blind spot'. This lesson explains the correct procedure for entering a carriageway from an acceleration lane, ensuring you match the speed of the traffic flow and find a safe gap. It also covers the technique for changing lanes, emphasizing the critical importance of checking your blind spot with a shoulder check (dode hoek) before making any lateral movement to prevent collisions.

This lesson covers the procedures and safety considerations for driving in reverse and turning around. You will learn that reversing should only be done over short distances and when it does not endanger or obstruct other road users. The curriculum details techniques for turning in the road and identifies situations and locations where U-turns are prohibited. The importance of all-around observation, checking blind spots, and yielding to all other traffic is a central theme.
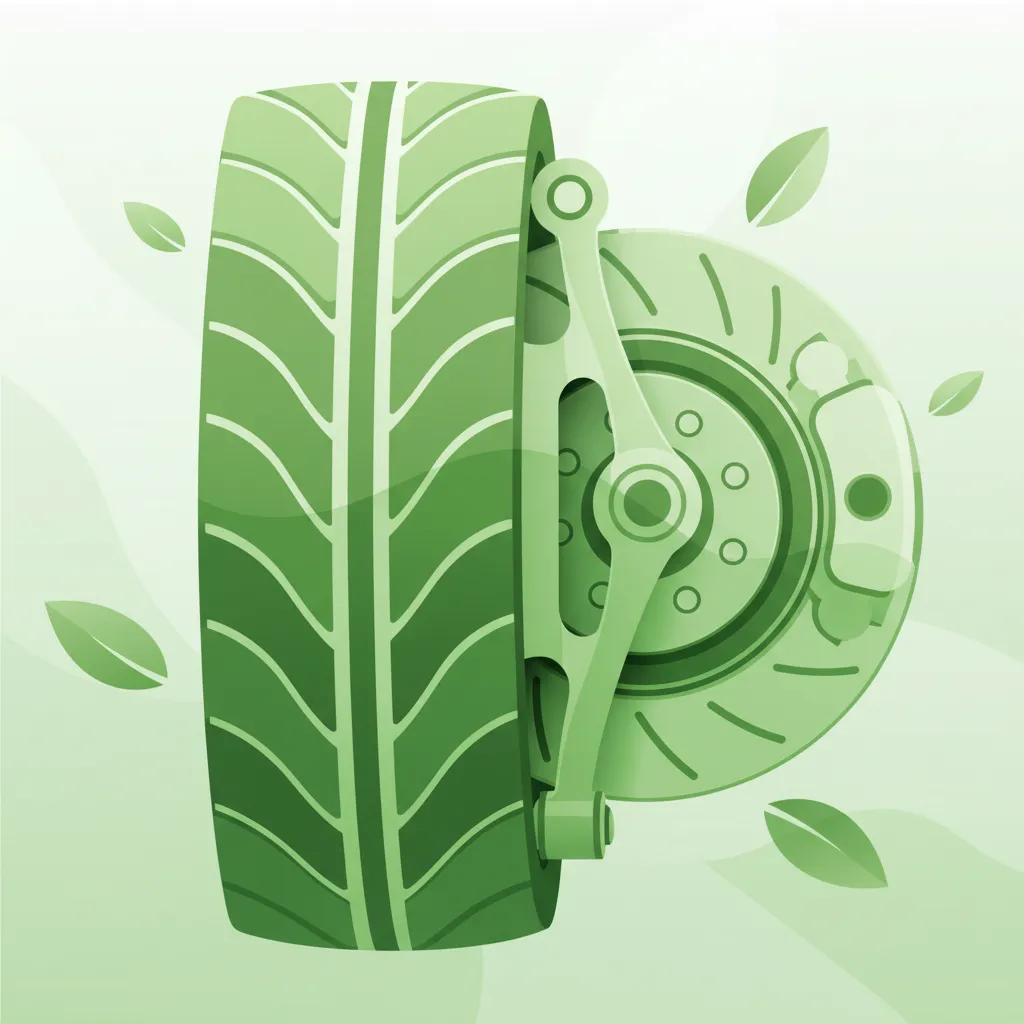
This lesson focuses on the three most critical safety systems of a car. You will learn the legal minimum tire tread depth (1.6 mm) and the importance of maintaining correct tire pressure for safety and fuel efficiency. The content covers the basics of the braking system, including how to check brake fluid and recognize warning signs of worn brakes. Additionally, the lesson explains the function of the steering system and the importance of ensuring it operates smoothly and without issue.

In the event of an accident, a calm and methodical approach is essential. This lesson details the necessary actions, from stopping safely and assessing the situation to exchanging driver and insurance details with the other party. It explains how to fill out the European Accident Statement form ('schadeformulier'), which is a vital document for insurance claims. You will also learn when it is mandatory to call the police and the importance of gathering evidence like photos and witness contact information.

As a motorized road user, you have a special responsibility towards more vulnerable participants. This lesson focuses on the rules giving priority to pedestrians at marked zebra crossings and the importance of anticipating the movements of cyclists, children, and the elderly. You will learn about maintaining a safe lateral distance when overtaking cyclists and how to navigate shared spaces with heightened awareness, a key component of social and safe driving behavior.
Learn the correct procedures for seeking roadside assistance after a vehicle breakdown in the Netherlands. This guide covers essential information to provide to assistance services and how to manage the incident safely until help arrives.
This lesson provides a clear action plan for when your car breaks down. You will learn to pull over to a safe location, preferably the hard shoulder on a motorway, and immediately activate your hazard warning lights. The curriculum explains the legal requirement to place a warning triangle a suitable distance behind the vehicle (if safe to do so) and the strong recommendation to wear a high-visibility jacket. Crucially, it instructs that all occupants should exit the vehicle on the safe side and wait behind the guardrail for assistance.
This lesson outlines the correct protocol to follow after a traffic accident. The first priority is to ensure the safety of everyone involved by securing the scene and checking for injuries. You will learn when it is mandatory to call the emergency services (112), such as when there are injuries or significant road blockage. The curriculum also explains the legal requirement to stop and exchange insurance and contact details with other parties involved. The use of the European Accident Statement form to record the details is also covered.

This lesson provides foundational knowledge in emergency response. While not a full first aid course, it covers the basic principles of assisting an injured person until professional help arrives, such as ensuring their airway is clear. You will learn exactly what information to provide when you call 112, including the precise location, the number of vehicles and people involved, and the nature of any injuries. This ensures that the correct emergency services can be dispatched as quickly as possible.
In the event of an accident, a calm and methodical approach is essential. This lesson details the necessary actions, from stopping safely and assessing the situation to exchanging driver and insurance details with the other party. It explains how to fill out the European Accident Statement form ('schadeformulier'), which is a vital document for insurance claims. You will also learn when it is mandatory to call the police and the importance of gathering evidence like photos and witness contact information.
This lesson covers the procedures and safety considerations for driving in reverse and turning around. You will learn that reversing should only be done over short distances and when it does not endanger or obstruct other road users. The curriculum details techniques for turning in the road and identifies situations and locations where U-turns are prohibited. The importance of all-around observation, checking blind spots, and yielding to all other traffic is a central theme.
This lesson details the specific regulations for driving on Dutch motorways, identifiable by the G1 sign. You will learn the correct procedure for joining the flow of traffic using the acceleration lane and for leaving via the deceleration lane. The curriculum reinforces the 'keep right unless overtaking' rule for lane discipline. It also explains that stopping is strictly forbidden, and the hard shoulder (vluchtstrook) may only be used for genuine emergencies.
This lesson covers the full range of lights and signals required on a vehicle for visibility and communication. You will learn about the mandatory requirements for headlights, taillights, brake lights, indicators, and reflectors. The curriculum emphasizes the driver's legal responsibility to ensure all lights are clean and functional before every journey. The correct use and function of the horn as an audible warning device in case of imminent danger are also explained.

This lesson focuses on the use of specialized lights for specific situations. You will learn the strict conditions under which fog lights may be used: the rear fog light is only permitted when visibility from fog or snow is less than 50 meters, and not in rain. The lesson also explains the correct use of hazard warning lights, which are intended to warn other drivers of a stationary obstruction (like a breakdown or the tail end of a sudden traffic jam) or while being towed.
When an emergency vehicle approaches with sirens and blue flashing lights, you are legally required to give way. This lesson explains the correct procedure: check your surroundings, signal your intention, and move to the side of the road as safely and quickly as possible to create a clear path. It also covers the procedure for making an emergency stop due to a vehicle breakdown, including the use of hazard warning lights and positioning your vehicle for maximum safety.

This lesson provides practical advice for driving in challenging weather. You will learn about the risk of aquaplaning in heavy rain and how to react, as well as how to manage the effects of strong crosswinds. The curriculum covers winter driving, explaining the danger of black ice, the benefits of winter tires, and techniques for avoiding and correcting a skid. A key focus is on adjusting driving style: increasing following distances, reducing speed, and making gentle steering and braking inputs.
Find clear answers to common questions learners have about Duties after a Roadside Breakdown. Learn how the lesson is structured, which driving theory objectives it supports, and how it fits into the overall learning path of units and curriculum progression in the Netherlands. These explanations help you understand key concepts, lesson flow, and exam focused study goals.
The absolute first action is to immediately switch on your hazard warning lights. This alerts other road users that you have a problem. After activating your hazards, you should then safely steer your vehicle as far to the right as possible or onto the hard shoulder if available.
You should exit your moped if it is safe to do so, especially if you are in a dangerous position on the road (e.g., live traffic lanes). Prioritize your personal safety by moving away from the vehicle and standing in a safe location, preferably behind a safety barrier if one is present. Never stand between your vehicle and oncoming traffic.
For lighter vehicles like mopeds (bromfietsen and snorfietsen), carrying and deploying a warning triangle is generally not a strict legal requirement as it is for cars. However, it is always good practice to be prepared for such eventualities and to remain visible. The focus for mopeds is on immediate safe positioning and personal safety.
If you have breakdown assistance insurance, you should contact your provider’s emergency number. If you do not have specific coverage, you may need to call a local towing service or a trusted mechanic. It’s wise to have these contact numbers readily available before you ride.
Your primary legal responsibility is to make your vehicle as visible as possible (hazard lights) and move it to a safe location if feasible. If the vehicle cannot be moved and causes a significant obstruction, you must take all reasonable steps to warn oncoming traffic and arrange for its removal as quickly as possible to avoid creating a hazard.