
This lesson breaks down the crucial concept of total stopping distance for A2 motorcycles. You'll learn how to calculate both reaction and braking distances, understanding the factors that influence them on Dutch roads. Mastering this knowledge is vital for safe riding, effective hazard anticipation, and excelling in your CBR theory exam. It builds upon understanding safe following distances.
As a motorcycle rider, mastering the art of safe riding extends beyond just controlling your bike; it fundamentally involves understanding how far your motorcycle will travel before it can come to a complete stop. This crucial concept, known as Total Stopping Distance (TSD), is a cornerstone of road safety, directly impacting your ability to avoid collisions and comply with Dutch traffic law. For those preparing for their Dutch Category A2 motorcycle license, a thorough grasp of TSD is not just theoretical knowledge but a life-saving skill.
This lesson delves into the components of TSD, the factors that influence it, and how to estimate it accurately in various riding conditions. By understanding the physics and human factors involved, you can make informed decisions about your speed, following distance, and overall hazard anticipation on Dutch roads.
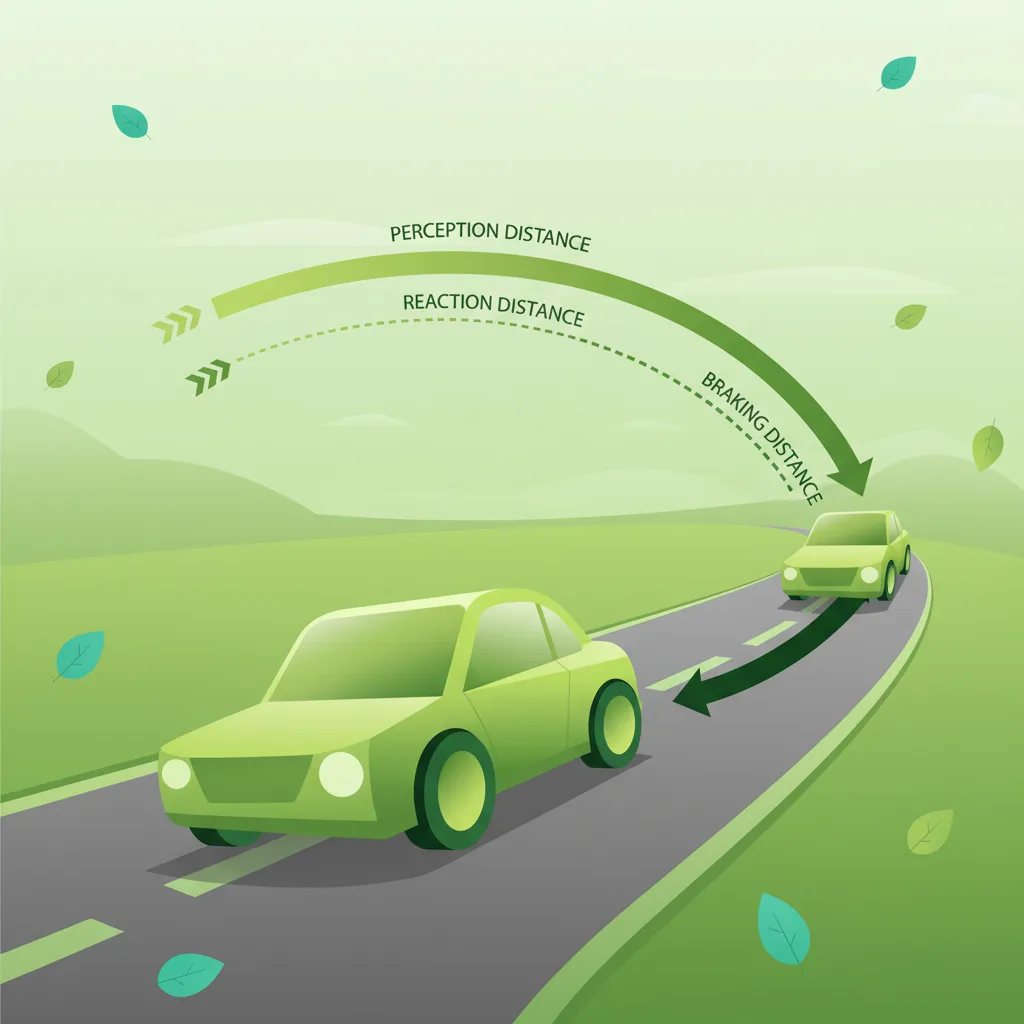
Total Stopping Distance (TSD) is the sum of two distinct distances: the reaction distance and the braking distance. Each component represents a different phase of the stopping process, and both are equally critical for safe riding.
TSD is the total length your motorcycle covers from the moment you first detect a hazard to the point where your motorcycle is completely stationary. It can be expressed with a simple formula:
Total Stopping Distance (TSD) = Reaction Distance + Braking Distance
Understanding this breakdown helps you identify where improvements can be made, either by enhancing your reaction time or optimizing your motorcycle's braking performance and your technique.
Before any physical braking can occur, you, the rider, must perceive a hazard, decide to take action, and then initiate that action. The time taken for this entire mental and physical process is called Perception-Reaction Time (PRT). It is a critical human factor that cannot be eliminated by advanced vehicle technology and directly impacts the reaction distance.
PRT typically comprises three phases:
For an alert and experienced rider on familiar roads, a standard PRT is often estimated at 1.5 seconds. However, this can increase significantly under various conditions, such as fatigue, distraction, riding at night, or when carrying a passenger. The Dutch traffic code implicitly accounts for an average PRT of approximately 2 seconds for motorcycles in its "safe distance" guidelines.
Practical Tip: Never assume your PRT is constant. Factors like mental workload, stress, and even your health can dramatically extend it.
Reaction distance is the distance your motorcycle travels during your Perception-Reaction Time (PRT) before you even begin to apply the brakes. This is the "thinking and moving" segment of your total stopping path.
The formula for reaction distance is straightforward:
Reaction Distance = Speed (in metres per second) × PRT (in seconds)
Since speed limits and motorcycle speeds are typically measured in kilometres per hour (km/h) in the Netherlands, you'll need to convert this to metres per second (m/s) for accurate calculations. To convert km/h to m/s, divide by 3.6.
Example Calculations:
As you can see, reaction distance increases linearly with speed. Doubling your speed will double your reaction distance, even if your PRT remains constant. This distance cannot be reduced by better brakes; it can only be influenced by your alertness and anticipation.
Once you've reacted and applied the brakes, your motorcycle enters the braking distance phase. This is the distance required for your motorcycle to decelerate from its current speed to a complete stop, assuming a constant rate of deceleration. Unlike reaction distance, braking distance is heavily influenced by the physical capabilities of your motorcycle and the road conditions.
The formula for braking distance is:
Braking Distance = (Speed²) / (2 × Deceleration Rate)
Where:
Braking distance increases quadratically with speed. This means that if you double your speed, your braking distance will increase by a factor of four (2²). This quadratic relationship makes high speeds particularly dangerous, as the required stopping distance rapidly becomes very long.
Example Calculations:
These examples clearly show how critical the deceleration rate is. A lower deceleration rate, caused by factors like wet roads, significantly extends your braking distance.
Many elements converge to determine your motorcycle's braking performance and, consequently, your total stopping distance. Understanding these factors allows you to anticipate potential hazards and adjust your riding style proactively.
The deceleration rate (a) is a crucial metric that quantifies how quickly your motorcycle can shed speed. It represents the negative acceleration generated when you brake. A higher deceleration rate means a shorter braking distance, while a lower rate leads to a longer distance.
The achievable deceleration rate depends on several interactive factors:
Typical deceleration rates for a well-maintained Category A2 motorcycle:
Tyre grip, quantitatively expressed by the friction coefficient (µ), is arguably the most vital factor determining your braking capability. The friction coefficient is a dimensionless ratio describing the maximum frictional force achievable between your tyres and the road surface, relative to the normal load pressing the tyre onto the road.
Any reduction in tyre grip, whether due to worn tread, incorrect tyre pressure, or contamination (oil, leaves), directly reduces the maximum deceleration rate your motorcycle can achieve, leading to significantly longer braking distances. Dutch regulations (RVV 1990) explicitly require tyres to be in acceptable condition, with sufficient tread depth, to ensure roadworthiness and safety.
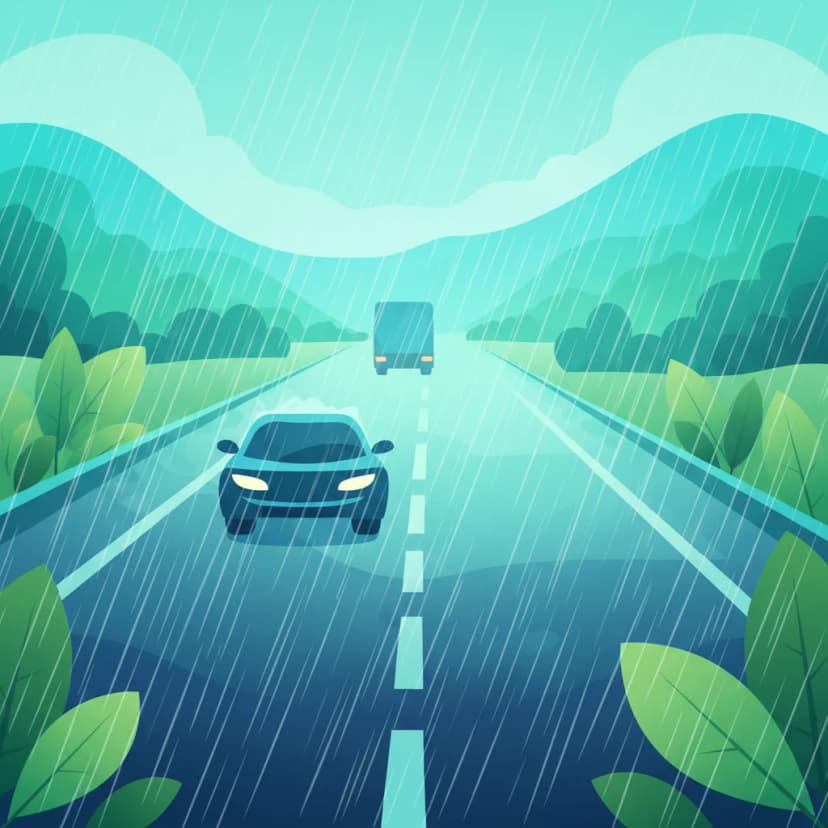
The physical state of the pavement plays a monumental role in determining the friction coefficient and, therefore, your braking distance. As discussed, dry pavement offers the best grip, but other conditions demand significant adjustments.
Road Hazard: Be especially wary of painted road markings (like zebra crossings or turn arrows) when wet. The paint often has a lower friction coefficient than the surrounding asphalt.
The Anti-Lock Braking System (ABS) is an electronic safety feature designed to prevent your wheels from locking up during braking. It continuously monitors wheel speed and, if a wheel is about to lock, rapidly modulates the brake pressure to that wheel, allowing it to continue rotating. This maintains the tyre's optimal grip on the road, maximizing the deceleration rate without skidding.
The longitudinal inclination of the road, or its slope/gradient, directly affects your effective deceleration rate and thus your braking distance.
Riders must account for gradients, particularly on long downhill stretches, by increasing their following distance and potentially using engine braking to help manage speed.
The total mass (load) of your motorcycle, including the rider, any passenger, luggage, and fuel, influences braking performance. While heavier vehicles generally have more kinetic energy to dissipate, a well-designed braking system should be able to handle the manufacturer's maximum rated load.
However, an increase in mass can subtly affect braking in a few ways:
It's crucial to stay within your motorcycle's manufacturer-specified maximum load limits. Overloading is not only unsafe but also a violation of Dutch law (RVV 1990, Article 4.3).
Beyond the motorcycle and the road, the rider's condition and decisions are paramount in determining Total Stopping Distance.
Your Perception-Reaction Time (PRT) is highly susceptible to your physical and mental state. Factors that increase PRT directly extend your reaction distance, adding metres to your total stopping distance before you even touch the brakes.
Dutch law (RVV 1990, Article 12.2) explicitly states that a road user must not drive if they are not able to perform the required actions safely, encompassing fatigue and other impairments.
Even with precise calculations, the real world is unpredictable. This is why applying a safety factor or safety margin to your calculated Total Stopping Distance is crucial. This additional buffer accounts for uncertainties, such as an unexpected obstacle, a delayed reaction, a sudden change in road surface, or the limitations of your own riding skill.
Rider Mindset: Always ride with the assumption that the unexpected will happen. This mindset fosters vigilance and a natural application of a safety margin.
Adhering to legal requirements and recommended guidelines is paramount for motorcycle riders in the Netherlands. These regulations are designed to ensure road safety and minimize collision risks.
The primary legal framework governing road traffic in the Netherlands is the Reglement Verkeersregels en Verkeerstekens 1990 (RVV 1990 – Traffic Rules and Traffic Signs Regulations 1990).
Article 4.2 of RVV 1990 (Safe Following Distance): “De bestuurder moet een afstand bewaren die, rekening houdende met de snelheid en de verkeersomstandigheden, voldoende is om veilig te kunnen stoppen.” (The driver must maintain a distance that, considering speed and traffic conditions, is sufficient to be able to stop safely.)
This article is broad, but its essence lies in the requirement to maintain a gap that allows you to stop without colliding with any obstacle or vehicle ahead. This implicitly requires you to account for your Total Stopping Distance. Failure to maintain a safe distance can lead to fines and, in the event of a rear-end collision, you will almost certainly be found liable.
The Centraal Bureau Rijvaardigheidsbewijzen (CBR), responsible for driving tests in the Netherlands, provides specific guidelines for motorcycle riders to ensure compliance with RVV 1990 and promote best safety practices.
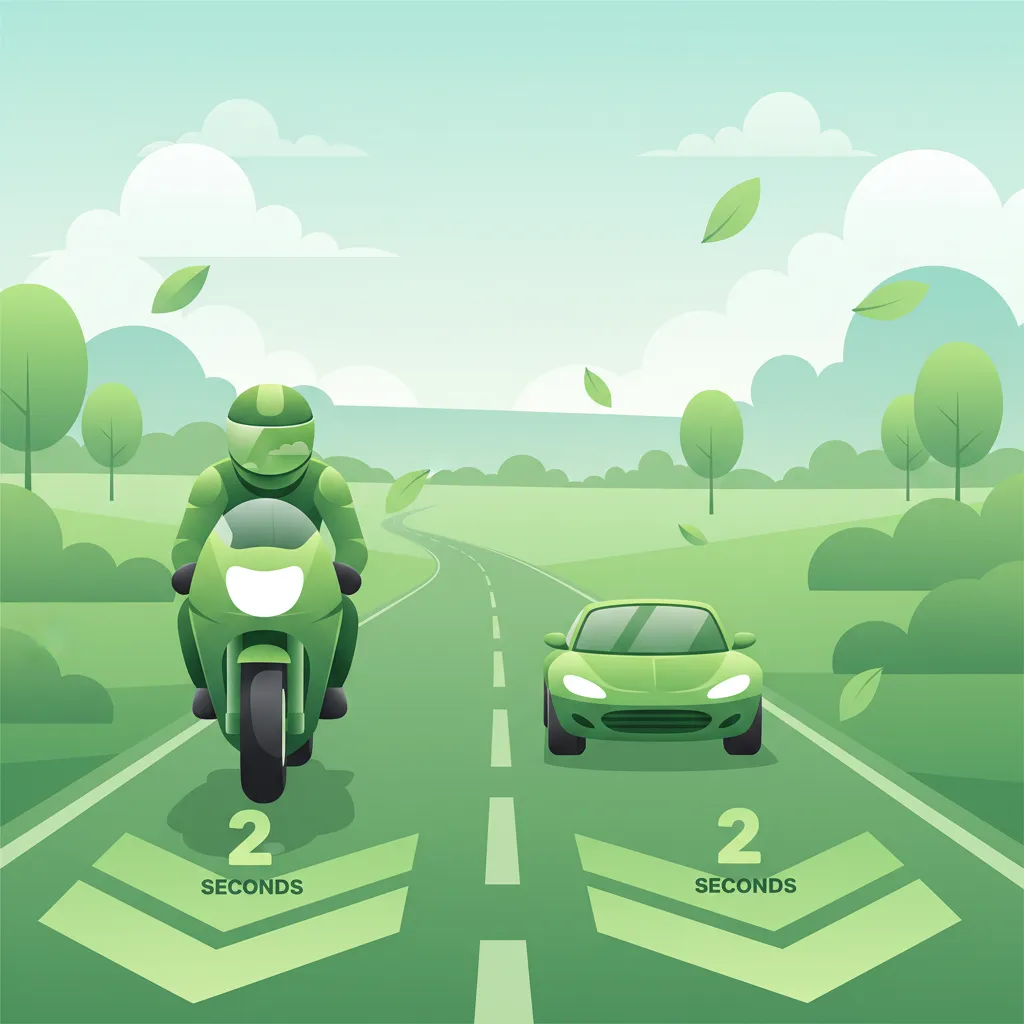
CBR Guideline 4.1 (The Two-Second Rule for Motorcycles): “Motorfietsen dienen een tijdsafstand van minimaal twee seconden te bewaren; onder ongunstige omstandigheden wordt een extra seconde aangeraden.” (Motorcycles must maintain a time distance of at least two seconds; under unfavourable conditions, an extra second is recommended.)
The two-second rule is a practical, speed-independent method to approximate a safe following distance. To apply it, pick a fixed point on the road ahead (e.g., a signpost or bridge). When the vehicle in front of you passes that point, start counting "one-thousand-one, one-thousand-two." If your motorcycle reaches the same point before you finish counting, you are following too closely. This rule helps ensure your reaction distance is adequately covered.
CBR Guideline 4.5 (Adjusting Following Distance in Adverse Conditions): “In natte, gladde, of hellende situaties moet de tijdsafstand met ten minste 20 % verhoogd worden.” (In wet, slippery, or sloping situations, the time distance must be increased by at least 20%.)
This guideline reinforces the need to increase your safety margin when conditions are not ideal. On wet roads, for example, your two-second gap should effectively become a 2.4-second gap, or even more, to accommodate the increased braking distance.
Underestimating your Total Stopping Distance carries severe consequences:
onvoldoende afstand houden) and potential legal liability in case of an accident.To solidify your understanding, let's look at how to apply these concepts in real-world riding situations, integrating formulas and rules of thumb.
While precise calculations require knowing the exact deceleration rate, you can use simplified rules of thumb for quick mental estimates on the road.
Simplified Reaction Distance Rule (Metres): For a 2-second PRT, approximately:
Simplified Braking Distance Rule (Metres, Dry Surface): For typical dry conditions:
Total Stopping Distance (Simplified, Dry Surface, 2s PRT):
These rules of thumb are simplified estimates for quick mental checks and assume dry, ideal conditions with a 2-second PRT. Always apply safety margins and adjust for adverse conditions.
Let's explore some common scenarios to see how TSD changes.
Becoming a safe and confident rider means understanding not just the mechanics of stopping, but also common misjudgments and how to interact with the environment effectively.
Your Total Stopping Distance is always relative to the road users around you.
Lesson content overview
Explore all units and lessons included in this driving theory course.
Explore search topics learners often look for when studying Calculating Total Stopping Distance. These topics reflect common questions about road rules, driving situations, safety guidance, and lesson level theory preparation for learners in the Netherlands.
Browse additional driving theory lessons that cover connected traffic rules, road signs, and common driving situations related to this topic. Improve your understanding of how different rules interact across everyday traffic scenarios.
Explore how speed, road surface conditions, weather, and rider fatigue critically affect your motorcycle's total stopping distance. Understand the Dutch legal requirements and CBR guidelines for safe following distances to prevent accidents and pass your A2 theory exam.

This lesson provides a theoretical understanding of the components that make up the total stopping distance. It explains how to calculate reaction distance (the distance traveled before applying the brakes) and braking distance (the distance traveled while braking). The content highlights how speed exponentially increases stopping distance and how other variables like rider alertness, road grip, and brake condition play a significant role in the final calculation.
This lesson provides a detailed explanation of the two-second rule as a simple yet effective method for maintaining a safe following distance in good conditions. It breaks down the concept of total stopping distance into its two components: reaction distance (the distance traveled before applying the brakes) and braking distance (the distance traveled while braking). Understanding this calculation is fundamental for appreciating the need for a sufficient space cushion to react to sudden events ahead.
This lesson explains why the standard two-second rule is insufficient in adverse conditions and requires extension. It details how factors like rain, fog, and darkness reduce both visibility and tire grip, thereby significantly increasing total stopping distance. The content provides practical guidelines, such as extending the following gap to four seconds or more in the wet, to ensure the rider always has enough time and space to stop safely, regardless of the conditions.

This lesson reinforces the critical relationship between adverse conditions, reduced traction, and massively increased stopping distances. It provides a clear framework for how much riders need to increase their following distance and reduce their overall speed to maintain a safe margin for error. The curriculum teaches riders to constantly reassess their speed based on visual feedback from the road surface and the level of visibility, ensuring they can always stop within the distance they can clearly see.

This lesson focuses on the crucial safety practice of maintaining an adequate following distance to the vehicle ahead. It explains the 'two-second rule' as a minimum baseline and emphasizes the need to increase this gap to three or four seconds in adverse conditions like rain or poor visibility. For a motorcyclist, this 'space cushion' is a critical buffer that provides the necessary time and space to react to sudden hazards or stop safely.
This lesson focuses on the crucial safety strategy of adjusting your riding for adverse conditions. You will learn that on wet roads, your braking distance can double, necessitating a much larger following distance (e.g., a four-second gap or more). The content covers the risks of reduced visibility in fog and at night, and the destabilizing effects of strong crosswinds, explaining how a greater space cushion provides the time and space needed to react safely.

This lesson provides a comprehensive guide to safe and effective deceleration on a motorcycle. You will learn the principles of controlled braking, including the progressive application of both the front and rear brakes to maximize stopping power while maintaining stability. The content also explains the role of engine braking in managing speed and how the Anti-lock Braking System (ABS) helps prevent wheel lock-up during hard braking.
This lesson explains the two-second rule, a simple and effective technique for ensuring you have enough time to react and stop safely. You will learn how to use a fixed object on the roadside to measure the time gap between your motorcycle and the vehicle ahead. The content emphasizes why motorcyclists may need to extend this gap to three or more seconds in poor weather, at high speeds, or in heavy traffic.

This lesson revisits the concept of following distance, emphasizing its heightened importance in the high-speed motorway environment. It explains how increased speeds dramatically lengthen both reaction and braking distances, making a minimum two-to-three-second gap absolutely critical for safety. The content also stresses the importance of maintaining a space cushion to the sides, creating potential escape routes in case of sudden incidents in adjacent lanes.

This lesson focuses on Dutch regulatory signs that enforce mandatory rules and restrictions, particularly those impacting A2 motorcyclists. You will learn to recognize and obey prohibition signs, such as those indicating a motorcycle ban (BORD 40), speed limits, and overtaking restrictions (BORD 21). The content explains the legal consequences of non-compliance and how to apply these rules in practical riding scenarios to ensure full adherence to Dutch traffic law.
Learn to apply stopping distance calculations in practical Dutch riding scenarios. Understand how to estimate reaction and braking distances on dry, wet, and downhill roads, and how to use rules of thumb for safe following distances on your A2 motorcycle.
This lesson provides a theoretical understanding of the components that make up the total stopping distance. It explains how to calculate reaction distance (the distance traveled before applying the brakes) and braking distance (the distance traveled while braking). The content highlights how speed exponentially increases stopping distance and how other variables like rider alertness, road grip, and brake condition play a significant role in the final calculation.
This lesson provides a detailed explanation of the two-second rule as a simple yet effective method for maintaining a safe following distance in good conditions. It breaks down the concept of total stopping distance into its two components: reaction distance (the distance traveled before applying the brakes) and braking distance (the distance traveled while braking). Understanding this calculation is fundamental for appreciating the need for a sufficient space cushion to react to sudden events ahead.
This lesson provides a comprehensive guide to safe and effective deceleration on a motorcycle. You will learn the principles of controlled braking, including the progressive application of both the front and rear brakes to maximize stopping power while maintaining stability. The content also explains the role of engine braking in managing speed and how the Anti-lock Braking System (ABS) helps prevent wheel lock-up during hard braking.
This lesson focuses on the crucial safety practice of maintaining an adequate following distance to the vehicle ahead. It explains the 'two-second rule' as a minimum baseline and emphasizes the need to increase this gap to three or four seconds in adverse conditions like rain or poor visibility. For a motorcyclist, this 'space cushion' is a critical buffer that provides the necessary time and space to react to sudden hazards or stop safely.

This lesson explains the components of the total stopping distance: the reaction distance (distance traveled before you start braking) and the braking distance (distance traveled while braking). You will learn the general formulas and rules of thumb for estimating these distances at different speeds. Understanding that braking distance increases exponentially with speed is a critical piece of knowledge that reinforces the importance of maintaining safe speeds and following distances.

This lesson focuses on the physical skill of an emergency stop, building on previous braking lessons. You will learn to adopt a braced body position, keeping your arms straight and looking ahead, not down. The content details the technique of applying both brakes rapidly but progressively to the point of maximum traction, and how to trust and utilize ABS if your motorcycle is equipped with it.
This lesson reinforces the critical relationship between adverse conditions, reduced traction, and massively increased stopping distances. It provides a clear framework for how much riders need to increase their following distance and reduce their overall speed to maintain a safe margin for error. The curriculum teaches riders to constantly reassess their speed based on visual feedback from the road surface and the level of visibility, ensuring they can always stop within the distance they can clearly see.

This lesson outlines the step-by-step procedure for executing a controlled emergency stop in a straight line. It emphasizes keeping the motorcycle upright, looking ahead, and applying both brakes firmly and progressively up to the point of maximum traction (or ABS activation). Understanding this technique is critical for minimizing stopping distance in a sudden hazard scenario and is a key skill assessed in practical motorcycle training.
This lesson explains the two-second rule, a simple and effective technique for ensuring you have enough time to react and stop safely. You will learn how to use a fixed object on the roadside to measure the time gap between your motorcycle and the vehicle ahead. The content emphasizes why motorcyclists may need to extend this gap to three or more seconds in poor weather, at high speeds, or in heavy traffic.
This lesson explains why the standard two-second rule is insufficient in adverse conditions and requires extension. It details how factors like rain, fog, and darkness reduce both visibility and tire grip, thereby significantly increasing total stopping distance. The content provides practical guidelines, such as extending the following gap to four seconds or more in the wet, to ensure the rider always has enough time and space to stop safely, regardless of the conditions.
Find clear answers to common questions learners have about Calculating Total Stopping Distance. Learn how the lesson is structured, which driving theory objectives it supports, and how it fits into the overall learning path of units and curriculum progression in the Netherlands. These explanations help you understand key concepts, lesson flow, and exam focused study goals.
While ABS helps prevent wheel lock-up and maintains steering control during hard braking, its primary function isn't necessarily to shorten stopping distance. In optimal conditions, a skilled rider without ABS might stop slightly faster. However, ABS significantly improves safety and control in emergency braking, especially on slippery surfaces, by allowing you to brake harder without skidding. It allows for more consistent stopping in varied conditions for most riders.
Total stopping distance increases significantly with speed. Reaction distance increases proportionally with speed (double speed, double reaction distance). Braking distance, however, increases approximately with the square of the speed (double speed, four times the braking distance). This means going just a little faster requires much more space to stop, making speed management crucial for A2 riders.
The CBR theory exam for A2 motorcycles uses general rules of thumb for calculating reaction and braking distances, which are applicable to all vehicles, including motorcycles. For reaction distance, a common estimate is (speed in km/h / 3) meters. For braking distance, it's often (speed in km/h / 10) squared, then divided by a friction factor (often 20 for dry, good conditions). You won't need to perform complex calculations, but understand the principles and how factors influence the outcomes.
A wet road surface drastically reduces tyre grip, which significantly increases your A2 motorcycle's braking distance. Braking distance on a wet road can be 2-3 times longer than on a dry surface. It's crucial to reduce your speed, increase your following distance, and use smoother braking inputs to avoid skidding and maintain control in wet conditions.