
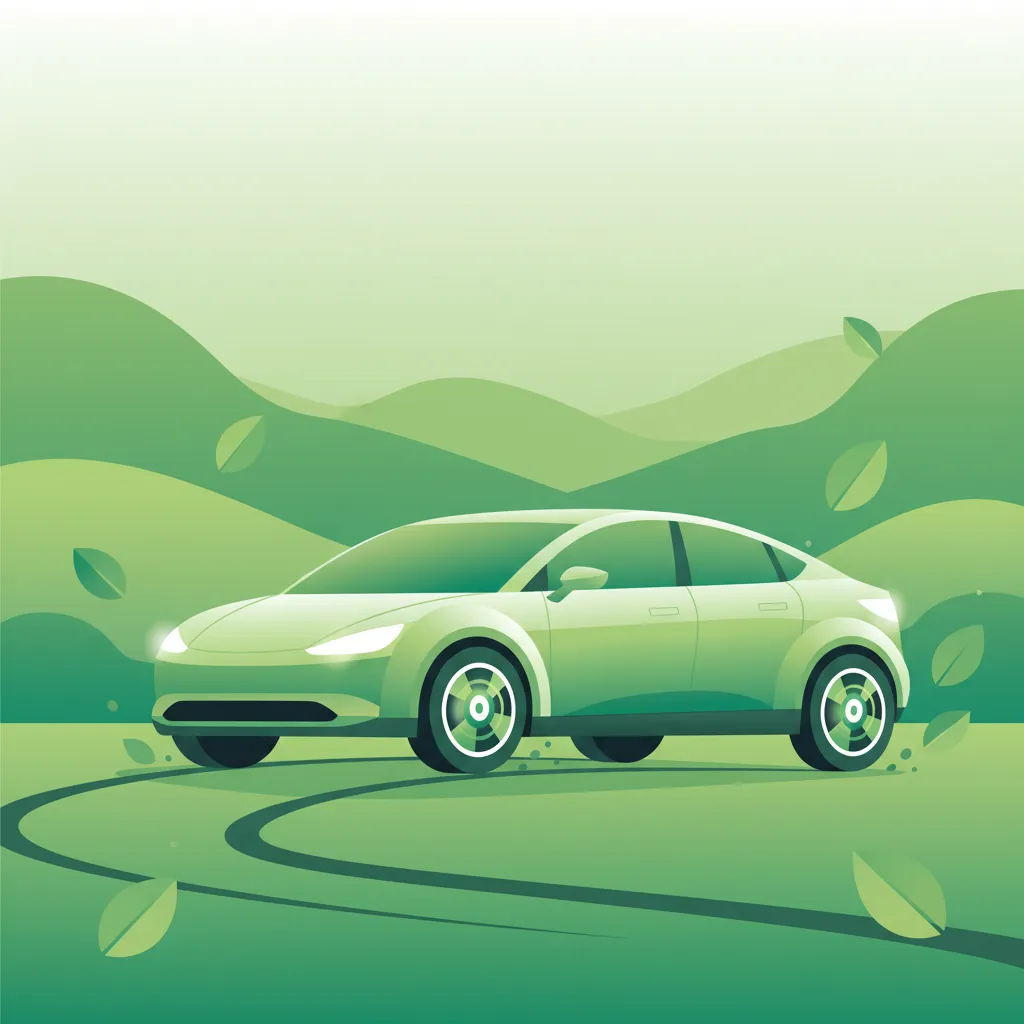
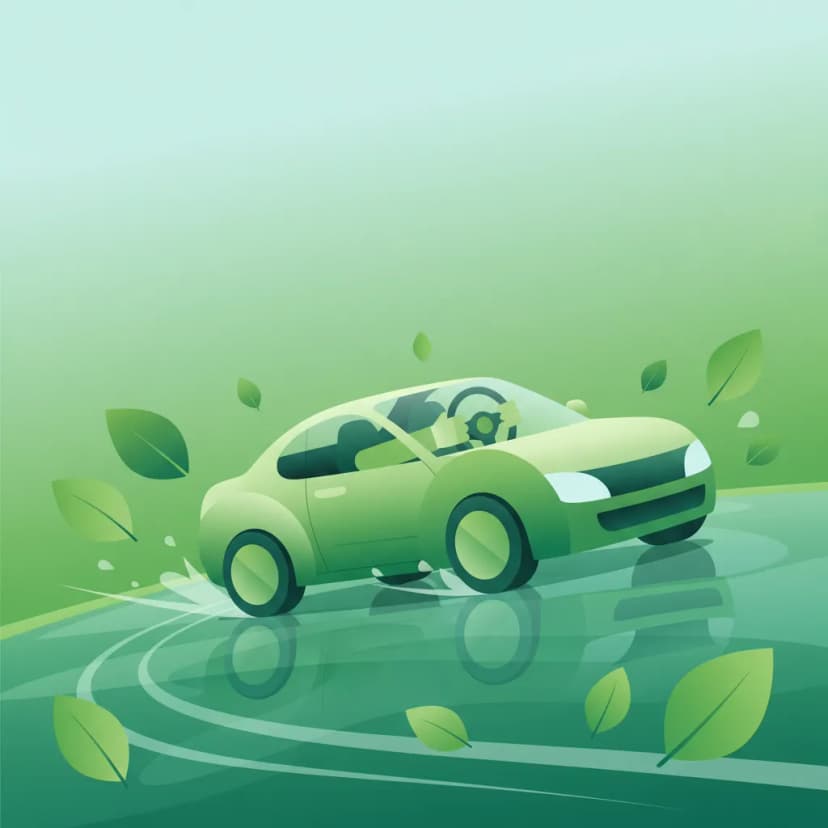
Bu ders, Hollanda sürüş teorisi sınavının önemli bir konusu olan kritik 'acil durdurma' prosedürünü kapsar. Maksimum fren gücü uygulayarak ve kontrolü sağlayarak ani tehlikelere nasıl kararlı bir şekilde tepki vereceğinizi öğreneceksiniz. Bu manevrayı anlamak, Hollanda yollarındaki beklenmedik olayları güvenli bir şekilde yönetmek için hayati önem taşır.

Araç kullanmak, sürekli bir farkındalık ve beklenmedik durumlara hızla tepki verme yeteneği gerektirir. Yumuşak ve kontrollü sürüş hedeflerken, acil bir durdurma manevrasının kaçınılmaz olduğu kritik anlar vardır. Bu ders, Hollanda'daki Kategori B aracınızla ani, aşırı bir tehlikeye yanıt olarak anında ve kararlı bir duruş gerçekleştirmek için gereken temel bilgileri ve teknikleri size kazandıracaktır.
Acil durdurma, özel bir sürüş manevrasıdır; beklenmedik ve ciddi bir tehlike nedeniyle aracınızı mümkün olan en kısa güvenli mesafede tamamen durdurma eylemi olarak tanımlanır. Bu, kademeli bir işlem olan rutin frenlemeden farklıdır. Birincil amaç, maksimum güvenli yavaşlamadır – tekerlekleri kilitlemeden veya kontrolü kaybetmeden mümkün olduğunca hızlı yavaşlamak.
Bu tekniğe hakim olmak önemlidir, çünkü çarpışmaları önleme, savunmasız yol kullanıcılarını koruma ve tehlikeli durumlarda aracınızın kontrolünü sürdürme yeteneğinizi doğrudan etkiler. Özellikle yol trafiğinin dinamik ve bazen öngörülemeyen doğası göz önüne alındığında, tüm sürücüler için temel bir beceridir.
Acil durdurmalar, ani ve aşırı tehlikeler tarafından tetiklenir; bunlar yakın bir çarpışmadan kaçınmak için acil eylem gerektirir. Bu tehlikeler genellikle stokastikdir, yani beklenmedik bir şekilde ortaya çıkarlar.
Yaygın senaryolar şunlardır:
Tehlikeleri hızlı bir şekilde, genellikle ortaya çıktıklarında bir saniye içinde tanımlama yeteneği çok önemlidir. Görsel ve algısal tespit becerileriniz, bu tür durumlarda ilk savunma hattını oluşturur.
Tehlike Tanıma İpucu: Her zaman ileriye doğru ve aynı zamanda çevrenizi kontrol edin. Bu, tepki sürenizi uzatır ve potansiyel tehlikeler için hazırlanmanıza daha fazla zaman tanır.
Güvenli ve etkili bir acil durdurma gerçekleştirmek, aracı kararlılığı koruyarak yavaşlamayı en üst düzeye çıkarmak için birlikte çalışan birkaç birbiriyle bağlantılı prensibe dayanır.
Maksimum yavaşlama, tekerleklerin kilitlenmesini veya aracın kontrolünü kaybetmeden uygulayabileceğiniz en yüksek fren basıncı anlamına gelir. Ne kadar sert fren yaparsanız (aracın ve yolun sınırlarına kadar), frenleme mesafeniz o kadar kısa olur ve dolayısıyla toplam durma mesafeniz de o kadar kısa olur.
Sürücünün frenlemeyi başlatmasından aracın tamamen durmasına kadar aracın kat ettiği doğrusal mesafe.
Bu, genellikle "bas ve tut" frenlemesi olarak adlandırılan, sert ve kararlı bir şekilde fren pedalına basılmasını gerektirir. Tereddüt veya yetersiz basınç, durma mesafenizi önemli ölçüde artıracak ve bir çarpışma riskini artıracaktır.
Acil bir durdurma sırasında direksiyon simidini düz bir konumda tutmak hayati önem taşır. Bu, aracınızın yörüngesini korur, savrulmasını, kaymasını veya kontrolden çıkmasını önler. Mantıksız görünse de, maksimum fren kuvveti uygularken bir engelden kaçmaya çalışmak, özellikle modern elektronik yardımcılarsız, genellikle kontrol kaybına yol açar. Öncelik, kontrollü düz bir çizgide durmaktır.
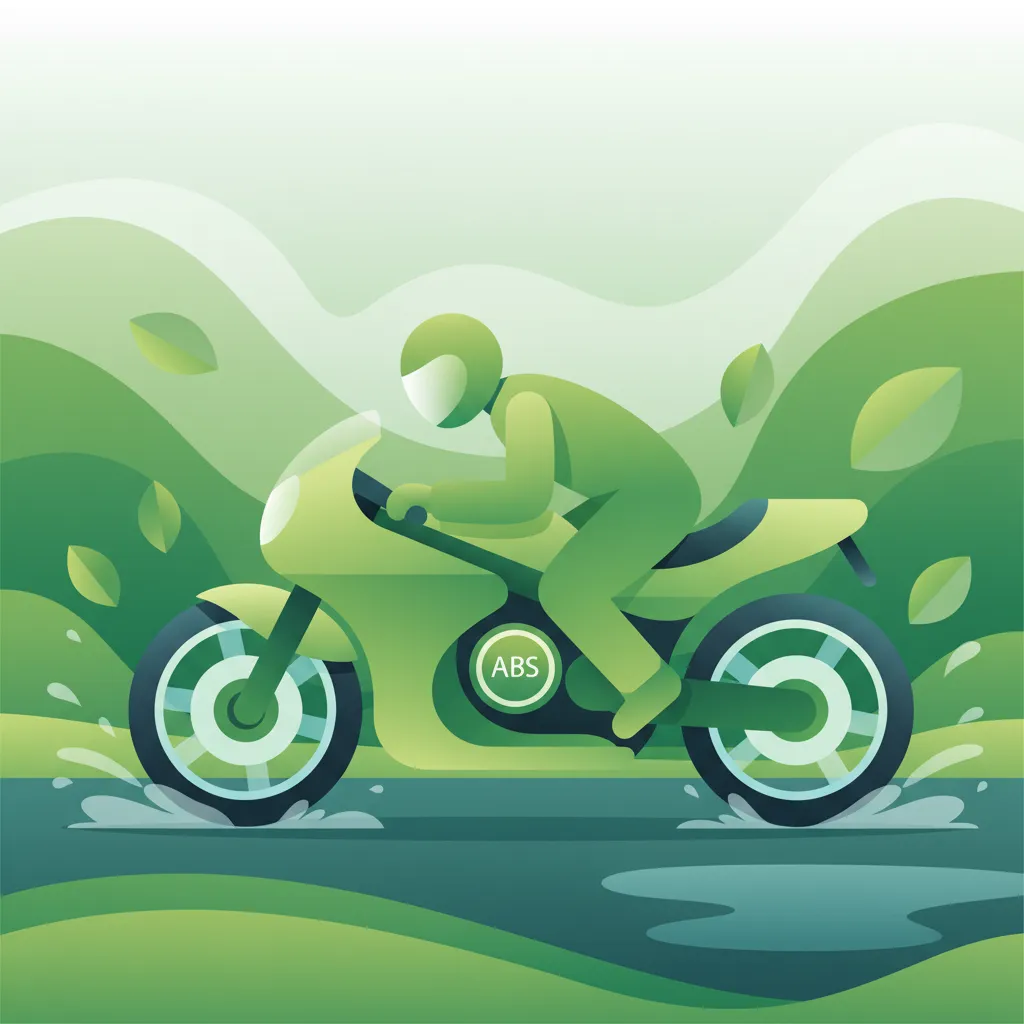
Modern araçlar, acil durdurmalar için kritik bir güvenlik özelliği olan Anti-blokaj Fren Sistemi (ABS) ile donatılmıştır.
Sert frenleme sırasında tekerleklerin kilitlenmesini önlemek için tekerlek hızını izleyen ve fren basıncını otomatik olarak ayarlayan elektronik bir güvenlik sistemidir, bu da özellikle kaygan yüzeylerde direksiyon kontrolünü ve durma mesafesini azaltır.
ABS devreye girdiğinde, fren pedalında titreşimli bir his hissedebilir ve bir öğütme sesi duyabilirsiniz. Bu normaldir ve sistemin çalıştığını gösterir. ABS, maksimum fren basıncı altında bile tekerleklerin dönmeye devam etmesini sağlayarak, direksiyon kontrolünü ve kaymayı önlemenizi mümkün kılar.
Anında frenleme en üst öncelik olsa da, dikiz ve yan aynalarınıza kısa bir göz atma (zaman ve güvenlik elverirse) kritik durumsal farkındalık sağlayabilir. Bu, arkadaki trafiğin konumunu ve arkanızdaki potansiyel tehlikeleri değerlendirmenize yardımcı olur, potansiyel olarak arkadan çarpışmaları önler. Ancak, ayna kontrolleri için asla anında frenleme eylemini riske atmayın. Fren kuvveti önce uygulanmalıdır.
Aracınız tamamen durduktan sonra manevra bitmiş sayılmaz. Araç sabitleme, aracı güvenli bir şekilde konumlandırmayı, genellikle ana karayolunun dışına veya belirlenmiş güvenli bir alana yerleştirmeyi ve aracın kaymasını önlemek için el frenini (parkeerrem) çekmeyi içerir. Bu, aracınızın diğer trafiğe ikincil bir tehlike oluşturmasını önler.
Anti-blokaj Fren Sistemi (ABS), güvenli acil frenlemenin temel taşıdır. İşleyişini anlamak, en çok ihtiyaç duyduğunuzda sisteme güvenmenin anahtarıdır.
Çok sert fren yaptığınızda, özellikle kaygan yüzeylerde, tekerleklerinizin tamamen dönmeyi durdurma riski vardır – bu, tekerlek kilidi olarak bilinir. Tekerlekler kilitlenirse, lastikler yol tutuşunu kaybeder ve araç kayar, direksiyon kontrolünü kaybeder.
ABS, tekerleklerden birinin kilitlenmek üzere olduğunu tespit etmek için her tekerlekte sensörler kullanarak bunu önler. Bir tekerlek kilitlenmeye başlarsa, ABS o tekerleğe uygulanan fren basıncını anlık olarak azaltır, tekrar dönmesini sağlar. Ardından basıncı yeniden uygular. Bu işlem saniyede birçok kez gerçekleşir ve herhangi bir insan sürücüsünün yapabileceğinden çok daha hızlı bir şekilde frenleri "pompalayarak" etkili olur. Fren basıncının bu sürekli modülasyonu, tekerleklerin optimum yol tutuşunu korumasını sağlar, hem frenleme verimliliğini hem de direksiyon kontrolünü korur.
ABS ve Durma: Acil bir durdurma yaparken, özellikle manuel şanzımanla, sert fren yaparken debriyajı ayırmadan motorun durması yaygındır. Acil bir durdurma sırasında motorun durması konusunda endişelenmeyin; yalnızca etkili bir şekilde frenlemeye odaklanın. Birincil amaç, aracı güvenli bir şekilde durdurmaktır.
ABS genellikle Çekiş Kontrolü ve Elektronik Stabilite Kontrolü (ESC) gibi diğer elektronik sistemlerle entegre edilmiştir.
Acil bir durma sırasında bir aracı tamamen durdurmak için gereken mesafeyi önemli ölçüde etkileyen birkaç faktör vardır. Bunları anlamak, uygun şekilde öngörmeye ve tepki vermeye yardımcı olur.
Bu en kritik faktördür. Durma mesafesi hızla üstel olarak artar. Hızınızı ikiye katlarsanız, durma mesafeniz sadece ikiye katlanmaz; kabaca dörde katlanır. Örneğin, 80 km/sa hızda, toplam durma mesafesi (tepki süresi + frenleme mesafesi), 50 km/sa hızda olduğundan önemli ölçüde daha uzundur.
Lastikleriniz ile yol yüzeyi arasındaki sürtünme katsayısı büyük rol oynar.
Daha ağır bir araç veya ağır yük taşıyan bir araç (örneğin, tam yüklü bir araba, römork çeken bir araba) artan atalet nedeniyle durmak için daha fazla kuvvet ve mesafe gerektirir. Sürücüler takip mesafelerini ve frenleme beklentilerini buna göre ayarlamalıdır. Römork çekiyorsanız, römork frenlerinin (varsa) doğru çalıştığından ve takılı olduğundan emin olun.
Yetersiz diş derinliğine sahip yıpranmış lastikler, özellikle ıslak yollarda çekişi azaltır ve daha uzun frenleme mesafelerine yol açar. İyi durumda ve doğru şişirilmiş lastikler, optimum frenleme performansı için esastır.
İyi bakımlı frenler, iyi pedallar, diskler ve sıvı ile optimum şekilde çalışacaktır. Arızalı veya kötü bakımlı frenler, hızlı ve güvenli bir şekilde durma yeteneğinizi tehlikeye atacaktır. Düzenli araç muayeneleri (APK), frenlerinizin güvenlik standartlarını karşılamasını sağlar.
Araç yavaşlamaya başlamadan önce, sürücünün tehlikeyi algılaması, bilgiyi işlemesi ve frenlemeyi başlatması için zamana ihtiyacı vardır. Ortalama insan tepki süresi yaklaşık 1 ila 1,5 saniyedir. 80 km/sa hızda, fren pedalına dokunmadan önce aracınız yaklaşık 22 metre yol kat edecektir. Bu "düşünme mesafesi", toplam durma mesafesine eklenir.
Ani, aşırı bir tehlikeyle karşılaştığınızda, şu adımları hemen izleyin:
Anında Tepki Verin: Tehlikeyi algıladığınız anda, ayağınız hemen gaz pedalından fren pedalına hareket etmelidir. Tereddüt etmeyin. Her salise önemlidir.
Maksimum Kuvvetle Fren Yapın (Bas ve Tut): Fren pedalına olabildiğince sert ve hızlı bir şekilde basın. Maksimum, sürekli basınç uygulayın. Aracınızda ABS varsa frenlere pompalamayın; sistemin işini yapmasına izin verin. ABS'nin devreye girdiğini pedalda titreşimli bir his ve muhtemelen bir öğütme sesiyle hissedeceksiniz. Araç tamamen durana kadar bu sağlam basıncı sürdürün.
Direksiyon Simidini Düz Tutun: Direksiyon simidini iki elinizle 9-ve-3 veya 10-ve-2 pozisyonunda sıkıca tutun. Frenleme işlemi boyunca tekerlekleri düz tutun. Sadece durmadan önce kaçınılmaz bir sabit engele çarpmamak için mutlak gerekli olduğunda çok küçük, kontrollü direksiyon ayarlamaları yapın, ancak düz çizgide frenlemeyi önceliklendirin.
Debriyajı Indirin (Manuel Şanzıman): Manuel şanzımanlı bir araç kullanıyorsanız, frenlere basarken debriyaj pedalını sonuna kadar indirin. Bu, siz hareket halindeyken motorun durmasını önler ve gerekirse durduktan sonra daha hızlı hareket etmenizi sağlar. Otomatik şanzımanlar için bu adım gerekli değildir.
Kısa Ayna Kontrolü (Zaman Varsa ve Güvenliyse): Araç yavaşlarken ve frenlemeyi riske atmadan bir salise bile zamanınız varsa, takip eden trafiği değerlendirmek için aynalarınıza hızlıca bakın. Bu, birincil frenlemeden sonraki ikincil bir önceliktir.
Durduktan Sonra Güvenli Yere Yönlendirme (Gerekirse): Araç durduktan sonra, tehlikeli bir konumdaysanız (örneğin, bir otoyol şeridinin ortasında) ve güvenliyse, aynaları kısaca kontrol edin ve aracınızı emniyet şeridi (vluchtstrook) veya belirlenmiş bir durma alanı gibi daha güvenli bir yere taşımak için hafifçe direksiyonu çevirin.
Aracı Sabitleyin: Güvenli bir konuma ulaştığınızda, el frenini (parkeerrem) çekin, boşa (veya otomatik viteslerde 'P') alın ve dörtlü flaşörleri (alarmlichten) yakarak aracı sabitleyin.
Acil bir durdurmanın temel prensipleri tutarlı kalır, ancak belirli çevresel veya araç koşulları incelikli uygulama gerektirir.
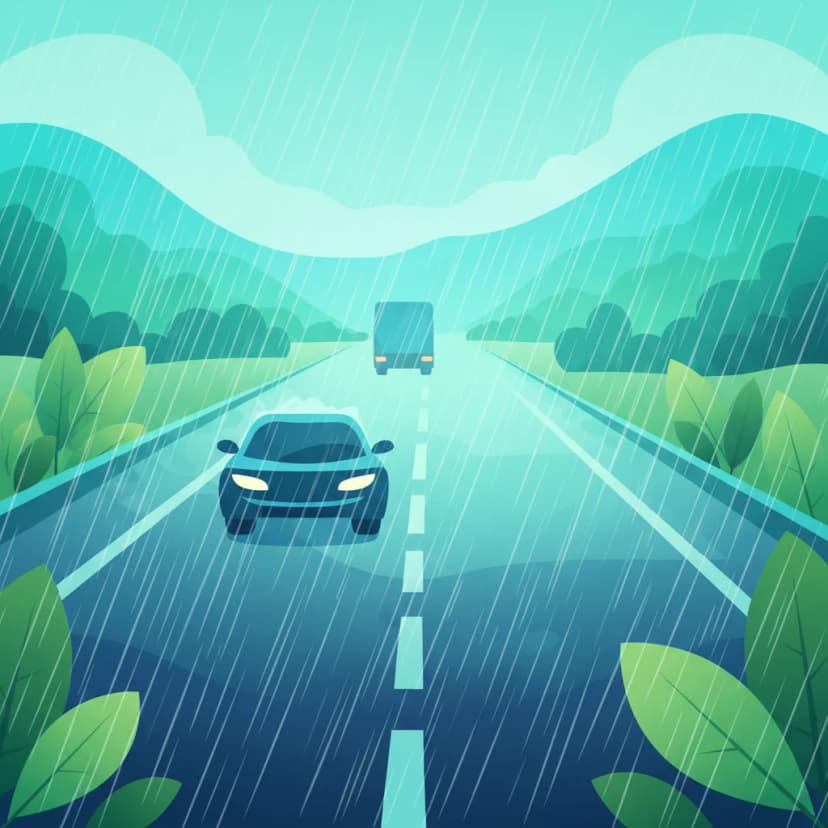
Islak veya buzlu yollarda, mevcut yol tutuşu önemli ölçüde azalır. Bu şu anlama gelir:
Su Kayması Riski: Çok ıslak yollarda, lastikler yol yüzeyiyle temasını kaybedebilir ve bir su tabakası üzerinde "yüzebilir" – bu olguya su kayması veya aquaplaning denir. Bu, direksiyon ve frenlemeyi etkisiz hale getirir. Şiddetli yağmurda hızı önemli ölçüde azaltın.
Otoyollarda (autosnelweg veya autoweg) acil durdurmalar, yüksek hızlar nedeniyle özellikle tehlikelidir.
Ağır yük taşımak veya römork çekmek aracınızın dinamiklerini temelden değiştirir:
Azalmış görüş (örneğin, sis, şiddetli yağmur, karanlık) tehlikeleri erken tespit etme yeteneğinizi önemli ölçüde etkiler:
Yayalar, bisikletliler ve moped sürücüleri son derece savunmasızdır. Beklenmedik bir şekilde yolunuza girerlerse:
Hollanda'da sürücüler, araçlarının her zaman tam kontrolünü elinde tutmakla yasal olarak yükümlüdür. Bu yükümlülük, Reglement Verkeersregels en Verkeerstekens 1990 (RVV 1990)'da yer almaktadır.
Bu ilkelere uymamak ve bir acil durdurmayı yeterince gerçekleştirememek, özellikle bir çarpışmaya veya tehlikeli sürüş durumuna yol açarsa, para cezaları ve potansiyel ehliyet askıya alınması dahil olmak üzere ciddi yasal sonuçlara yol açabilir.
Yüksek baskı altında deneyimli sürücüler bile hata yapabilir. Bu yaygın tuzakların farkında olmak, bunlardan kaçınmanıza yardımcı olabilir.
Neden yanlış: Bu en yaygın hatadır. Sürücüler genellikle tereddüt eder veya nazik bir frenin yeterli olacağını umarak yetersiz basınç uygular. Bu, durma mesafesini önemli ölçüde artırır ve kazalara yol açar. Doğru davranış: Hemen fren pedalına maksimum kuvvetle "bas ve tut".
Neden yanlış: Özellikle ABS devreye girdiğinde, araç tamamen durmadan freni bırakmak, sistemin tam olarak işini yapmasını engeller. Bazı sürücüler panikleyip pedalı bırakır. Doğru davranış: Araç tamamen durana kadar fren pedalına sürekli, sağlam basınç uygulayın.
Neden yanlış: Maksimum frenleme sırasında direksiyon simidini keskin bir şekilde çevirmeye çalışmak, özellikle ABS yoksa veya dönüş çok agresifse, kontrol kaybına neden olabilir. Araç sapabilir, kayabilir veya dönebilir. Doğru davranış: Direksiyon simidini düz tutun. Birincil hedef durmaktır.
Neden yanlış: Bazı sürücüler ABS'nin titreşim ve gürültüsünden rahatsız olabilir ve yanlışlıkla fren pedalını bırakabilir. Bu ABS'yi devre dışı bırakır ve tekerlek kilidine yol açabilir. Doğru davranış: ABS'ye güvenin. Pedal basıncını otomatik olarak ayarlamasına izin vererek fren pedalını sıkıca basılı tutun.
Neden yanlış: Frenleme öncelik olsa da, aynaları tamamen ihmal etmek, arkadan gelen bir araç çok yakınsa veya dikkat etmiyorsa arkadan çarpışmaya neden olabilir. Doğru davranış: Frenlemeyi başlattıktan sonra, takip eden trafiği değerlendirmek için aynalara hızlı, kısa bir bakış atmak farkındalık sağlayabilir, ancak asla birincil frenleme eylemini riske atmaz.
Neden yanlış: Durduktan hemen sonra tehlikenin geçtiğini varsaymak ve aracı sabitlemeyi başaramamak, aracın trafiğe doğru yuvarlanması veya bir engel oluşturması gibi ikincil tehlikeler yaratabilir. Doğru davranış: Güvenli bir şekilde durduktan sonra, mümkünse güvenli bir konuma geçin, el frenini çekin, boşa/park alın ve dörtlü flaşörleri yakın. Gerekirse ve güvenliyse yeniden konumlandırın.
Ders içeriği özeti
Bu sürüş teorisi kursuna dahil olan tüm üniteleri ve dersleri keşfedin.
Acil Durdurma çalışırken öğrencilerin sık aradığı konuları keşfet. Bu konular, yol kuralları, sürüş durumları, güvenlik rehberliği ve Hollanda içindeki ders düzeyinde teori hazırlığıyla ilgili yaygın soruları yansıtır.
Bu konuyla bağlantılı trafik kuralları, yol işaretleri ve yaygın sürüş durumlarını ele alan ek sürüş teorisi derslerine göz atın. Farklı kuralların günlük trafikte nasıl birlikte çalıştığını daha iyi anlayın.
Acil duraklamalar sırasında araç kontrolünü sürdürmek için kritik teknikleri anlayın. Bu ders, ABS'yi etkili bir şekilde kullanmayı, direksiyon yönetimini ve tehlikeli Hollanda trafik durumlarında maksimum güvenli yavaşlamayı sağlamayı ayrıntılarıyla anlatır. Tehlike yanıtı için temel sürüş teorisi.
Bu ders, sizi kritik bir duruma hazırlar: maksimum kuvvetle acil duruş yapma. En kısa mesafede kontrolü kaybetmeden durmak için doğru vücut duruşunu ve frenleme tekniğini öğreneceksiniz. İçerik, ABS'in tekerleklerin kilitlenmesini önlemek için frenleri hızla pompalayarak nasıl çalıştığını net bir şekilde açıklar, bu da panik frenleme sırasında bile direksiyon kontrolünü sürdürmenize olanak tanır.

Bu ders, kontrolü kaybetmeden mümkün olan en kısa durma mesafesini elde etmek için kontrollü bir acil duruş ('noodsremmen') gerçekleştirmenin ilkelerini öğretir. Her iki freni de sıkıca ve aşamalı olarak uygulama, öne doğru ağırlık transferini yönetme ve frenleme verimliliğini en üst düzeye çıkarmak için dik bir vücut duruşunu koruma tekniğini ayrıntılı olarak açıklar. İçerik, düz bir çizgide fren yapmaya ve engelin kendisine değil, durmak istediğiniz yere ileriye bakmaya vurgu yapar.

Bu ders, önceki frenleme derslerini temel alarak, acil durum duruşunun fiziksel becerisine odaklanmaktadır. Düz kollu ve ileriye bakan, aşağıya değil, sabit bir vücut pozisyonu benimsemeyi öğreneceksiniz. İçerik, her iki freni de maksimum çekiş noktasına kadar hızla ancak aşamalı olarak uygulama tekniğini ve motosikletinizde ABS varsa buna nasıl güveneceğinizi ve kullanacağınızı ayrıntılı olarak anlatmaktadır.

Bu ders, düz bir çizgide kontrollü bir acil duruş yapma adım adım prosedürünü ana hatlarıyla belirtir. Motosikleti dik tutmaya, ileriye bakmaya ve maksimum çekiş noktasına (veya ABS'nin devreye girmesine) kadar her iki freni de güçlü ve aşamalı olarak uygulamaya vurgu yapar. Ani bir tehlike senaryosunda durma mesafesini en aza indirmek için bu tekniği anlamak kritik öneme sahiptir ve pratik motosiklet eğitiminde değerlendirilen temel bir beceridir.
Bu ders, motosiklette güvenli ve etkili yavaşlama için kapsamlı bir rehber sunmaktadır. Dengeyi korurken durma gücünü en üst düzeye çıkarmak için hem ön hem de arka frenlerin aşamalı olarak uygulanmasını içeren kontrollü frenleme prensiplerini öğreneceksiniz. İçerik ayrıca, hızı yönetmede motor freninin rolünü ve Kilitlenmeyi Önleyici Fren Sistemi'nin (ABS) sert frenleme sırasında tekerlek kilitlenmesini önlemeye nasıl yardımcı olduğunu açıklamaktadır.

Bu ders, sadece fren kollarını sıkmaktan öteye geçen frenleme tekniklerini kapsar. Kontrollü yavaşlama için motor freni kavramını (gazı bırakarak veya vites küçülterek yavaşlama) öğreneceksiniz. Ayrıca, bazı modellerdeki güvenlik özelliği olan ve sert frenleme sırasında tekerleklerin kilitlenmesini önleyerek direksiyon kontrolünü sürdürmenizi ve kayma olasılığını azaltmanızı sağlayan Kilitlenmeyi Önleyici Fren Sistemi (ABS) fonksiyonunu açıklar.
Bu ders, motosikletlerde Kilitlenmeyi Önleyici Fren Sistemi'nin (ABS) işlevini açıklar, şiddetli frenleme sırasında tekerlek kilitlemesini nasıl önlediğini ve böylece sürücünün direksiyon kontrolünü korumasını sağladığını ayrıntılı olarak açıklar. ABS'nin güçlü bir güvenlik yardımı olmasına rağmen, fiziği hiçe saymadığını ve gevşek yüzeylerde bazen durma mesafelerini artırabileceğini netleştirir. İçerik, sürücülere sisteme güvenmelerini ve acil durumlarda frenleri tam ve sıkı bir şekilde uygulamalarını, çekişi yönetmek için ABS'nin işini yapmasını öğretir.
Bu ders, optimum durdurma performansı için gelişmiş teknikleri öğretmek üzere temel frenlemeden öteye geçiyor. Motosikletlerdeki ağırlık transferi nedeniyle ön frenin durma gücünün çoğunu sağladığını, ancak arka frenin ustaca uygulanmasının denge için kritik olduğunu öğreneceksiniz. İçerik, özellikle ABS olmayan motosikletlerde çekişi yönetmek ve tekerlek kilidini önlemek için progresif frenleme - kolların yumuşakça sıkılması - kavramını kapsar.
Bu ders, özellikle arka tekerlek ve daha kritik olan ön tekerlek kaymalarını kapsayarak çekiş kaybını nasıl yöneteceğiniz konusunda teorik bilgi sağlar. Sert frenleme veya hızlanma gibi tipik nedenleri ve düzeltici, genellikle sezgisel olmayan girdileri açıklar. Hedef sabitlemesini önlemek için istenen seyahat yönüne bakmanın önemi ve lastiklerin tekrar tutuş kazanmasına yardımcı olmak için yumuşak, ölçülü kontrollerin kullanılması kuvvetle vurgulanır.
Bu ders, ön ('voorrem') ve arka ('achterrem') frenlerin doğru dengesi ve uygulanmasına odaklanarak yüksek hızlı fren tekniklerinin ayrıntılı bir dökümünü sunar. Frenleme sırasında ağırlık transferinin fiziğini ve ön frenin neden durma gücünün çoğunu sağladığını açıklar. Ön lastiğin aşırı yüklenmesini ve çekiş kaybını önlemek için kademeli, yumuşak uygulama teknikleri ele alınır, böylece sürücüler herhangi bir hızdan hızlı ve güvenli bir şekilde yavaşlayabilir.
Acil frenleme sırasında aracınızın durma mesafesini etkileyen ana faktörleri, hız, yol yüzeyi ve lastik durumu dahil olmak üzere keşfedin. Bu unsurların, tehlike algısı için çok önemli olan Hollanda'da güvenli bir şekilde durma yeteneğinizi nasıl etkilediğini öğrenin.

Bu ders, toplam durma mesafesini oluşturan bileşenler hakkında teorik bir anlayış sunar. Tepki mesafesinin (frenleri uygulamadan önce kat edilen mesafe) ve fren mesafesinin (frenleme sırasında kat edilen mesafe) nasıl hesaplanacağını açıklar. İçerik, hızın durma mesafesini katlanarak nasıl artırdığını ve sürücü uyanıklığı, yol tutuşu ve fren durumu gibi diğer değişkenlerin nihai hesaplamada nasıl önemli bir rol oynadığını vurgular.
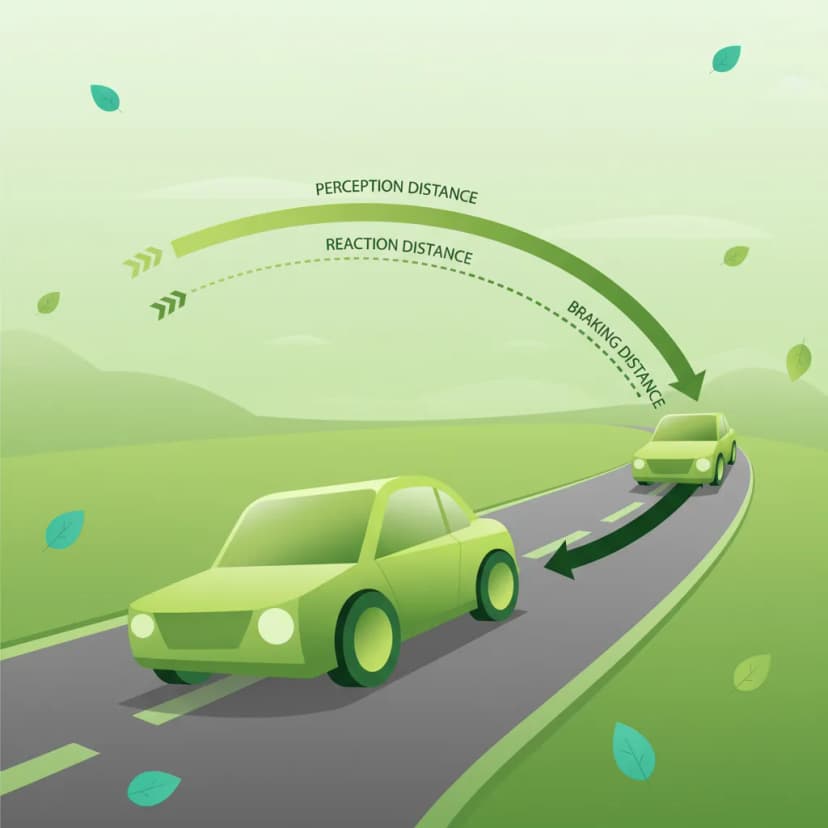
Bu ders, toplam durma mesafesi kavramını iki ana parçasına ayırır: tepki süresi boyunca kat edilen mesafe ve frenler uygulandıktan sonra motosikletin kat ettiği mesafe. Bu mesafeleri çeşitli hızlarda tahmin etmek için formülleri ve genel kuralları öğreneceksiniz. İçerik, sürücü yorgunluğu, yol yüzeyi koşulları ve lastik kalitesi gibi faktörlerin genel durma mesafenizi nasıl önemli ölçüde artırabileceğini vurgulamaktadır.

Bu ders, toplam durma mesafesinin bileşenlerini açıklar: reaksiyon mesafesi (fren yapmaya başlamadan önce kat edilen mesafe) ve fren mesafesi (fren yaparken kat edilen mesafe). Farklı hızlarda bu mesafeleri tahmin etmek için genel formülleri ve pratik kuralları öğreneceksiniz. Fren mesafesinin hızla katlanarak arttığını anlamak, güvenli hız ve takip mesafelerini korumanın önemini pekiştiren kritik bir bilgidir.

Bu ders, mevcut koşullara göre hızınızı ayarlamanın kritik önemini vurgulamaktadır, bu da yasal limitin altında sürüşü gerektirebilir. Yağmur, sis, kar ve karanlık gibi faktörlerin fren mesafelerini nasıl önemli ölçüde artırdığını ve görüş mesafesini azalttığını öğreneceksiniz. Müfredat, ıslak yollarda suda kızaklamanın ve kışın buzlanmanın tehlikelerini açıklar. Öğretilen temel ilke, güvenli bir sürücünün her zaman görebildiği mesafede temiz bir şekilde durabilmesi için hızını ayarlamasıdır.
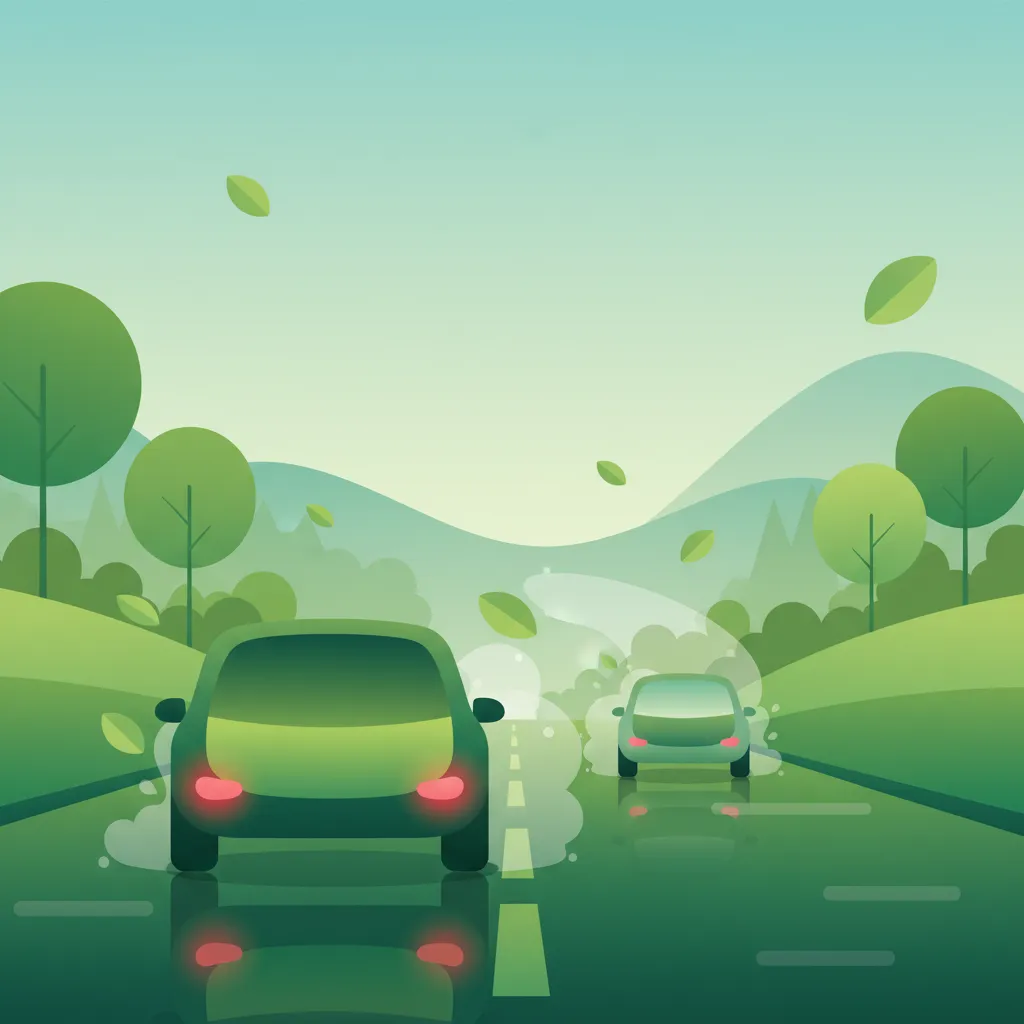
Bu ders, olumsuz koşullar, azalan çekiş ve büyük ölçüde artan durma mesafeleri arasındaki kritik ilişkiyi pekiştirir. Sürücülerin, hata payını korumak için takip mesafelerini ne kadar artırmaları ve genel hızlarını ne kadar azaltmaları gerektiğine dair net bir çerçeve sunar. Müfredat, sürücülere yol yüzeyindeki yol tutuşu ve görünürlük seviyesine göre hızlarını sürekli olarak yeniden değerlendirmeyi öğretir, böylece her zaman net bir şekilde görebildikleri mesafe içinde durabileceklerinden emin olurlar.
Bu ders, standart iki saniyelik kuralın olumsuz koşullarda neden yetersiz kaldığını ve uzatılmasını gerektirdiğini açıklamaktadır. Yağmur, sis ve karanlık gibi faktörlerin hem görüşü hem de lastik tutuşunu nasıl azalttığını, böylece toplam durma mesafesini önemli ölçüde artırdığını detaylandırmaktadır. İçerik, sürücünün koşullar ne olursa olsun her zaman güvenli bir şekilde durması için yeterli zaman ve alana sahip olmasını sağlamak amacıyla, ıslak zeminde takip mesafesini dört saniyeye veya daha fazlasına uzatmak gibi pratik kılavuzlar sunmaktadır.
Bu ders, iyi koşullarda güvenli bir takip mesafesi sağlamak için basit ama etkili bir yöntem olarak iki saniye kuralının ayrıntılı bir açıklamasını sunar. Toplam durma mesafesi kavramını iki bileşenine ayırır: reaksiyon mesafesi (frenler uygulanmadan önce kat edilen mesafe) ve fren mesafesi (frenleme sırasında kat edilen mesafe). Bu hesaplamayı anlamak, öndeki ani olaylara tepki vermek için yeterli bir güvenlik boşluğuna duyulan ihtiyacı takdir etmek için temeldir.

Belirtilen hız sınırı bir maksimumdur, hedef değil. Bu ders, mevcut koşullara göre hızınızı ayarlama becerisini öğretir. Trafik yoğunluğu, kötü hava koşulları (yağmur, sis), sınırlı görüş (gece) ve kaygan yol yüzeyleri gibi faktörleri nasıl değerlendireceğinizi öğreneceksiniz. Bu durumlarda hızınızı düşürmek, tehlikelere tepki vermek için size daha fazla zaman tanır ve kontrolü kaybetme veya bir çarpışmaya karışma riskini önemli ölçüde azaltır.

Bu ders, durdurma (sürücünün araçla birlikte kaldığı kısa süreli duraklama) ve park etme (aracı terk etme) arasındaki yasal ayrımı netleştirmektedir. Park etmenin yasak olduğunu belirten sarı çizgiler gibi işaretleri ve yol işaretlerini tanımayı öğreneceksiniz. Müfredat, mavi bölgeler gibi belirlenmiş park etme bölgelerinde park etme kurallarını kapsar ve her zaman park etmenin yasak olduğu yerlerin bir listesini sunar, örneğin, bisiklet yolunda veya bir kavşağa çok yakın.
Bu ders, ön ('voorrem') ve arka ('achterrem') frenlerin doğru dengesi ve uygulanmasına odaklanarak yüksek hızlı fren tekniklerinin ayrıntılı bir dökümünü sunar. Frenleme sırasında ağırlık transferinin fiziğini ve ön frenin neden durma gücünün çoğunu sağladığını açıklar. Ön lastiğin aşırı yüklenmesini ve çekiş kaybını önlemek için kademeli, yumuşak uygulama teknikleri ele alınır, böylece sürücüler herhangi bir hızdan hızlı ve güvenli bir şekilde yavaşlayabilir.
Acil Durdurma ile ilgili öğrencilerin sıkça sorduğu sorulara net yanıtlar bul. Dersin nasıl yapılandırıldığını, hangi sürüş teorisi hedeflerini desteklediğini ve Hollanda içindeki birim ve müfredat akışıyla nasıl uyum sağladığını öğren. Bu açıklamalar, ana kavramları, ders akışını ve sınava yönelik çalışma hedeflerini anlamana yardımcı olur.
Normal duruş, hızı azaltmak veya güvenli bir şekilde durmak için kademeli frenlemeyi içerir. Acil durdurma, mümkün olan en kısa sürede aracı durdurmayı amaçlayan, ani, kaçınılmaz bir tehlikeye yanıt olarak yapılan ani, güçlü bir fren uygulamasıdır.
Aynaları kontrol etmek iyi bir uygulamadır, ancak gerçek bir acil durdurmada öncelik anında ve maksimum frenlemedir. Acil ve kritik bir tehlike varsa, anında fren yaparsınız. Frenlemeyi geciktirmeden hızlı bir bakış atılabilecek bir an varsa, bunu yapın, ancak bu nadirdir.
Kilitlenmeyi Önleyici Fren Sistemi (ABS), şiddetli frenleme sırasında tekerleklerinizin kilitlenmesini önler. Bu, direksiyon kontrolünü korumanızı sağlar, bu da maksimum fren yaparken bir engelin etrafından manevra yapabileceğiniz anlamına gelir ki bu önemli bir güvenlik avantajıdır.
Araç durduktan ve acil tehlike ortadan kalktıktan sonra el frenini çekin. Çevrenizi, özellikle arkadan gelen trafiği kontrol edin ve gerekirse tehlike uyarı ışıklarınızı kullanın. Ardından, tekrar hareket ederken dikkatli ilerleyin.
Acil durdurma, dersler sırasında uygulanan ve teoride ele alınan kritik bir manevra olmasına rağmen, sınav görevlisi genellikle trafik koşulları nedeniyle gerçek bir ihtiyaç olmadıkça bunu yapmanızı istemeyecektir. Önceden sizi bilgilendireceklerdir.